| Name | Progress |
|---|---|
| Introduction | Not Read |
| 🍰 Player | Not Read |
| Name | Progress |
|---|---|
| Software Installation | Not Read |
| Project Setup | Not Read |
| Running and Testing | Not Read |
| React and ReactDOM | Not Read |
| 💡 Assignment 1: Welcome Message | Not Attempted |
| Submissions | Not Read |
| Name | Progress |
|---|---|
| Pure Components - memo | Not Read |
| Lifecycle - useEffect | Not Read |
| Expensive? - useMemo | Not Read |
| DOM Interactions - useRef | Not Read |
| forwardRef | Not Read |
| useImperativeHandle | Not Read |
| 👾 useImperativeHandle | Not Attempted |
| Context | Not Read |
| useCallback | Not Read |
| useId | Not Read |
| useReducer | Not Read |
| Name | Progress |
|---|---|
| Database | Not Read |
| NextAuth and Github Authentication | Not Read |
| Prisma and ORM | Not Read |
| Project Setup | Not Read |
| Project Authentication | Not Read |
| Name | Progress |
|---|---|
| APIs | Not Read |
| APIs - Slides | Not Attempted |
| Rest APIs | Not Read |
| Rest APIs - Express.js | Not Read |
| ReastAPIs - Next.js | Not Read |
| Securing APIs | Not Read |
| Securing APIs - NextAuth | Not Read |
| Name | Progress |
|---|---|
| tRPC | Not Read |
| tRPC - Routers | Not Read |
| tRPC - Server Rendering | Not Read |
| tRPC - Client Rendering | Not Read |
| Persisting Data | Not Read |
| Assignment 3: APIs | Not Read |
Let's finally have som fun and start building truly reactive React components!
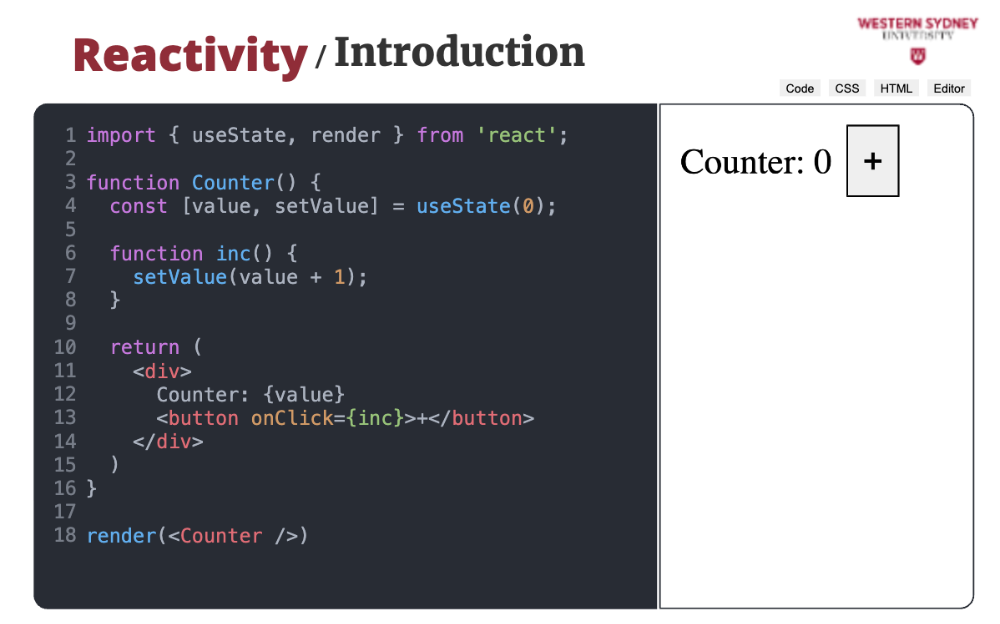
In React, "reactivity" refers to the way in which React applications respond to changes in state or props by automatically updating the user interface (UI). This concept is central to React’s design and helps make it a powerful library for building dynamic web applications.
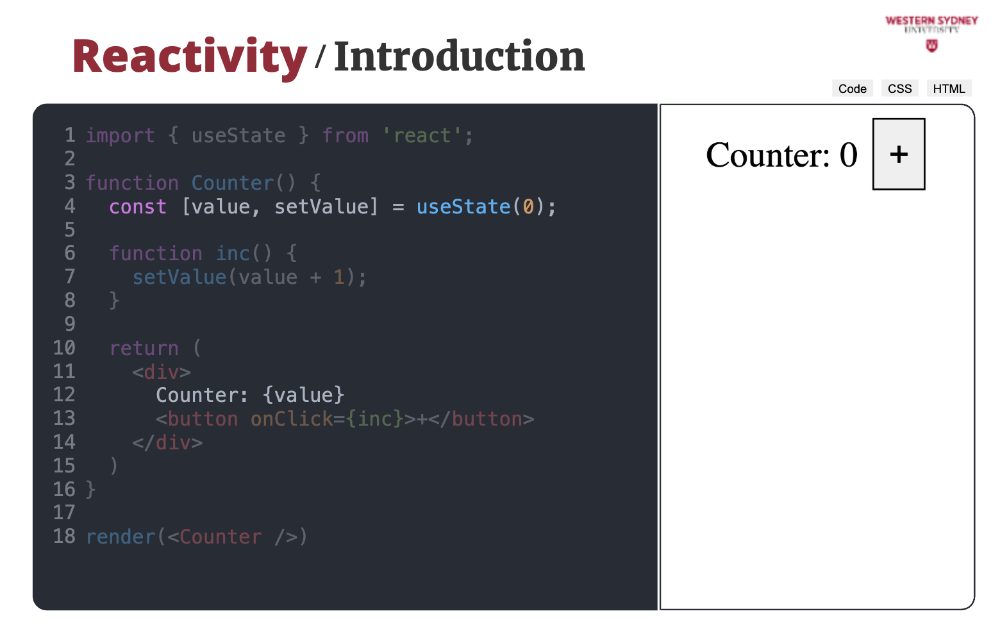
Thus, instead of telling the webpage how to change the website after the state has changed, we describe how the page should look based on the current state and let React take care of the changes.
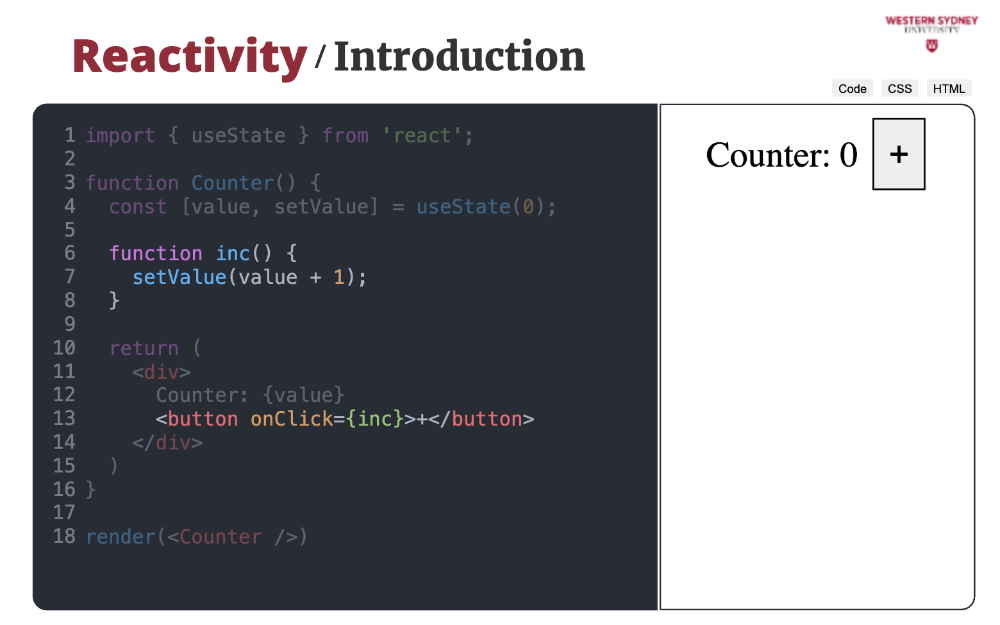
All we need to do is tell react when to initiate the state change. In our case, we change the state when clicking the button. After every click, the state changes and a new count is rendered. Let's explore more!
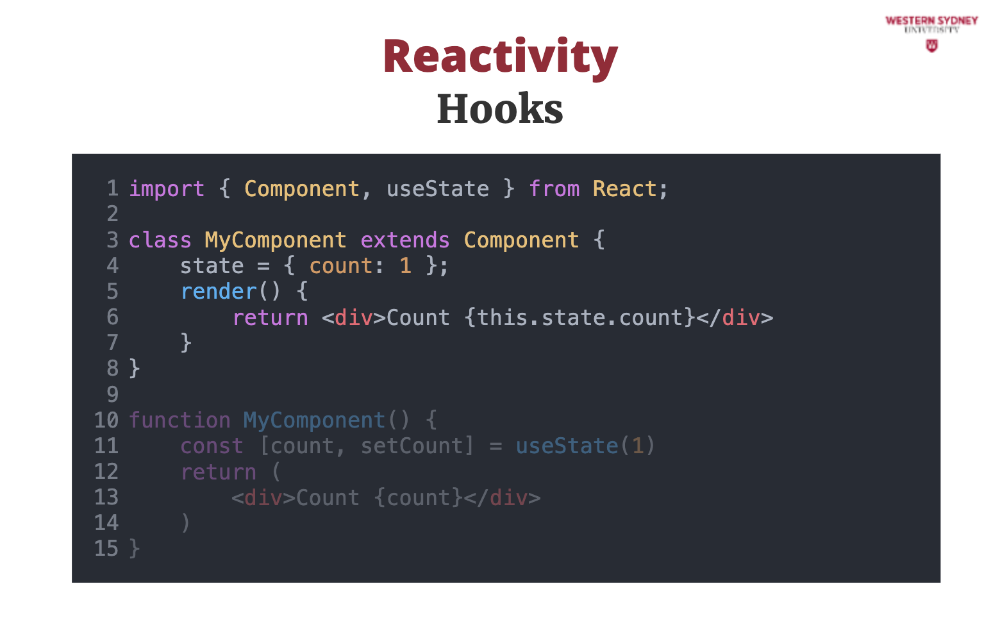
While React also supports the definition of Components using classes ...
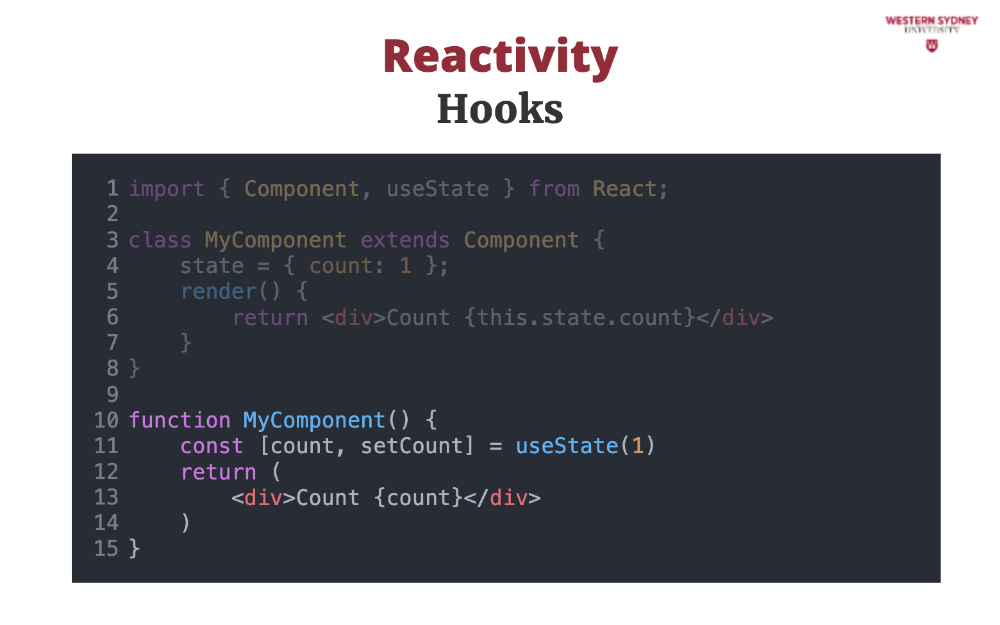
... we will focus on a more modern representation of React components using functions, also known as functional components. In React, functional components use special functions called hooks to control the life cycle and behaviour of react components.
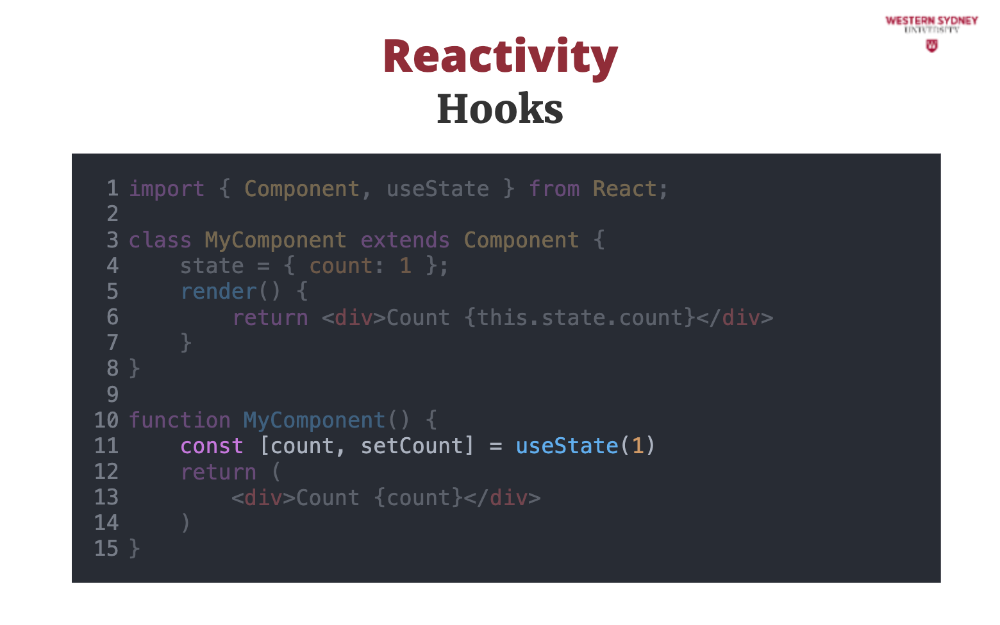
You can easily spot the react hook as it will have the “use” prefix.
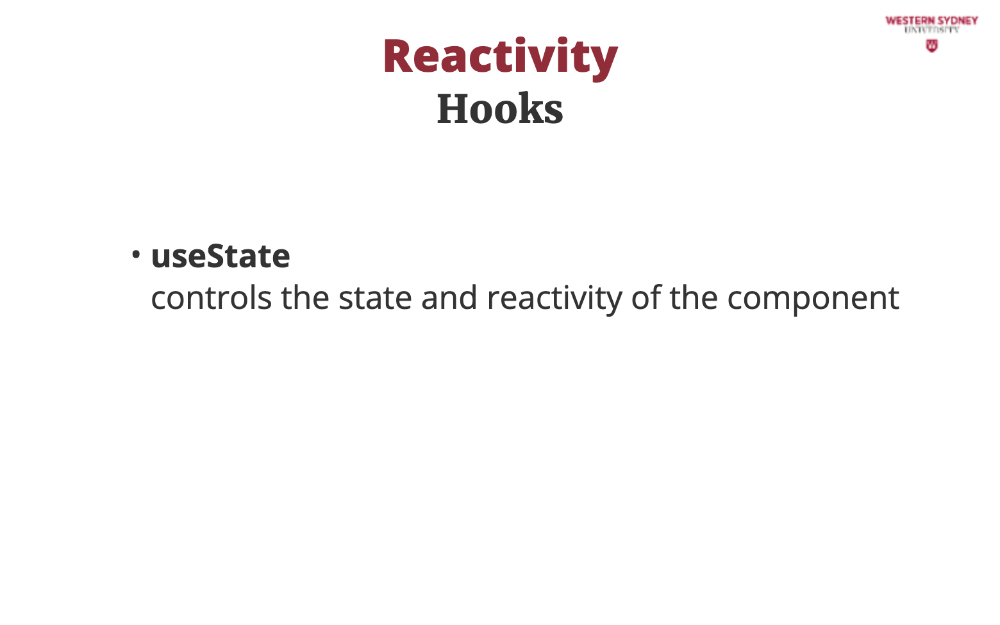
For example, we will use useState hook to control the state and reactivity of the component ...
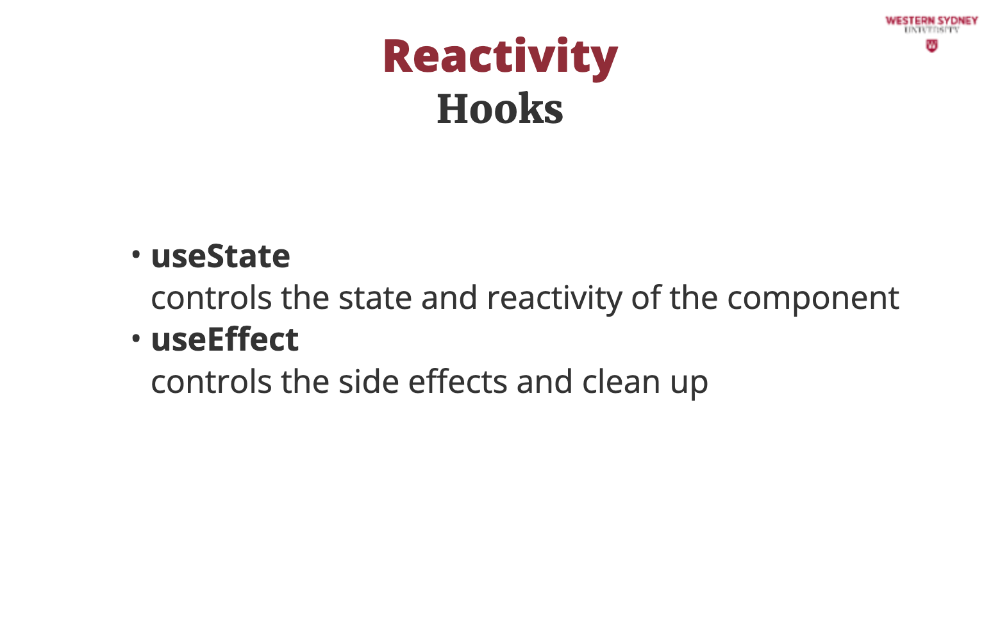
useEffect to control the side effects and clean up after the component
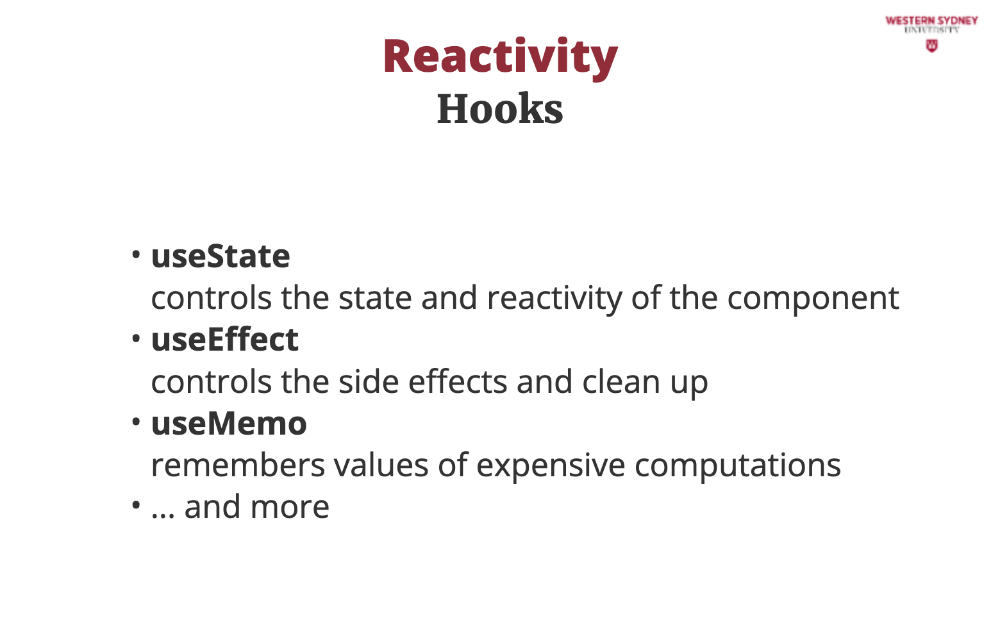
useMemo to remember values of expensive computations and many others. This section will focus on the useState hook to control the reactivity of functional React components.
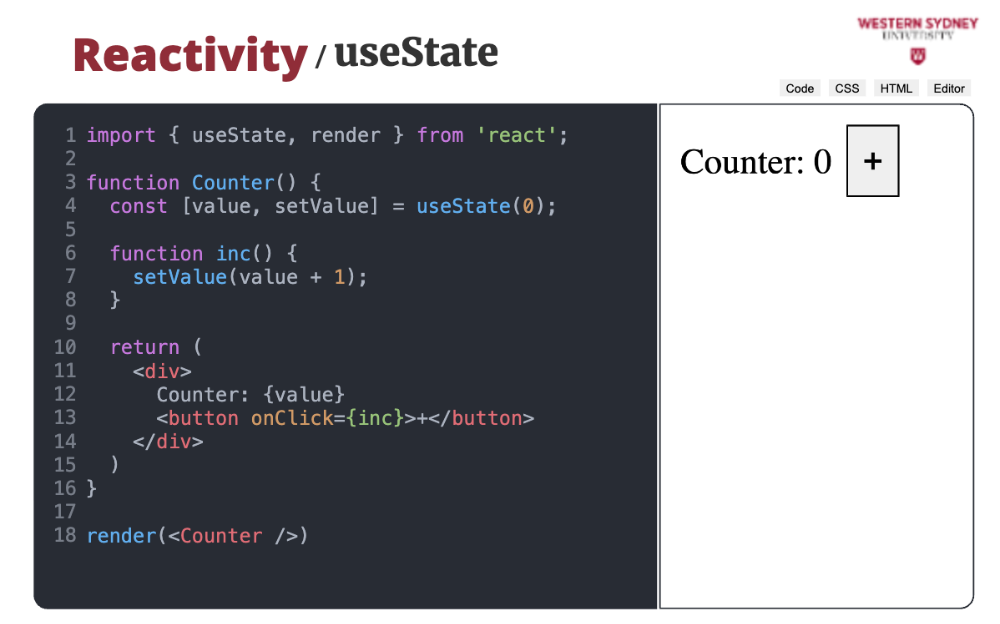
Let's revisit the previous example and discuss React state in detail! State in React determines the behaviour and rendering of components. When state data changes, React re-renders the component to reflect the updates. Try clicking the plus button to see how the component automatically renders a new value.
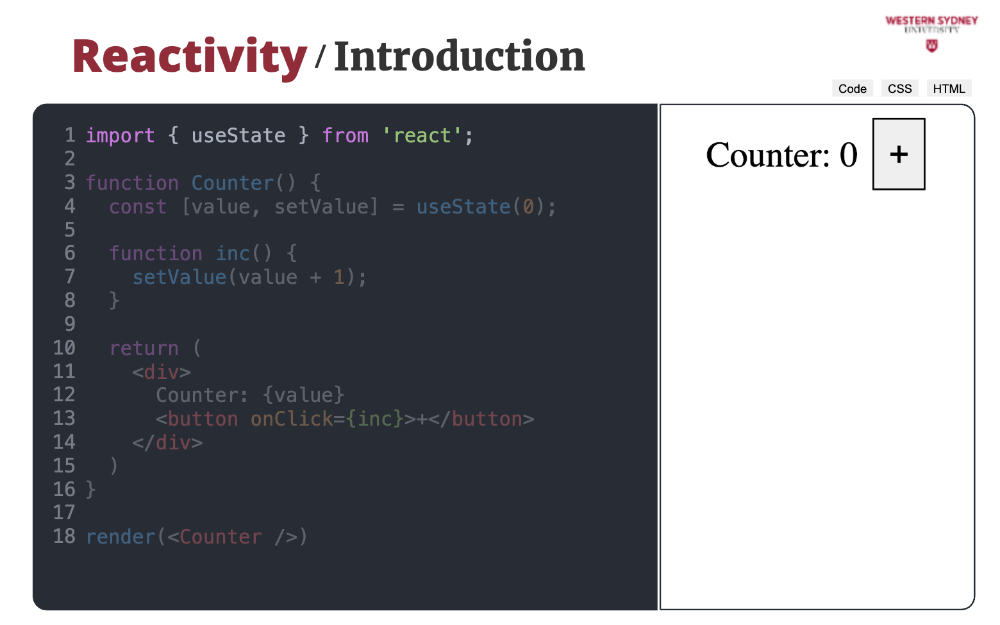
In functional components, we will use the useState hook from the React library to control the component state.
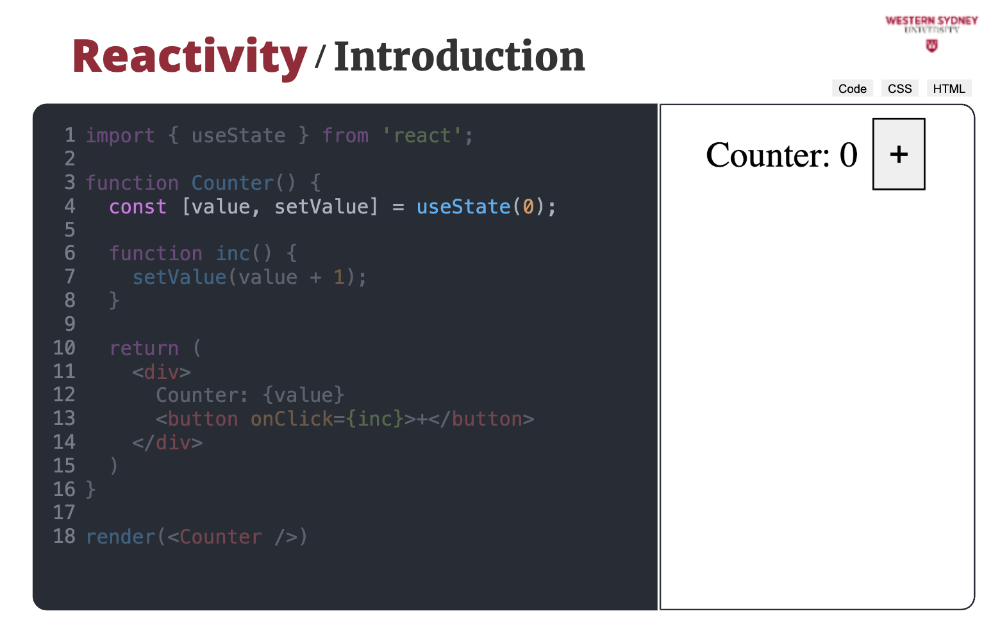
The useState hooks return an array of two elements.
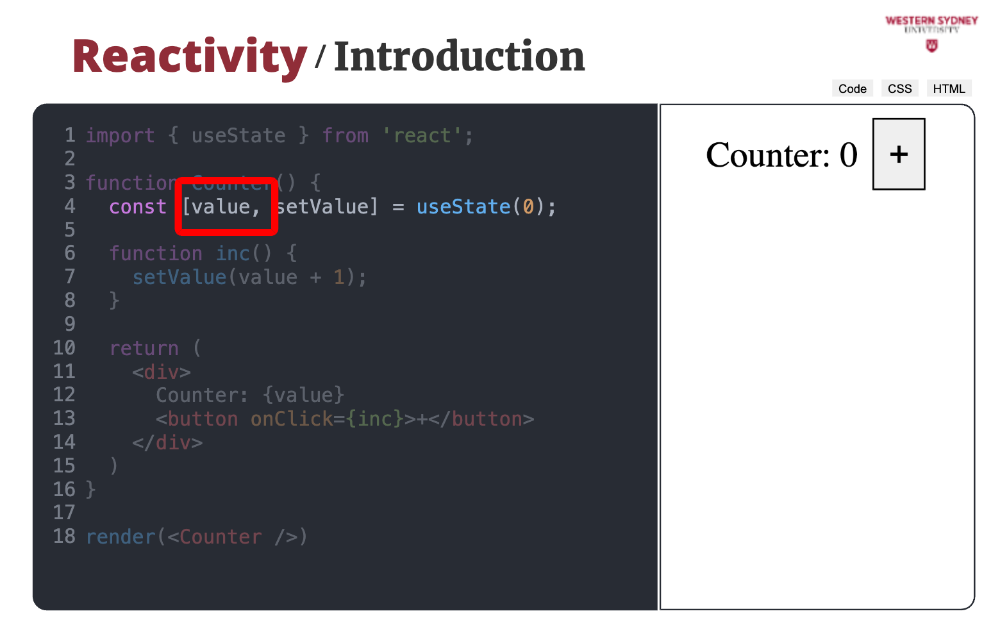
The first array element is the value from the state ...
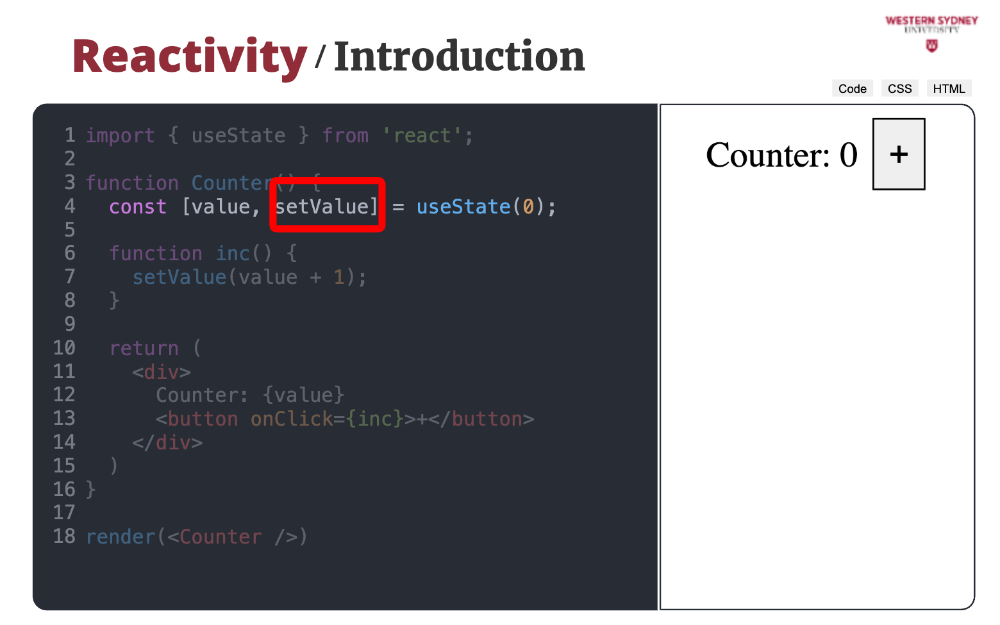
... and the second one is a function we use to change the value.
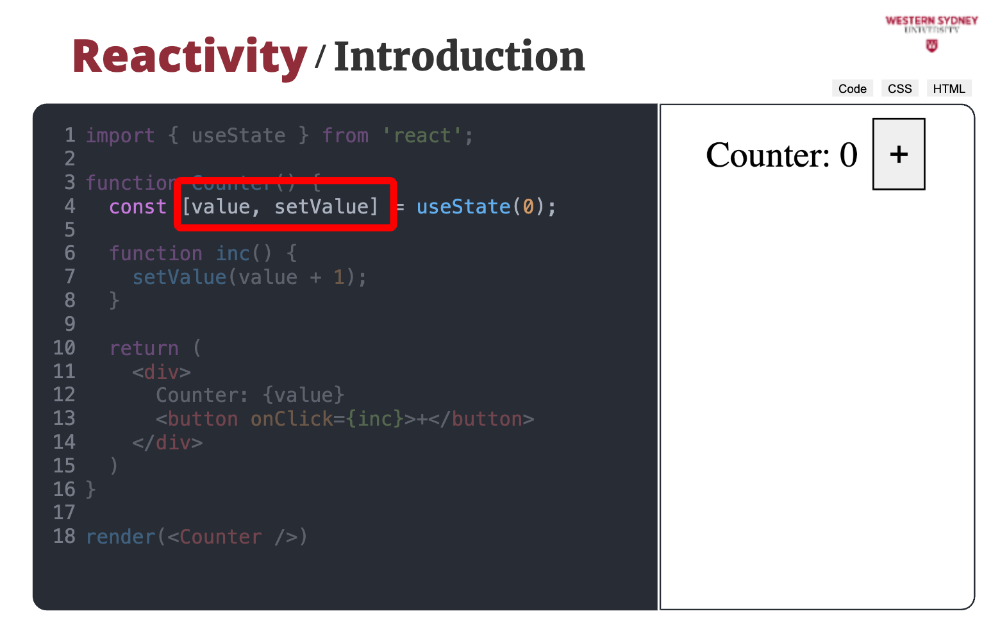
We use array destructuring to assign values to variables.
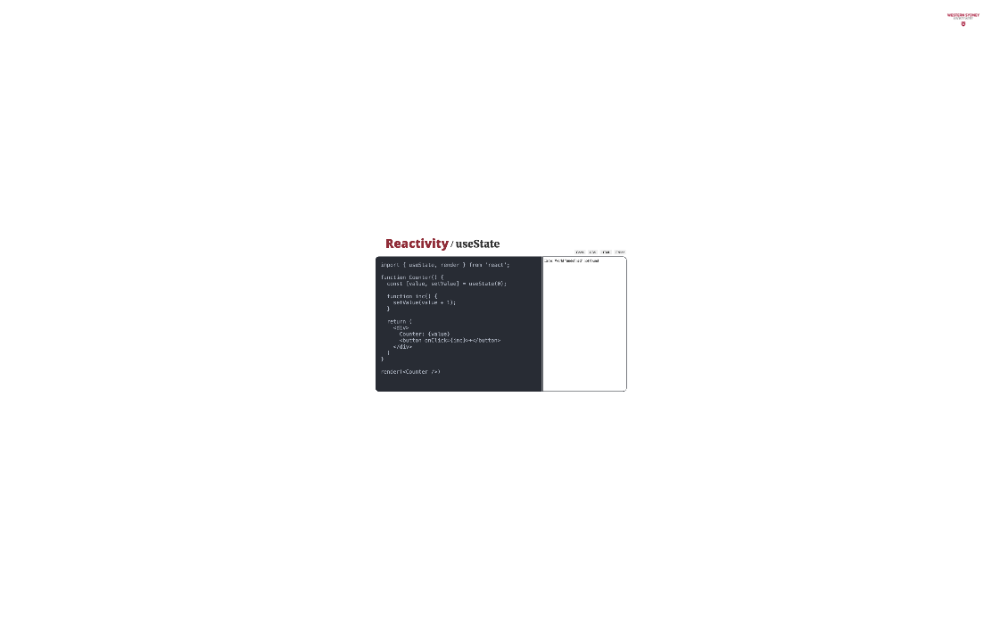
To manage the state, we often define custom handlers, such as this inc function, which increases the state value by one.
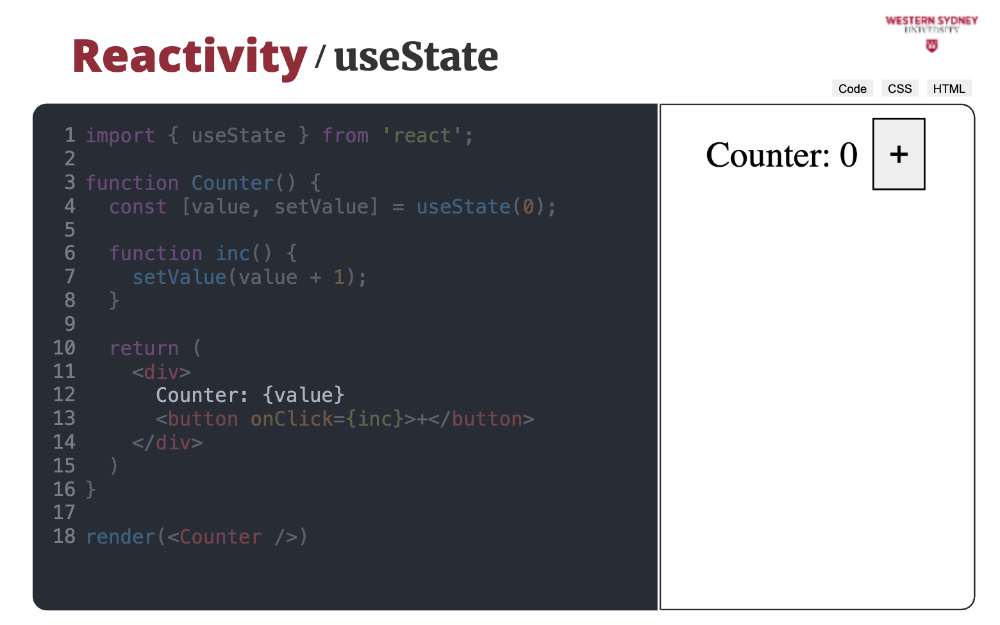
We can then show the current value in a position where we desire, with its own custom look and styles.
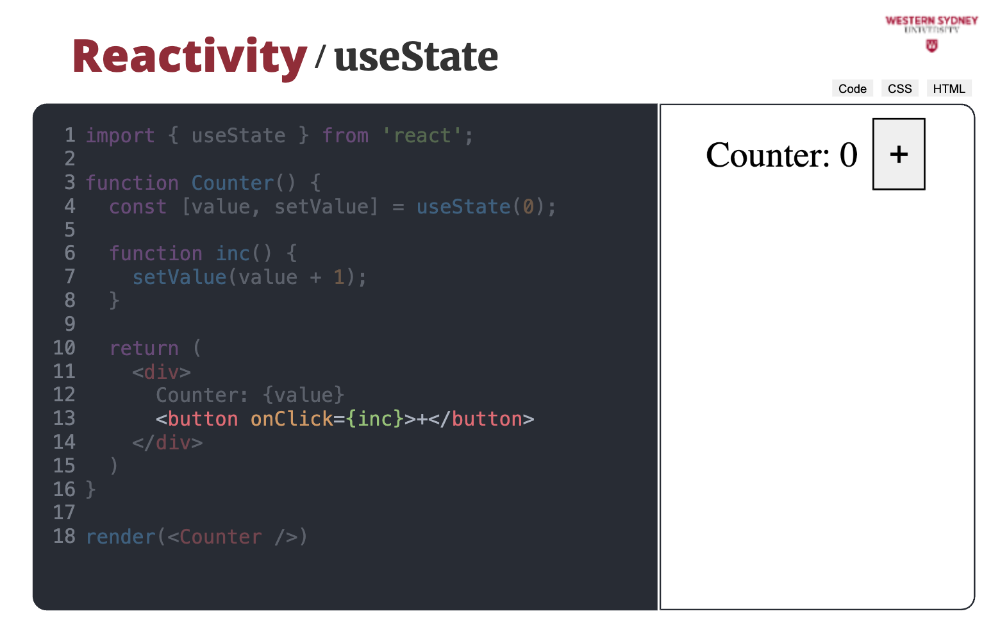
We also assign our custom state change handler to the button's onClick function. Therefore, every time we click the button, it will call the inc function, which will change the state.
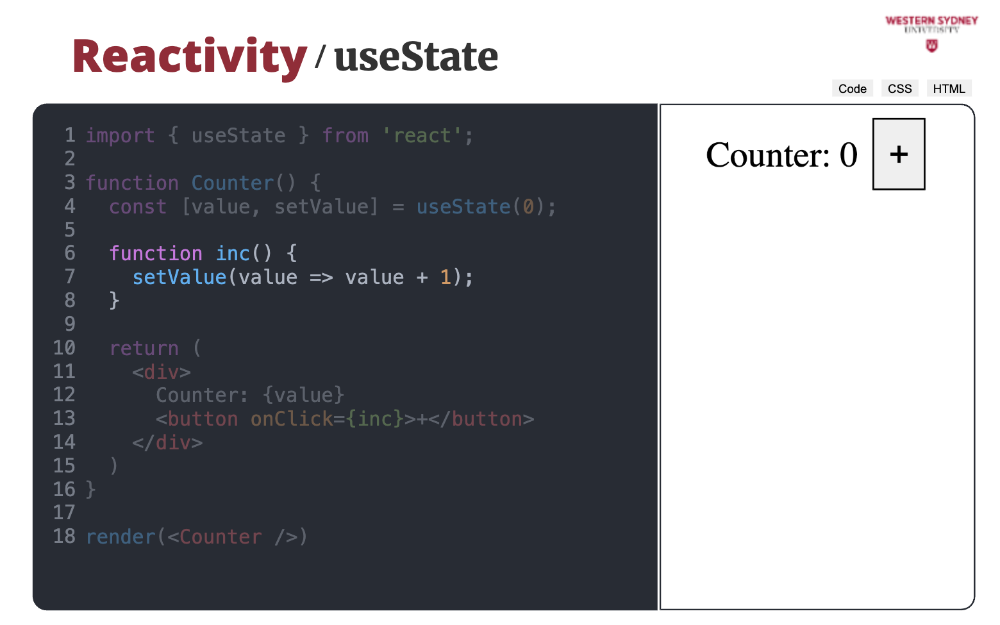
The last thing we need to mention is that the state change function can also accept a producer function that takes one parameter, a current value of the state variable and returns a new state. This is often useful when dealing with asynchronous state changes, ensuring the state never becomes stale.
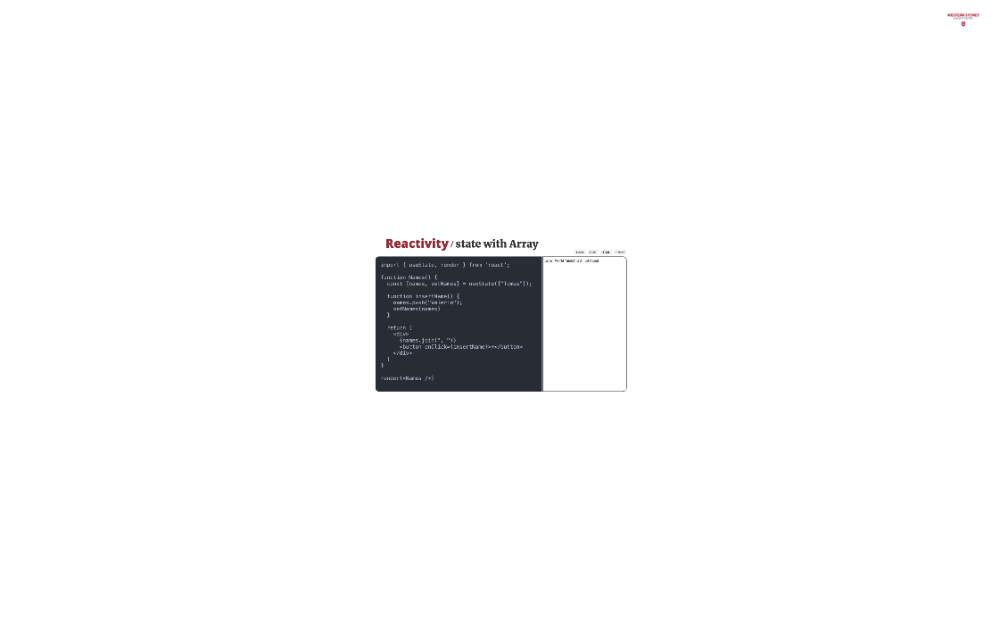
Let's take a look at a more complex example, where we store arrays in the React state. Similar to our previous example, we initialise the state and state change function, this time storing the array value.
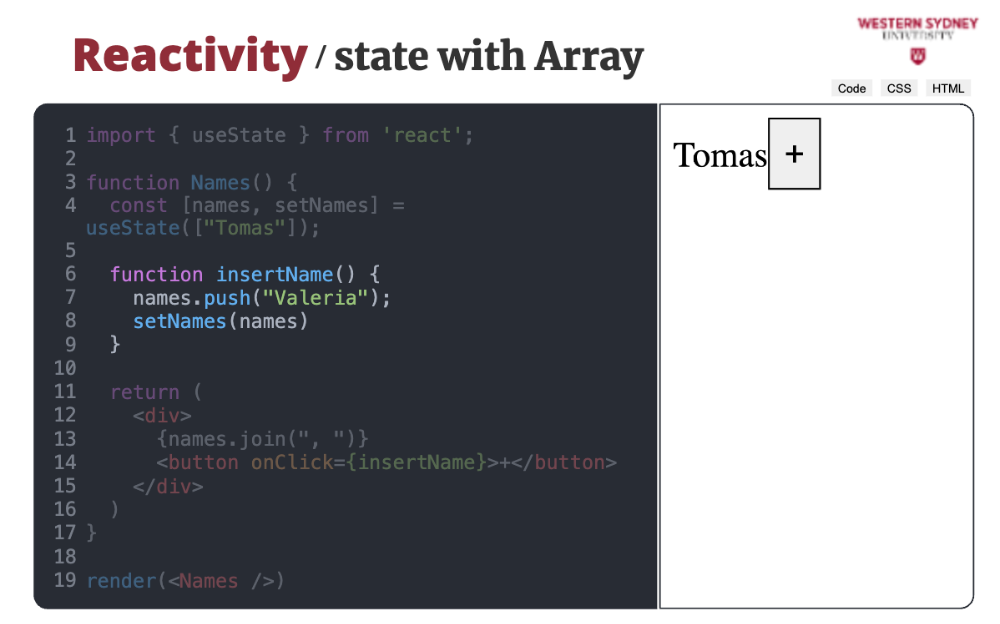
In the state change handler function, we simply push a new string to the state array and store the same array in the state.
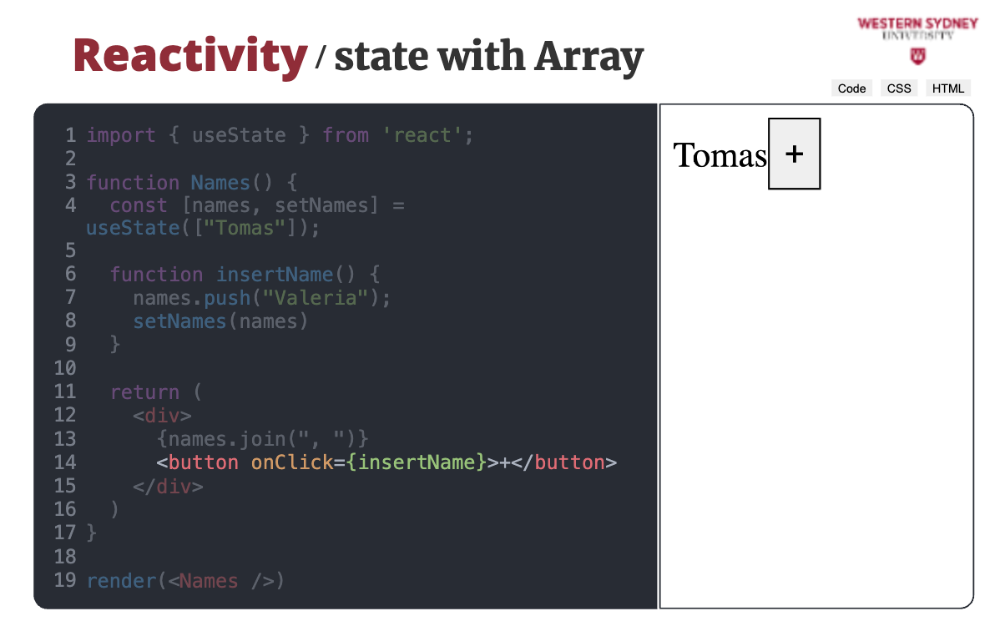
Then, we wire our state change handler to the button click ...
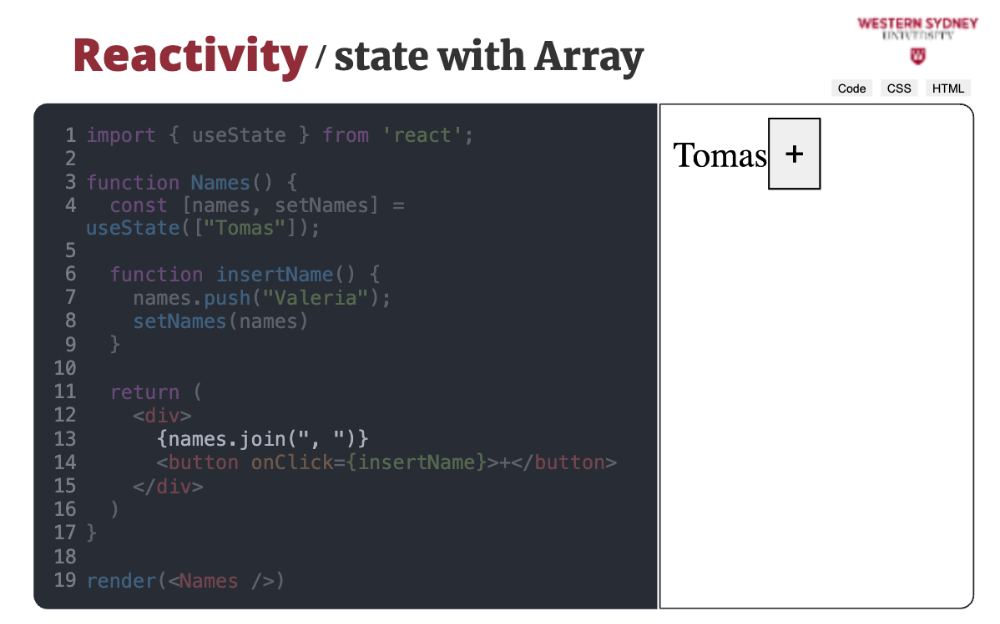
And show all the array content, separated by a comma. But when you click on the button, nothing happens! When dealing with React state, the most important thing to realise is that you must provide a different state value to re-render the component. Otherwise, no change will happen. This is simple with atomic values such as string or number but becomes more complicated with objects or arrays, which use object references. React makes only object reference comparisons for performance reasons.
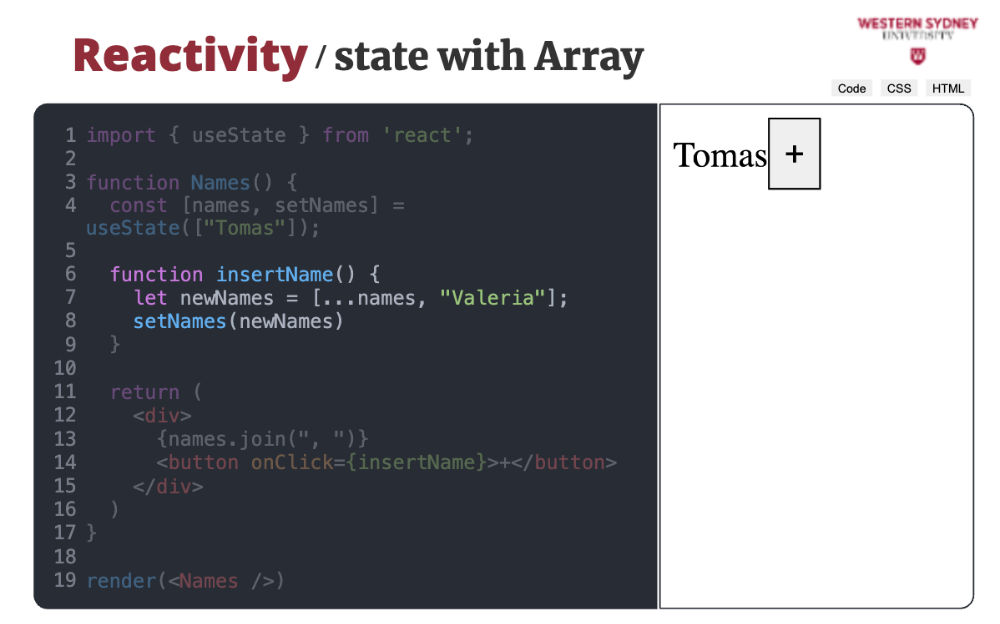
Therefore, to change the state, it is not sufficient to update the array. You have to create a new array to create a new object reference. In this case, we use the convenient spread operator to change the array.
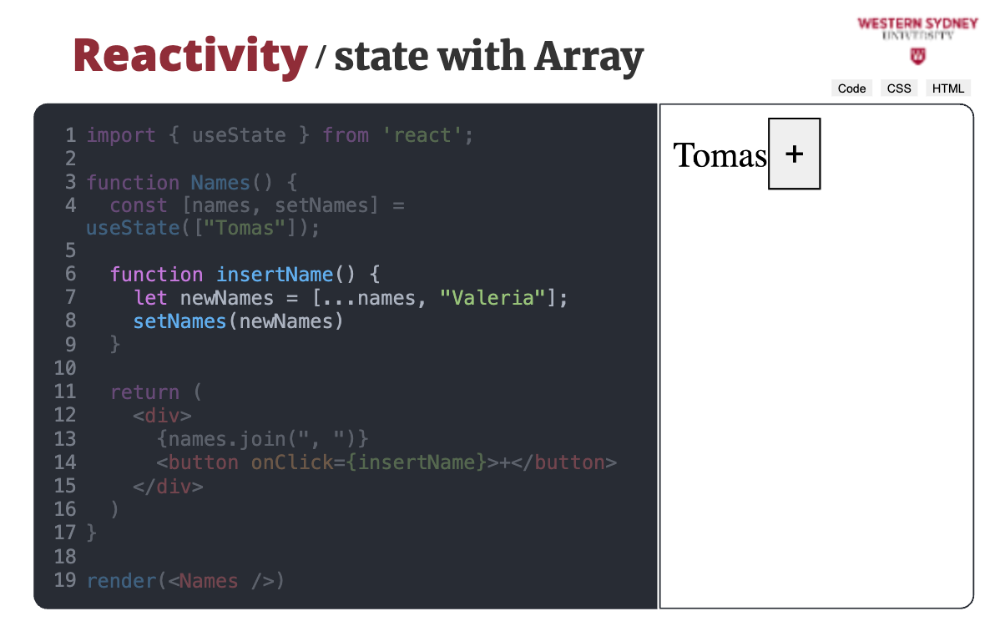
When you click on the plus button now, all is well as react recognises that a state has been updated.
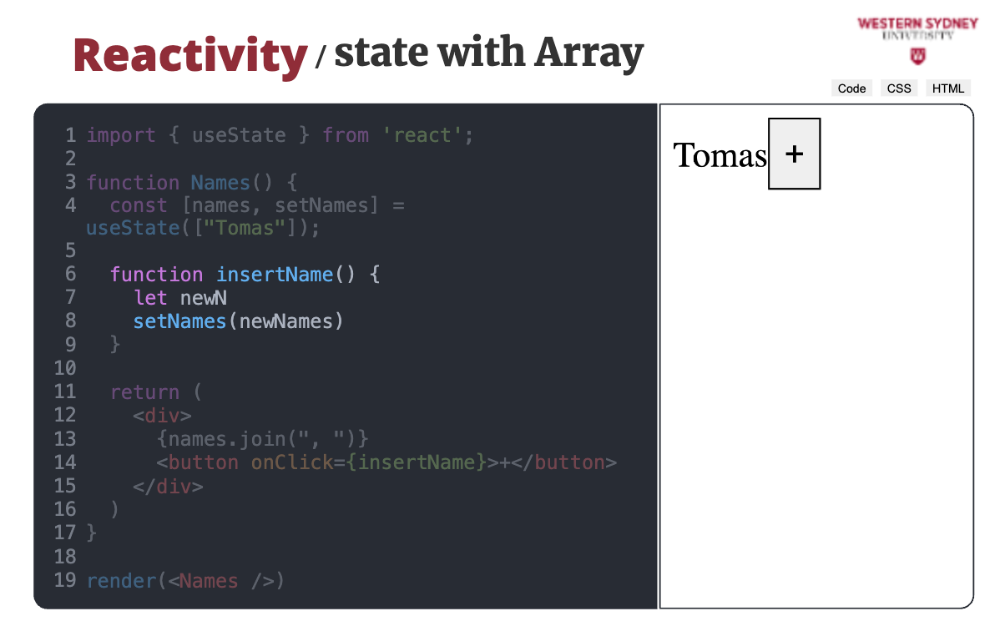
If you do not like the spread operator, you can use the concat function to create a new array combining two provided array. So, please remember that functions such as push, pop, shift or unshift that modify existing array in-place will not work for React state changes and a new object reference to a modified array must be provided.
With objects, situation is the same as with arrays. Changing object properties does not change the object reference and you have to update the state with a new object value. Consider this example.
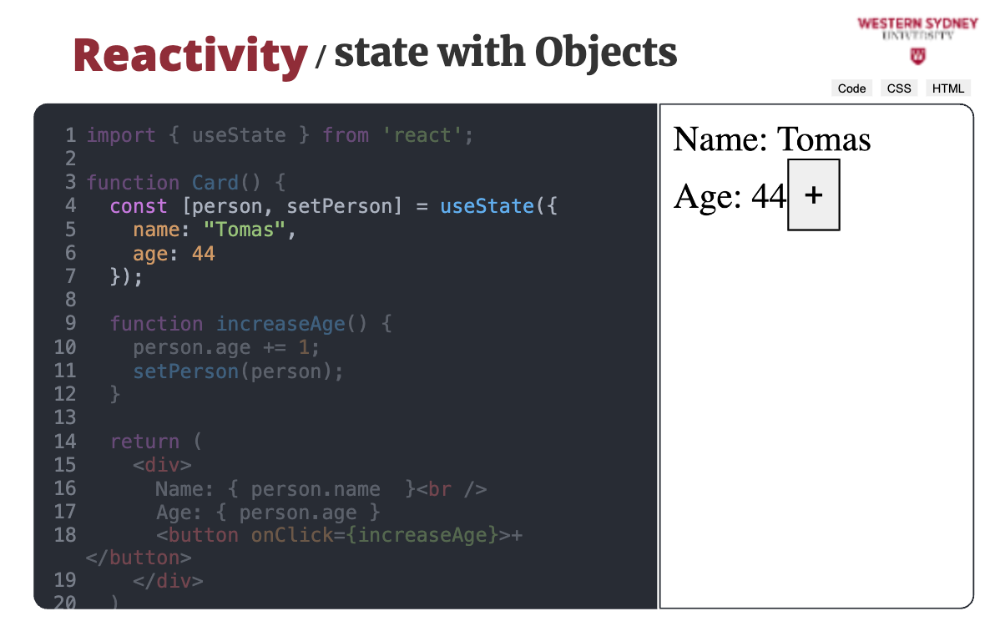
First, we initialise the state that is an object value, holding name and age of a person.
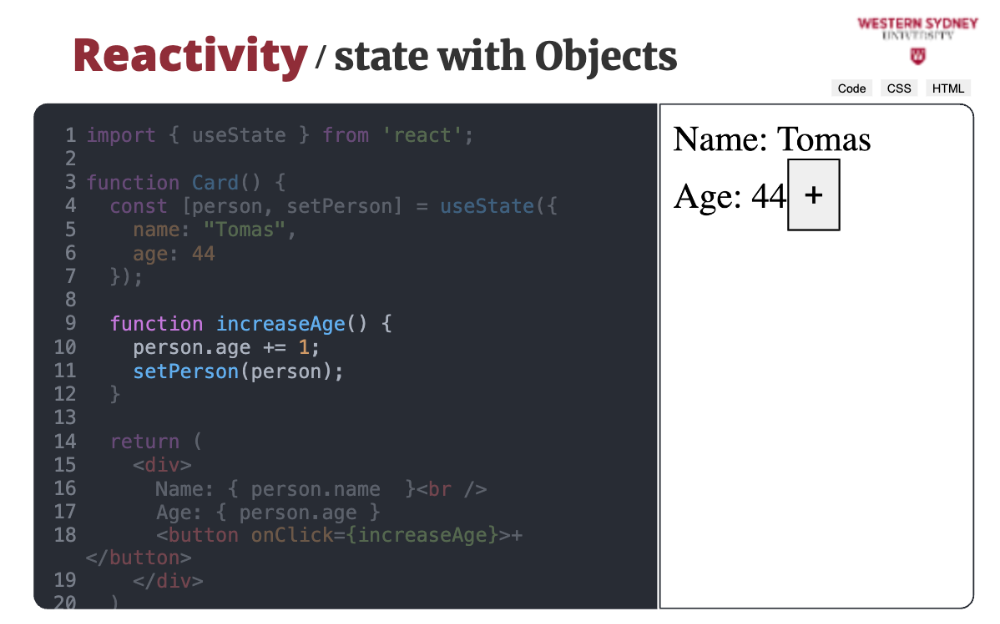
Then, we define our state handler where we increase the age of the person and store it back to the state. Can you already spot the error?
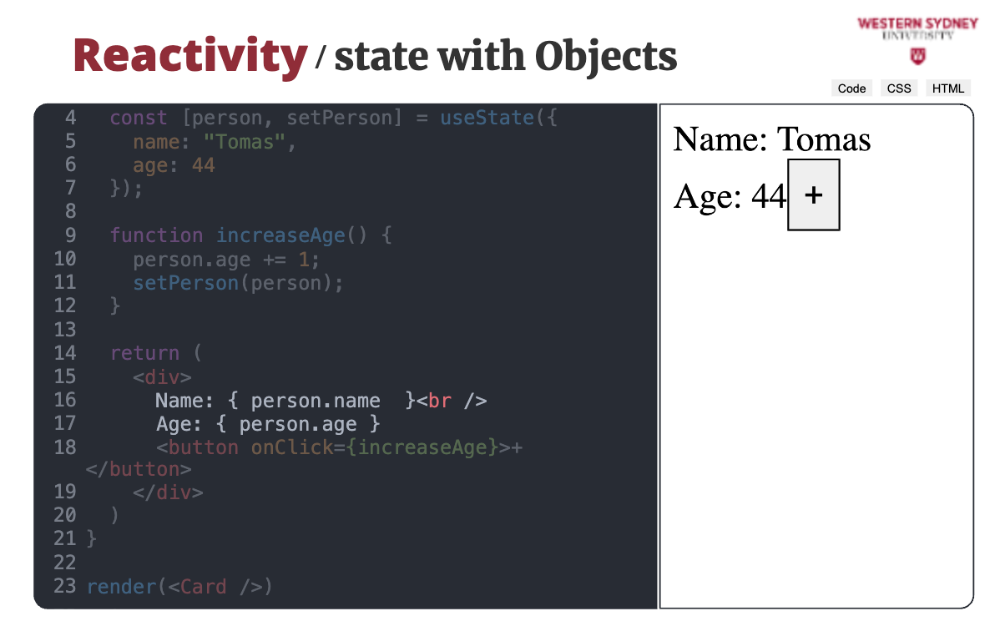
Then, we show the name and age inside a div.
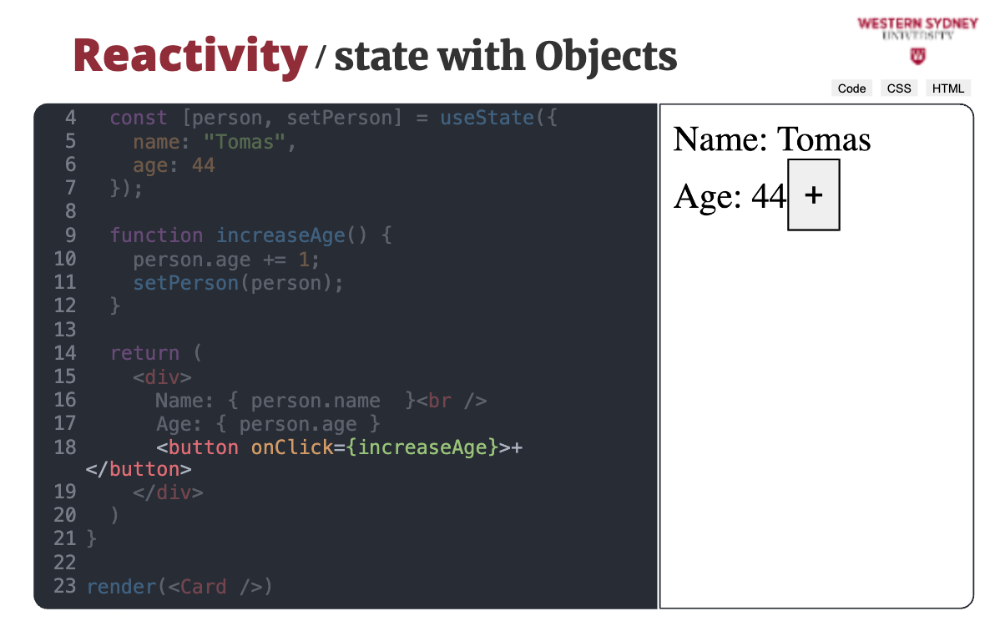
Last, we wire the button click to the state change handler. But when we click the button, the person's age does not update! Let's fix it.
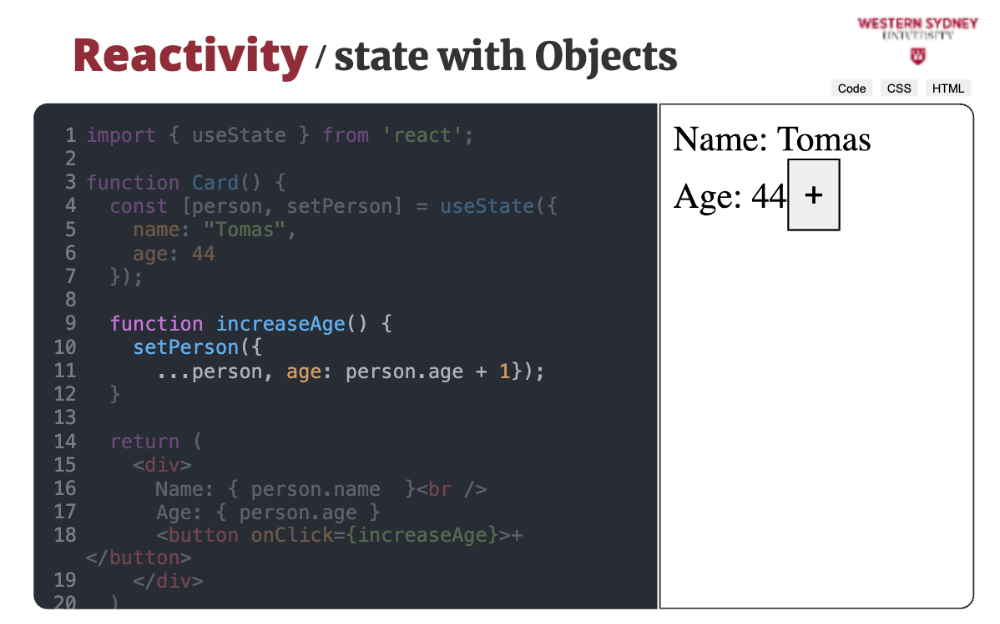
Let's fix it! The goal is to produce a new state, in our case a new object. We will use the convenient spread operator to create the new state. Similarly you could use the assign function to create a new object but this will do!
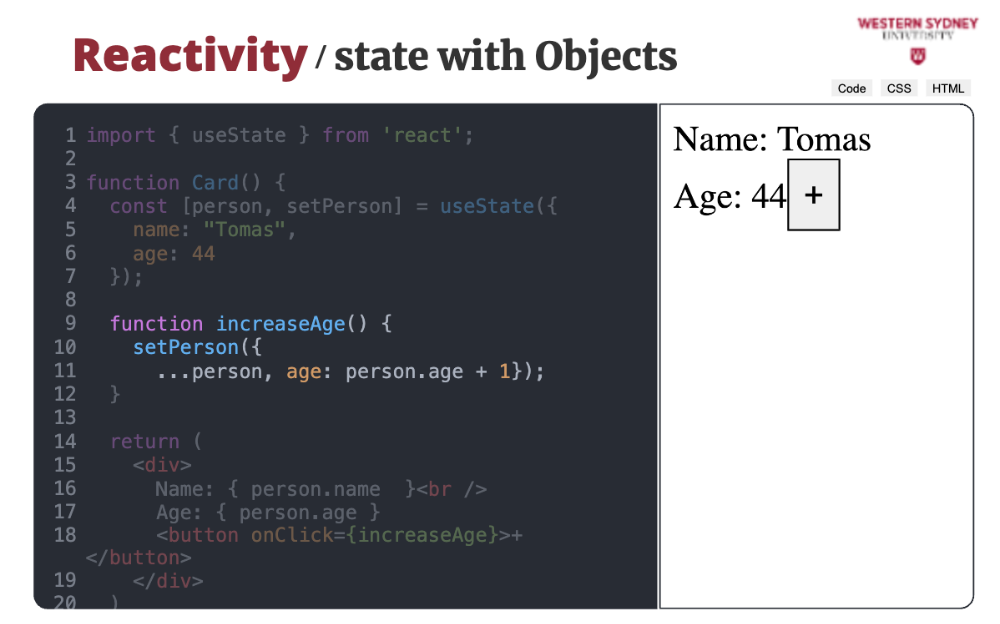
When we run our example now, all works as expected!
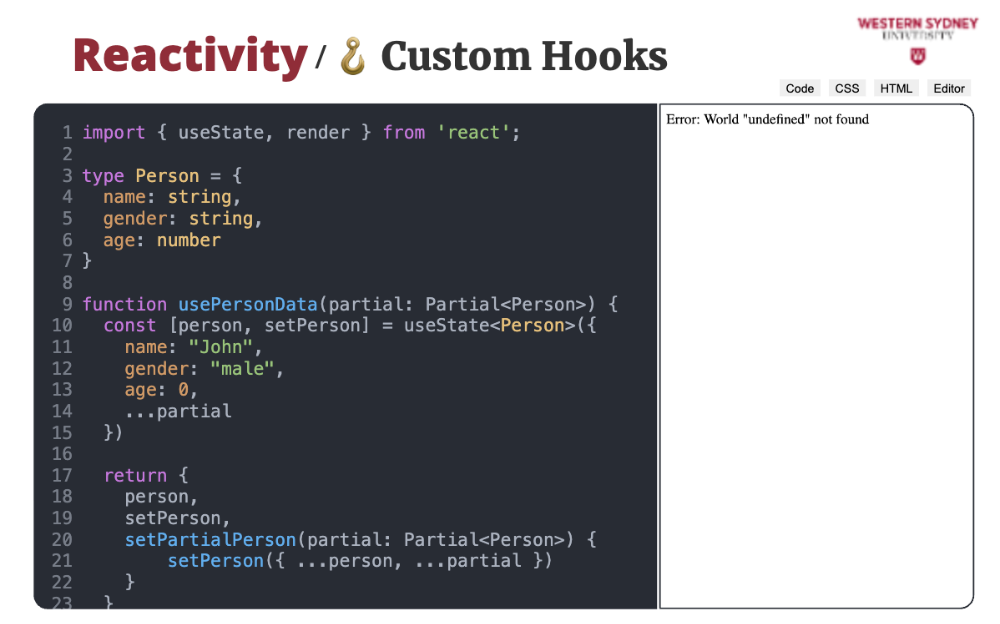
Sometimes, you may want to use the same component state repeatedly in your app across many components.
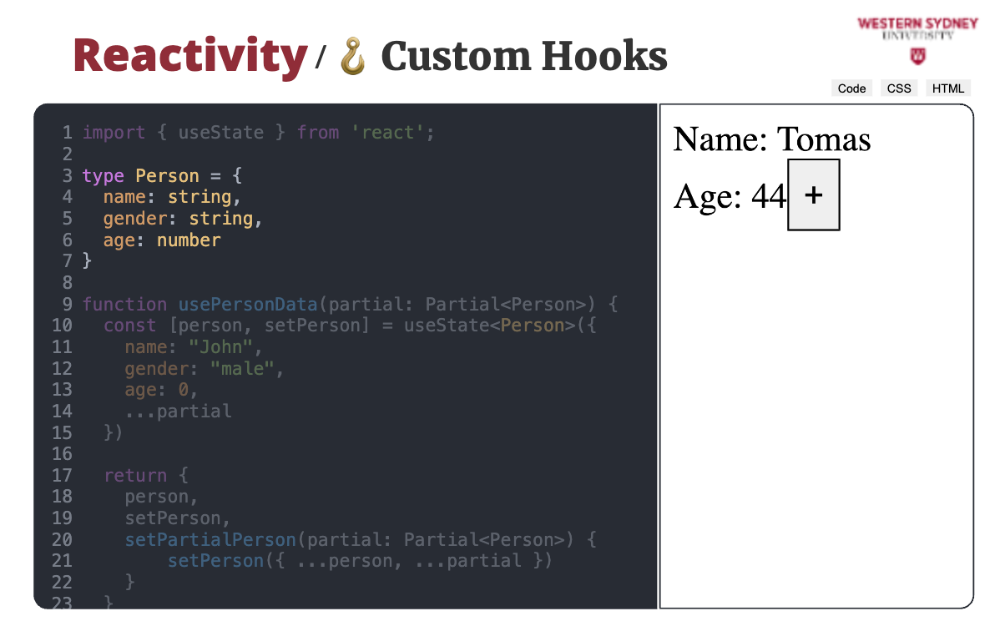
For example, you want to track and modify this user data across more components in your app.
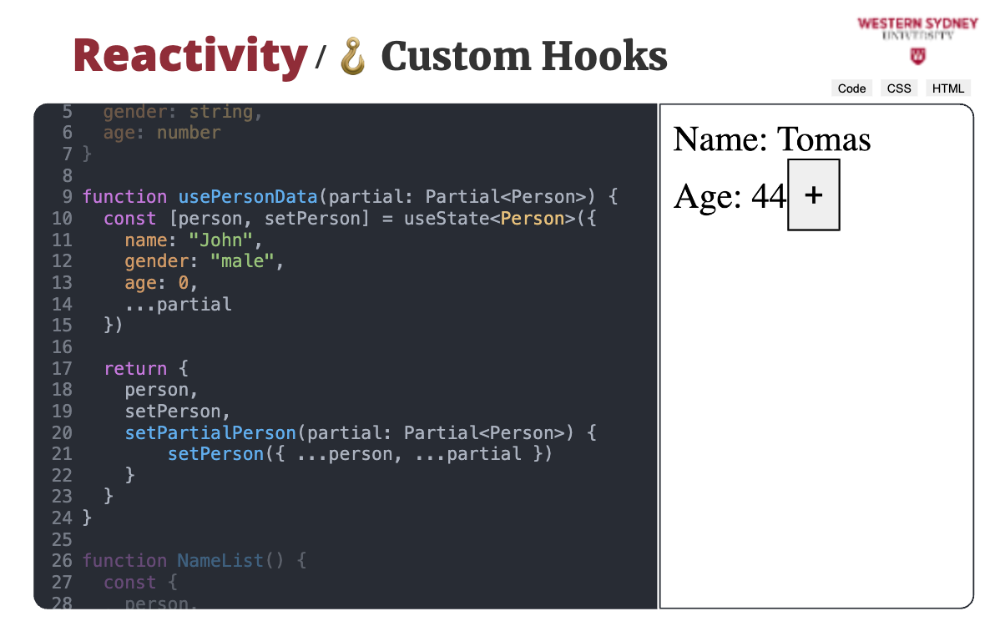
For such purpose, we create a new usePersonData to track user data and we also add some extra functionality to simplify their use.
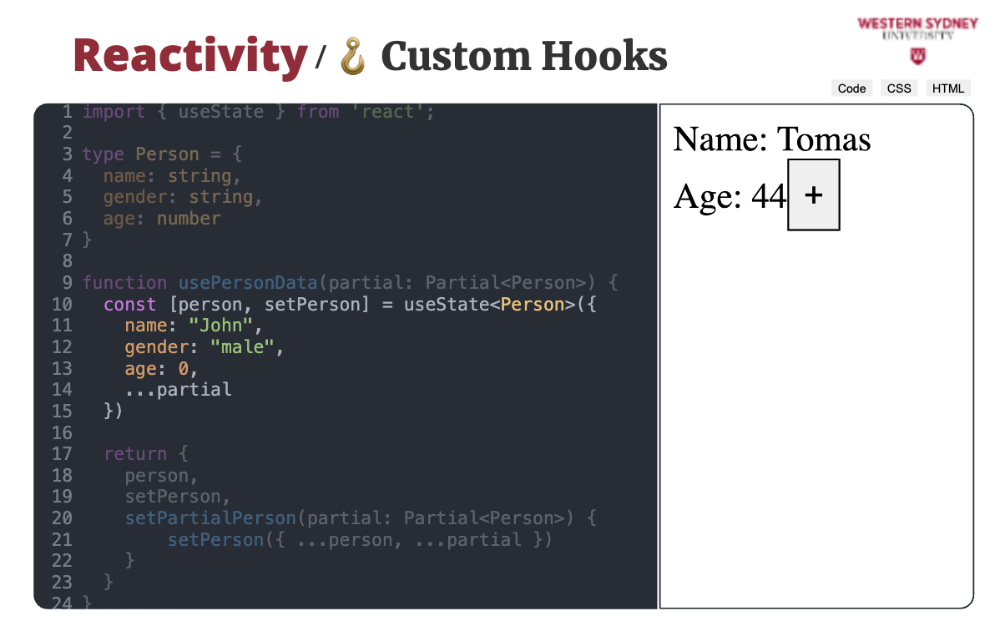
For example, we will initialise user data with some default values and allow to specify only a subset of required values.
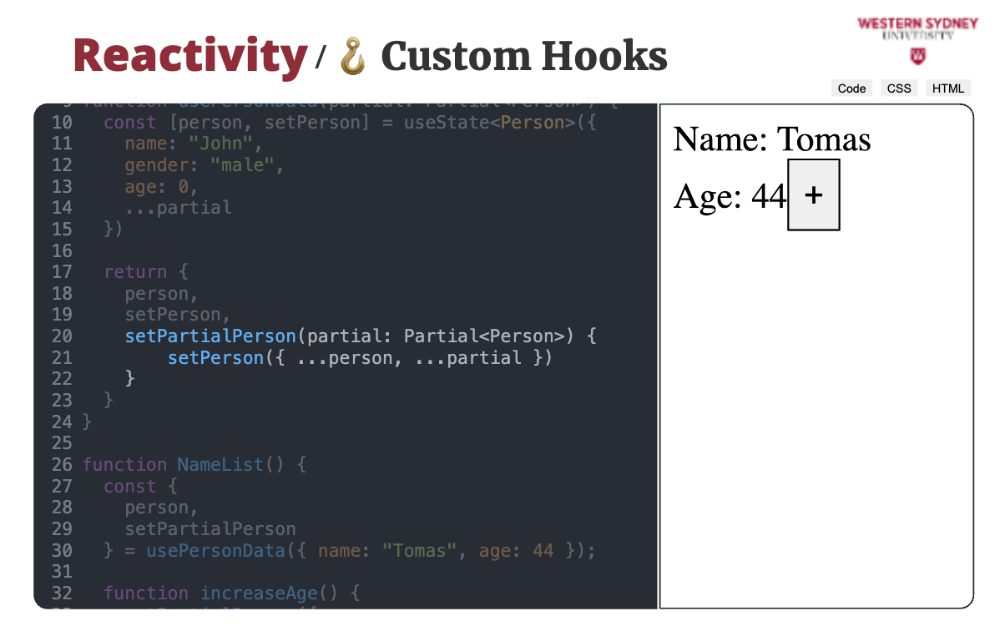
We also add a new method that will allow to specify only a subset of user data that we want to update, simplifying data updates.
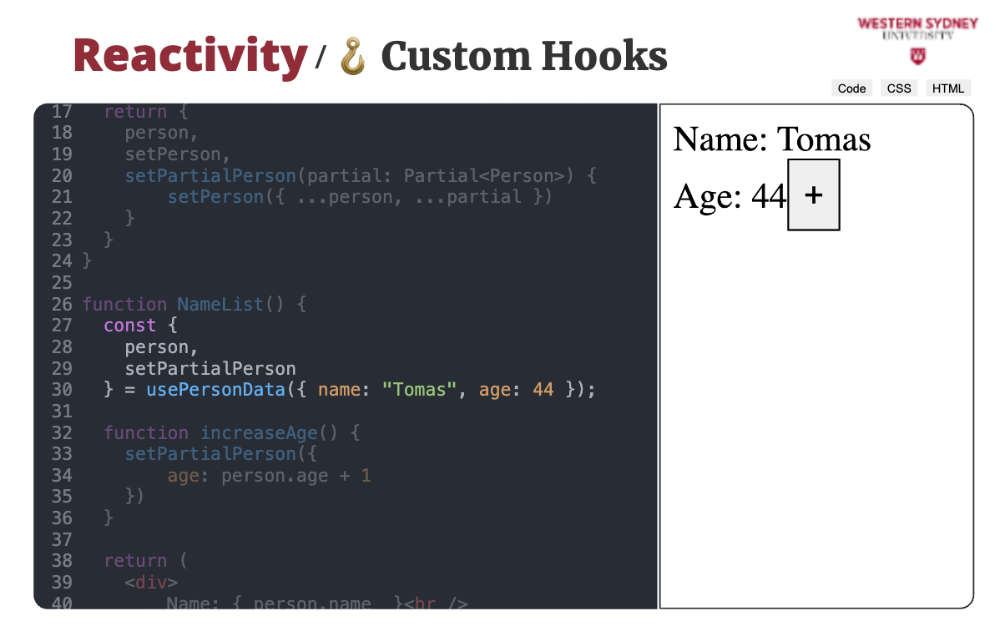
Now, we are ready to use this hook. Note that we use object destructuring and not array as in regular hooks, as we return an object from our custom hook, not an array.
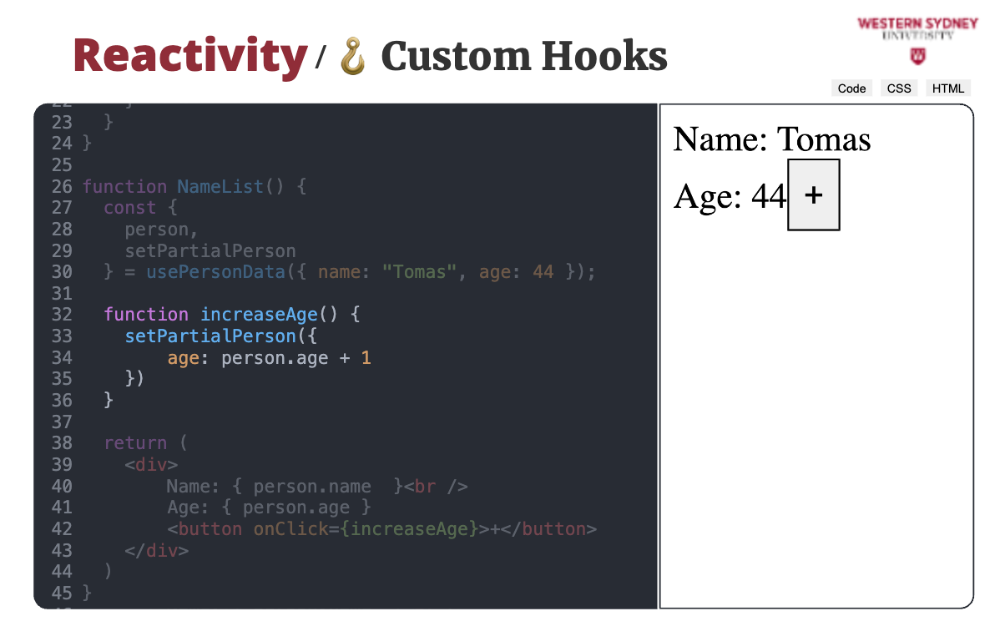
We can now use our fancy new method to use partial data to update the state, reducing the need for spread operators.
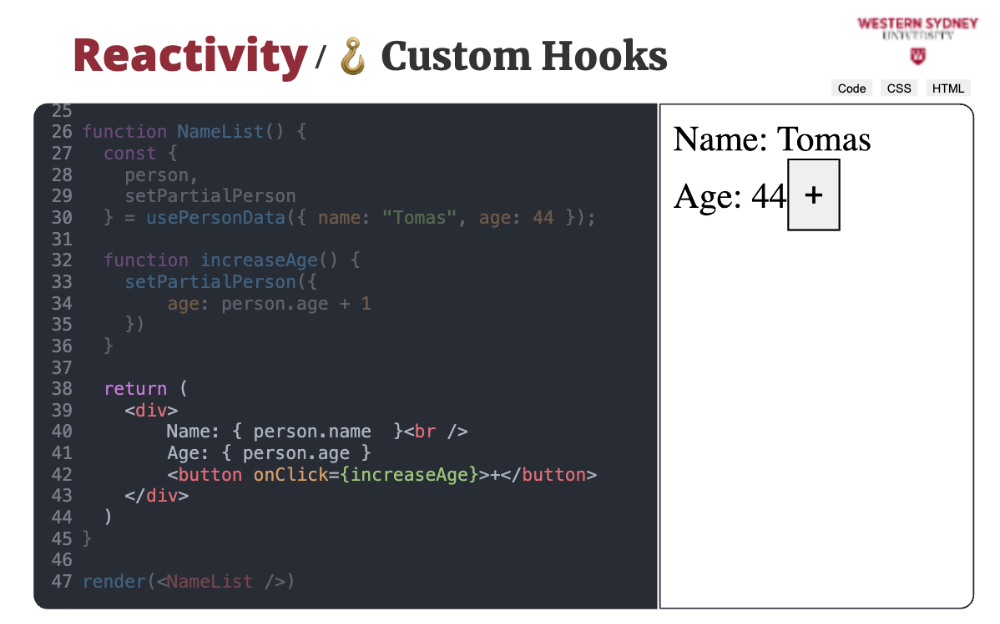
We can use the data as with a regular hook. Pretty cool, huh? Online, you may find collections of custom hooks simplifying common operations, and reducing the boilerplate in your applications. Let's take a look now at some limits of hooks and the rules we need to follow when using them,
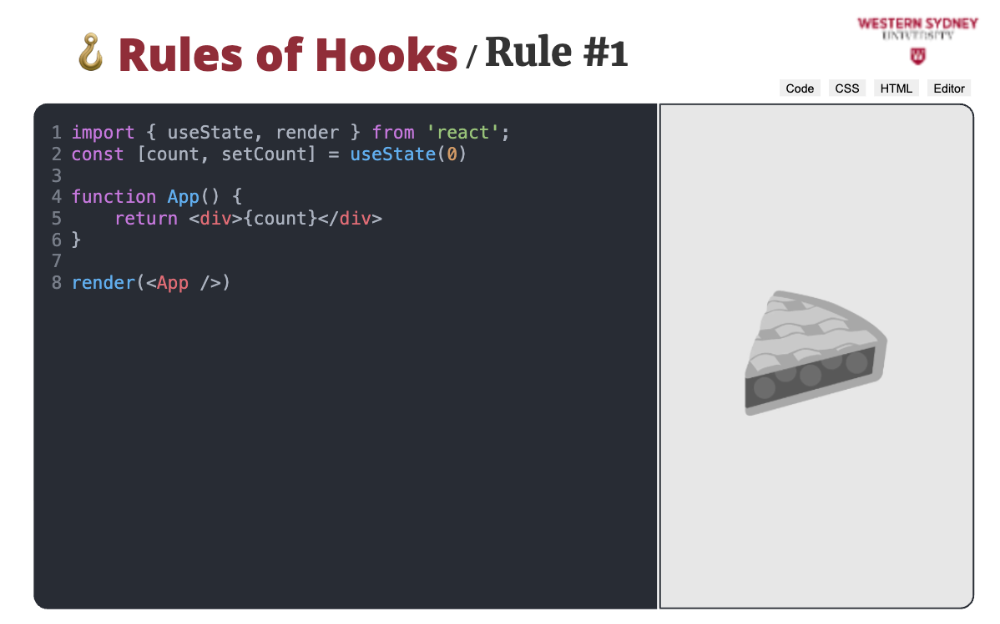
When using hooks you need to remember two important rules. Rule #1: Hooks can only be called from within the functional components.
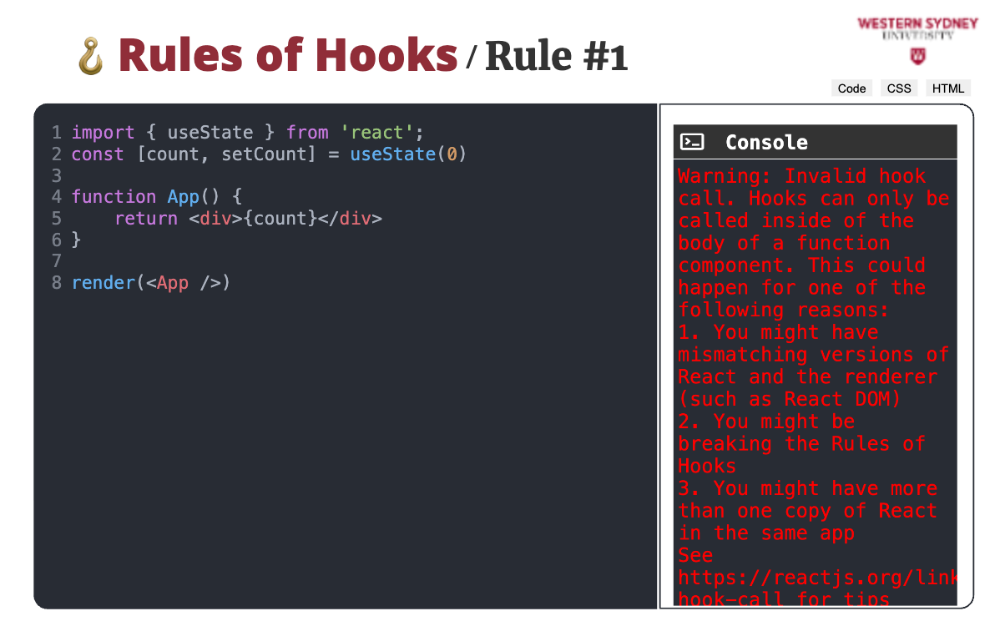
For example, the following code would fail and rendering this component would lead to runtime warning telling you that hooks can only be called inside the body of a function.
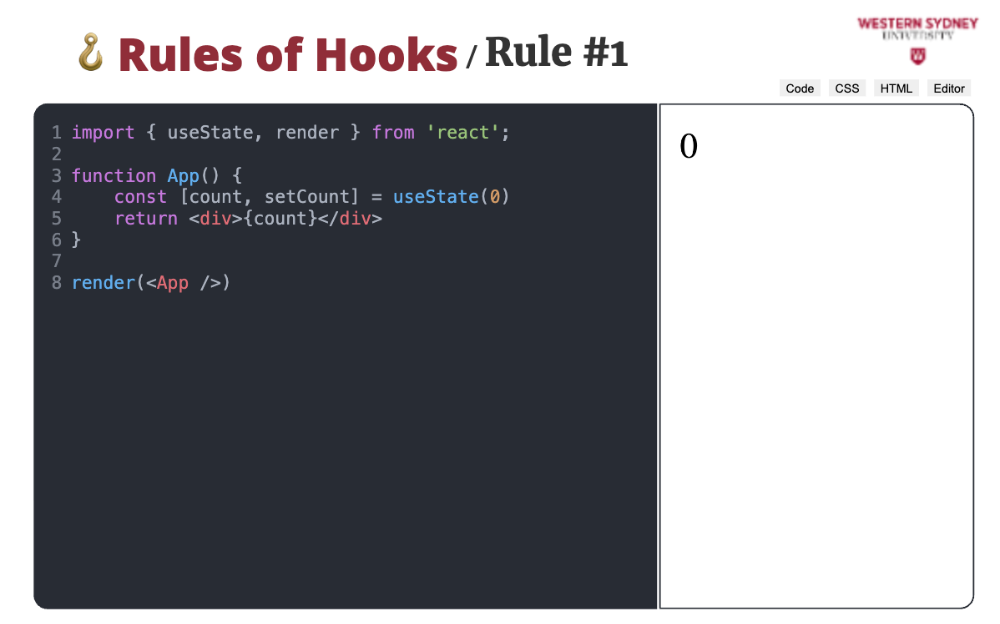
To fix it, you must move hooks inside the component and the code will work.
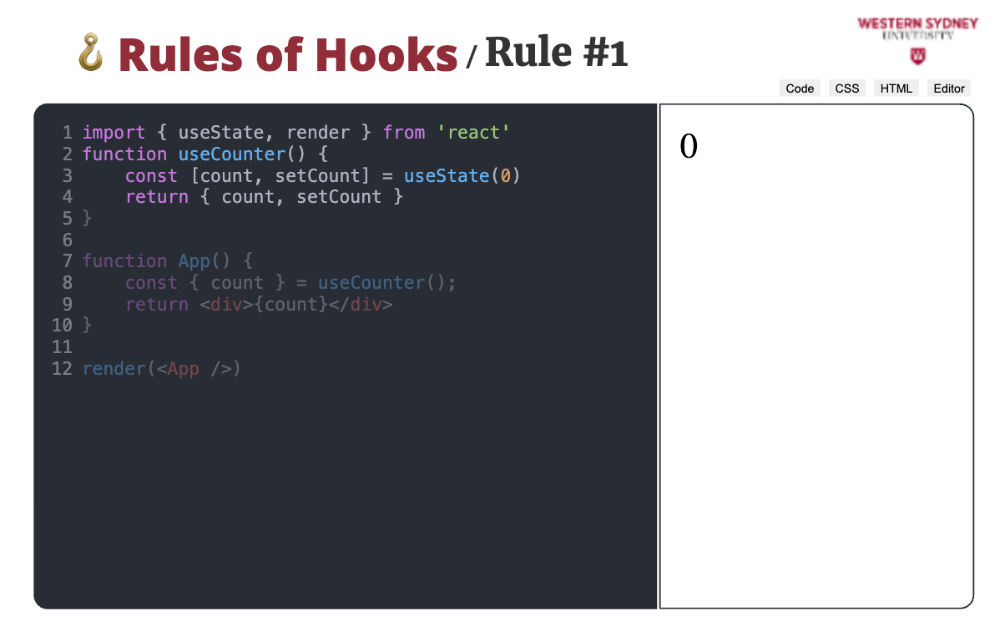
If you paid attention, you might argue that custom hooks are not components, yet we use hooks inside them!
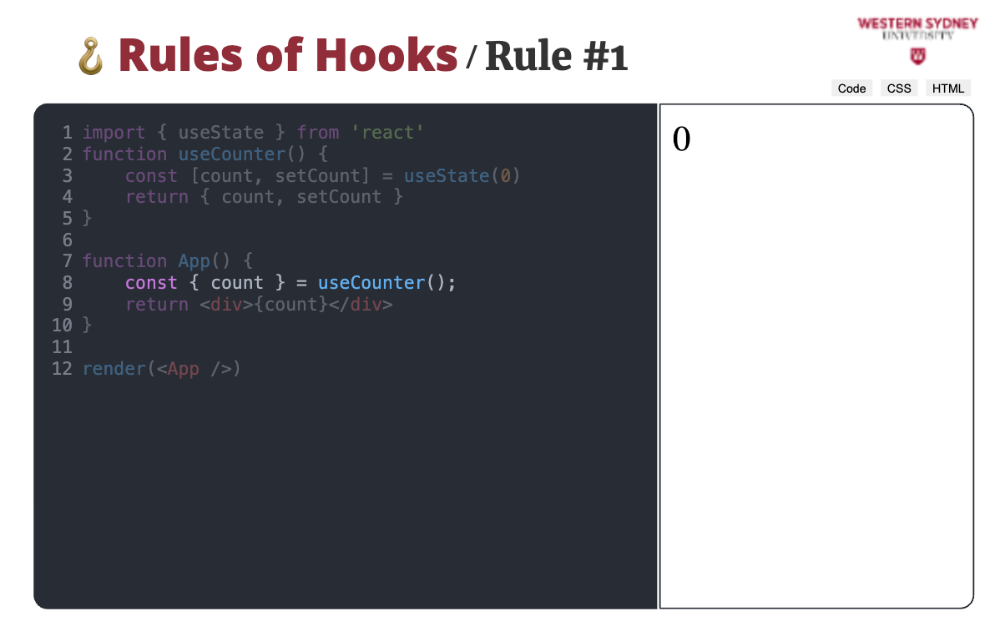
Well, even though the custom hook is NOT a component, we are calling it from within the component. That is why we are not violating the number one rule of hooks. React knows, that the hook was called from within a component.
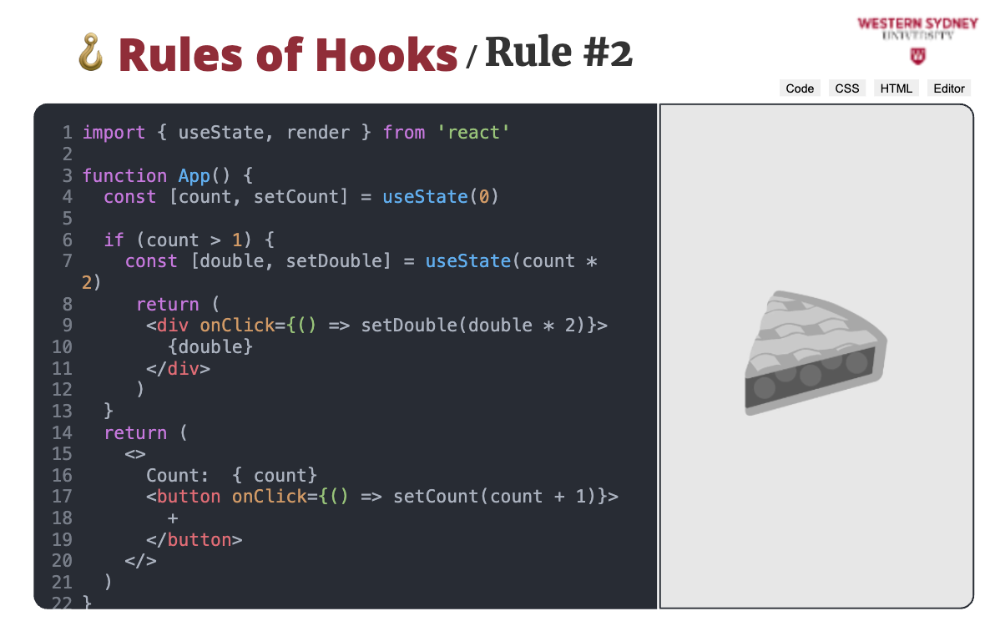
Rule #2 dictates that you must render the same number of hooks on each component render. Ergo, you cannot conditionally call hooks.
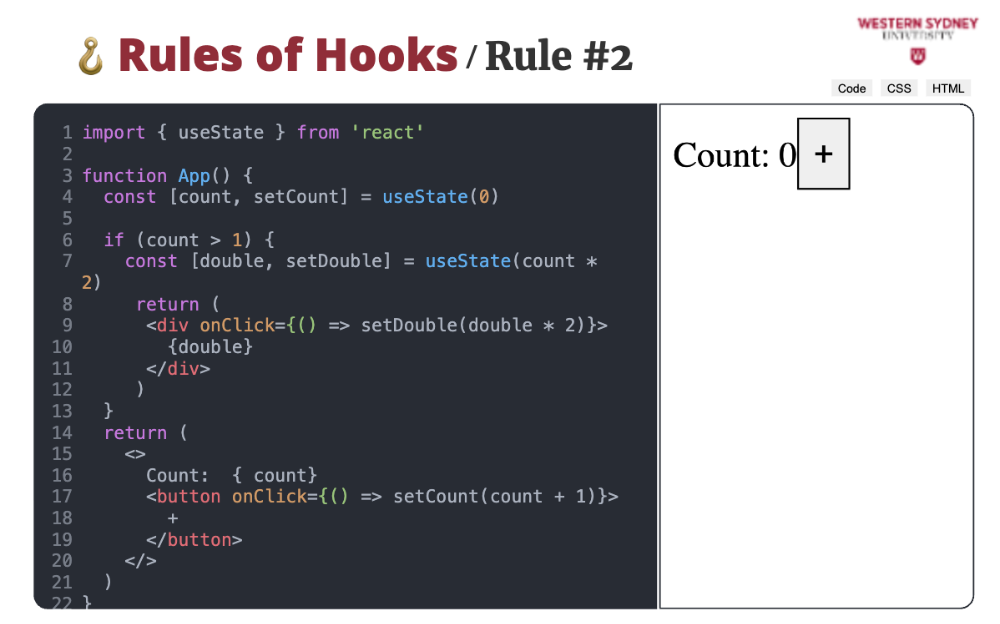
In this example, the first click of the button works just fine, but clicking the button a second time crashes the application.
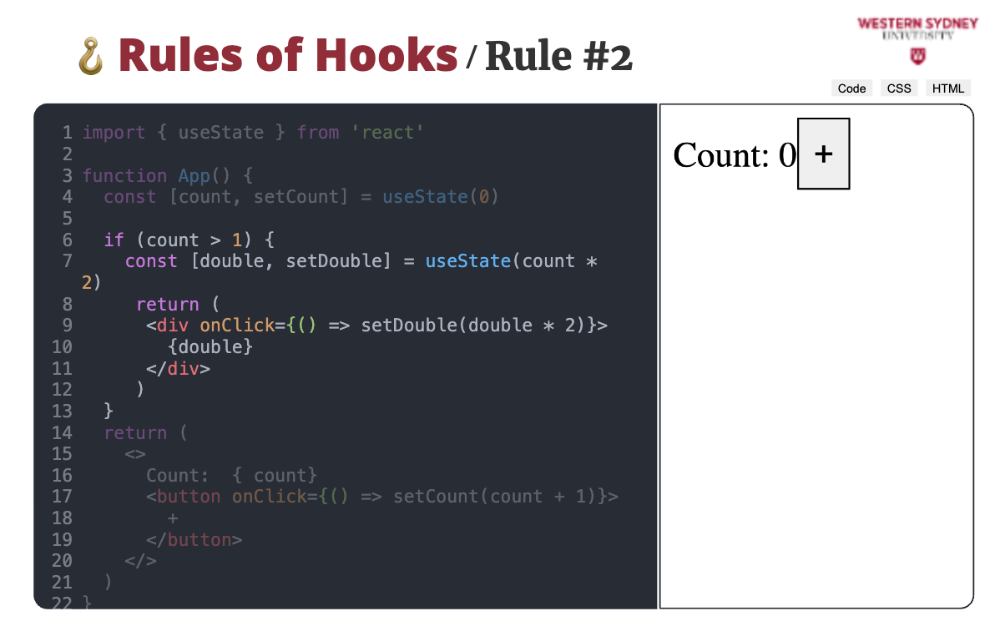
The reason for this is that when the value of the count reaches one, we initialise a new state variable that breaks the rule of hooks.
The way to fix this is to extract the conditional code into a custom component and track its state separately.
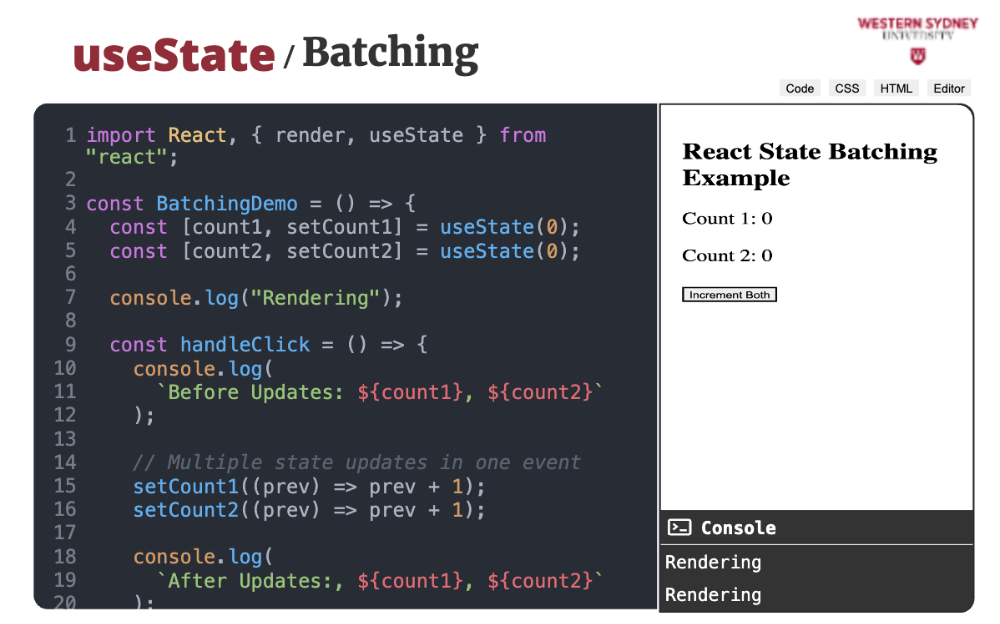
In React, state updates are batched to optimize performance and minimize unnecessary re-renders. Batching means that multiple state updates within the same event are combined into a single re-render. LEt's take a look at the example.

We print the message that the component is rendering.

The console.log prints the stale state (values before the update).

setCount1 and setCount2 are called sequentially. React batches both updates and processes them together in one re-render.
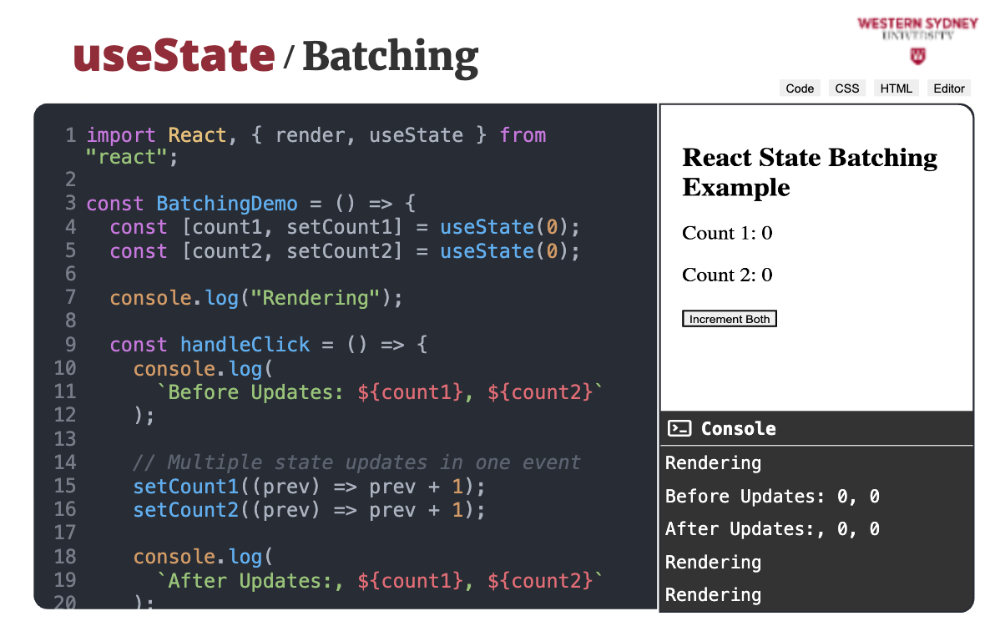
Then, we log the count values and observe their value. Do you think the value changed?
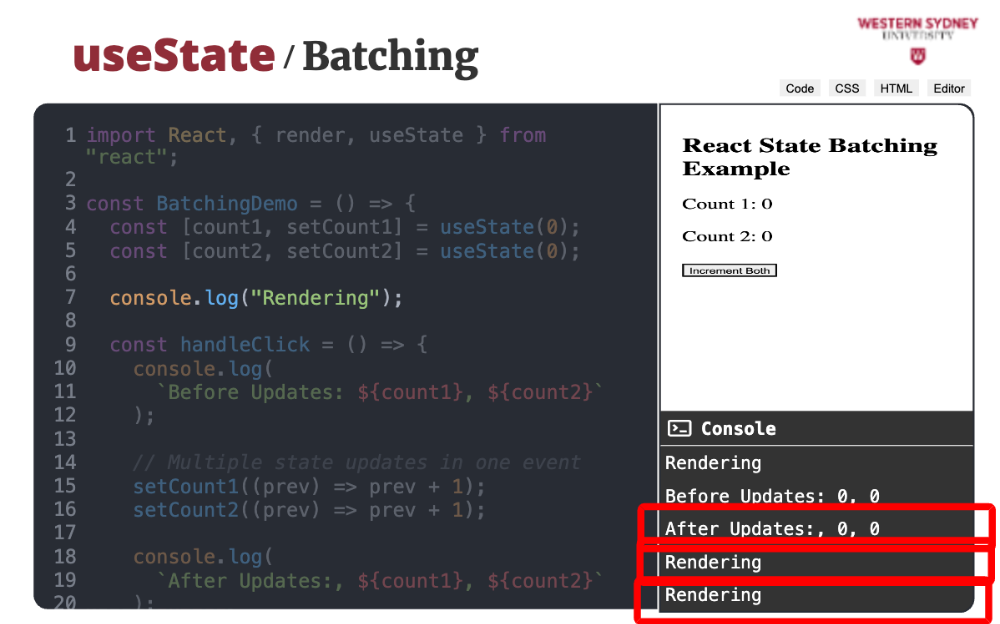
Let's take a look at a console, what we see there once we click the button. The rendering happens only once! The updates happened in batch!

The Before Updates log will show the old values.
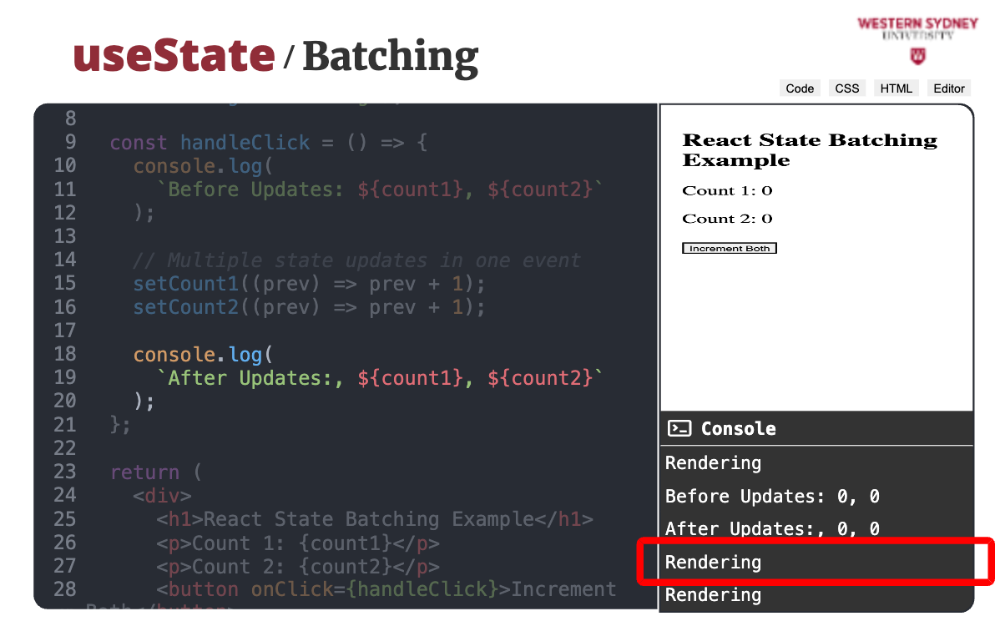
The After Updates log will still show stale values because state updates are asynchronous.

In React, "reactivity" refers to the way in which React applications respond to changes in state or props by automatically updating the user interface (UI). This concept is central to React’s design and helps make it a powerful library for building dynamic web applications. Thus, instead of telling the webpage how to change the website after the state has changed, we describe how the page should look and let React take care of the changes.
The primary tool for reactivity in React is the state. Managing state in React involves understanding how to efficiently handle operations like adding, removing, and updating items within arrays. This section explores these fundamental concepts using the React state management system.
While React also supports the definition of Components using classes, we will focus on a more modern representation of React components using functions, also known as functional components. In React, functional components use special functions called hooks to control the life cycle and behaviour of react components. You can easily spot the react hook as it will have the “use” prefix. For example, we will use:
useState hook to control the state and reactivity of the component
useEffect to control the side effects and clean up after the component
useMemo to remember values of expensive computations
… and others
In this section, we focus on the most use hook of them all “useState”
State in React is a set of data that determines the behaviour and rendering of components. When state data changes, React re-renders the component to reflect the updates. The state is typically initialised in a component's constructor (for class components) or using the useState hook in functional components.
Below is an example of using state in a functional component:
function Counter() {
  const [value, setValue] = useState(0);

  function inc() {
    setValue(value + 1);
  }

  return (
    <div>
      Counter: {value}
      <button onClick={}>+</button>
    </div>
  )
}
The useState hooks return an array of with two elements. First array element is the value from the state and the second one is a function we use to change the value. We use array destructuring to assign values into variable.
Furthermore, in our example, the button increases the count value. Without telling React how to update the value on the screen the counter value is increased. Magic! 🪄
The setValue in the example above either accepts a new value or a producer function. Producer functions assure that the value used to compute the new state is never stale. This can often happen when using custom hooks, useMemo hook or asynchronous operations. For example:
 function Counter() {
  const [value, setValue] = useState(0);

  function inc() {
    // producer function
    setValue((value) => value + 1);
  }

  return (
    <div>
      Counter: {value}
      <button onClick={}>+</button>
    </div>
  )
}
We will show some examples of stale state once we start exploring the useMemo hook.
Here, the things get tricky. The most important thing to realise is that you have to provide a different value in order to re-render the component, otherwise no change will happen. This is simple with atomic values such as string or number, but becomes more complicated with objects or arrays, which use object references. React does only shallow (object reference) comparison for performance reasons.
To change the state it is not sufficient to update the array. You have to create a new array to create a new object reference. In the following example, pressing the “+” button does nothing.
function NameList() {
    const [names, setNames] = useState(["Tomas"]);

    function insertName() {
        names.push("Valeria");
        setNames(names)
    }

    return (
        <div>
            {names.join(", ")}
            <Button onClick={insertName}>+</Button>
        </div>
    )
}
We have modified only the internal properties and structure of the array, retaining the same object reference. Similarly doing any of the operations on the array will not produce any state change:
pop
shift
unshift
splice
reverse
Instead, we need to use methods that modify the array and return a nbew object reference such as:
Let's fix the example above in a couple of ways.
function NameList() {
    const [names, setNames] = useState(["Tomas"]);

    function insertName() {
        // fix 1
        setNames(names.concat(["Valeria"]))

        // or, fix 2
        setNames([...names, "Valeria" ])
    }

    return (
        <div>
            {names.join(", ")}
            <Button onClick={insertName}>+</Button>
        </div>
    )
}With objects, situation is the same as with arrays. Changing object properties does not change the object reference and you have to update the state with a new object value. Consider the following failing example:
function NameList() {
    const [person, setPerson] = useState({ name: "Tomas", age: 44 });

    function increaseAge() {
        person.age += 1;
        setPerson(person);
    }

    return (
        <div>
            Name: { person.name  }<br />
            Age: { person.age }
            <Button onClick={increaseAge}>+</Button>
        </div>
    )
}
Before you look at the solution below, try to fix the example yourself.! Did you do it? If not, check out our solution, we fix it in two different ways, using a spread operator and using Object.assign function.
function NameList() {
    const [person, setPerson] = useState({ name: "Tomas", age: 44 });

    function increaseAge() {
        // fix 1
        setPerson(Object.assign(person, { age: person.age + 1});

        // or fix 2
        setPerson({
            ...person,
            age: person.age + 1
        })
    }

    return (
        <div>
            Name: { person.name  }<br />
            Age: { person.age }
            <Button onClick={increaseAge}>+</Button>
        </div>
    )
}
While both ways do the same, it is better to use the spread operator as it is easier to read and works seamlessly for complex components. In the next section, let's work on an exercise using useState.
Often, you keep using the same component state repeatedly in your app across many component. Or, you mimic the same component behaviour across your app. For such purpose, you can create a custom hook. For example, imagine that you track person data in many components, and you want to only use partial data to initialise the person information. For such functionality, we add a usePersonData hook:
function usePersonData(partialPerson: Partial<Person>) {
    const [person, setPerson] = useState<Person>({
        name: "John",
        lastName: "Doe",
        age: 0,
        ...partialPerson
    })
    return {
        person,
        setPerson,
        setPartialPerson(partialPerson: Partial<Person>) {
            setPerson({ ...person, ...partialPerson })
        }
    }
}

function NameList() {
    const { person, setPartialPerson } = usePersonData({ name: "Tomas", age: 44 });

    function increaseAge() {
        setPartialPerson({
            // ...person // no need for this!
            age: person.age + 1
        })
    }

    return (
        <div>
            Name: { person.name  }<br />
            Age: { person.age }
            <Button onClick={increaseAge}>+</Button>
        </div>
    )
}
As you can see, cusom hook can help create helper functions simplifying the overall complexity of your application code.
When using hooks you need to remember two important rules:
For example, the following would fail:
const [count, setCount] = useState(0)

function App() {
    return <div>{count}</div>
}
Rendering this component would lead to runtime error. To fix it, you must move hooks inside the component:
function App() {
    const [count, setCount] = useState(0)
    return <div>{count}</div>
}
But, you may argue that custom hooks are NOT functions, yet we use react hooks within! For example:
function useCounter() {
    const [count, setCount] = useState(0)
    return { count, setCount }
}

function App() {
    const { count } = useCounter();
    return <div>{count}</div>
}
Well, even though the custom hook is NOT a component, we are calling it from within the component. That is why we are not violating the number one rule of hooks. React knows, that the hook was called from within a component.
For example, this example would fail:
function App() {
  const [count, setCount] = useState(0)
  if (count > 0) {
      const [double, setDouble] = useState(count * 2)
      return <div onClick={() => setDouble(double * 2)}>{double}</div>
  }
  return <div onClick={() => setCount(count + 1)}>{count}</div>
}
In the above example we tracked state in the count variable, until it reached 1. Then we decided to start doubling the value. Unfortunately, this breaks the rule of hooks as we can not render different number of hooks and you would see a following error in your console:

To fix this you need to track both hooks on the component level:
function App() {
  const [count, setCount] = useState(0)
  const [double, setDouble] = useState(count * 2)

  return (
      count == 0
      ? <div onClick={() => setCount(count + 1)}>{count}</div>
      : <div onClick={() => setDouble(double * 2)}>{double}</div>
  )
}useStateIn React, state updates are batched to optimize performance and minimize unnecessary re-renders. Batching means that multiple state updates within the same event are combined into a single re-render.
setState multiple times in a single event handler, React groups these updates and performs only one render.onClick).setTimeout or API calls are also batched.Here’s an example to demonstrate how React batches state updates:
import React, { useState } from "react";

const BatchingDemo = () => {
  const [count1, setCount1] = useState(0);
  const [count2, setCount2] = useState(0);

  const handleClick = () => {
    console.log("Before Updates:", count1, count2);

    // Multiple state updates in one event
    setCount1((prev) => prev + 1);
    setCount2((prev) => prev + 1);

    console.log("After Updates (Still stale):", count1, count2);
  };

  return (
    <div>
      <h1>React State Batching Example</h1>
      <p>Count 1: {count1}</p>
      <p>Count 2: {count2}</p>
      <button onClick={handleClick}>Increment Both</button>
    </div>
  );
};

export default BatchingDemo;
console.log prints the stale state (values before the update).setCount1 and setCount2 are called sequentially.When you click the button:
Before Updates log will show the old values.After Updates log will still show stale values because state updates are asynchronous.count1 and count2 are updated.

