
One of the first things you'll encounter when learning React is JSX. Don't let the name intimidate you – it's actually a pretty cool and intuitive way of writing your user interfaces. In this section we will explore JSX and will explore the way of using JSX to create reusable, interactive components.
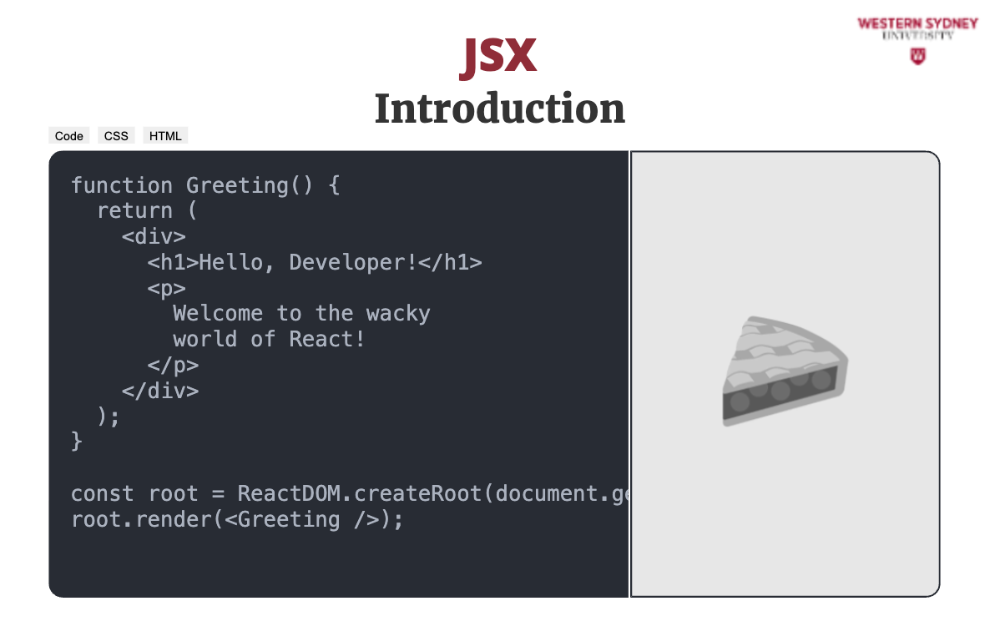
Think of JSX as a special kind of code that resembles a mix of HTML and JavaScript.
JSX allows you to write your components in a way that's easy to read and understand, even for someone who's new to web development. Here's an example of what JSX looks like. We're creating a React component called Greeting. The function's name defines the component's name.
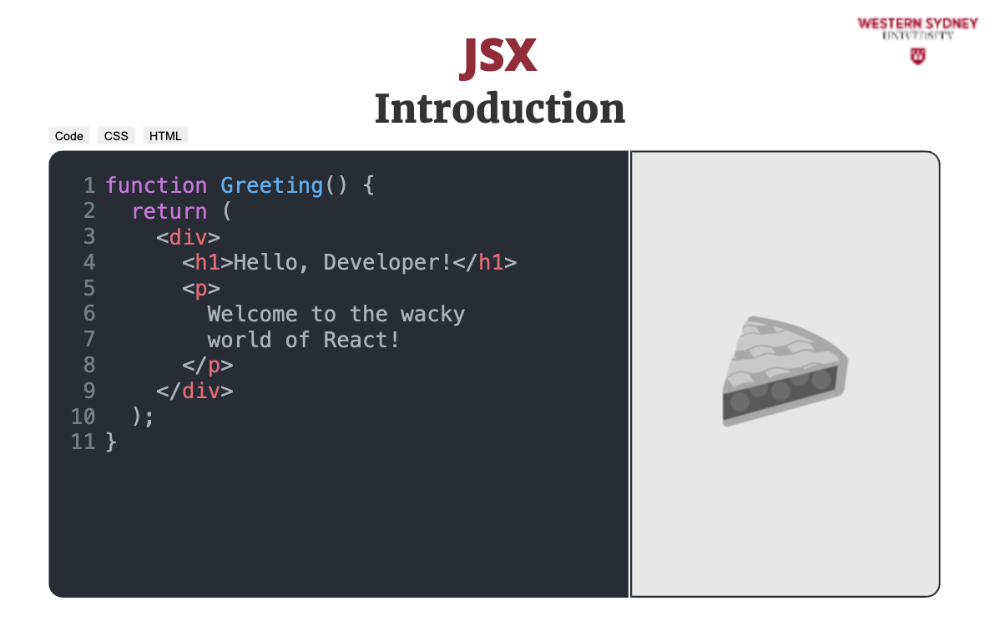
We're using JSX to describe what the component should render inside the component function. This function returns HTML code with a h1 header and a paragraph of text. It looks a lot like HTML, right? But looks can be deceiving!
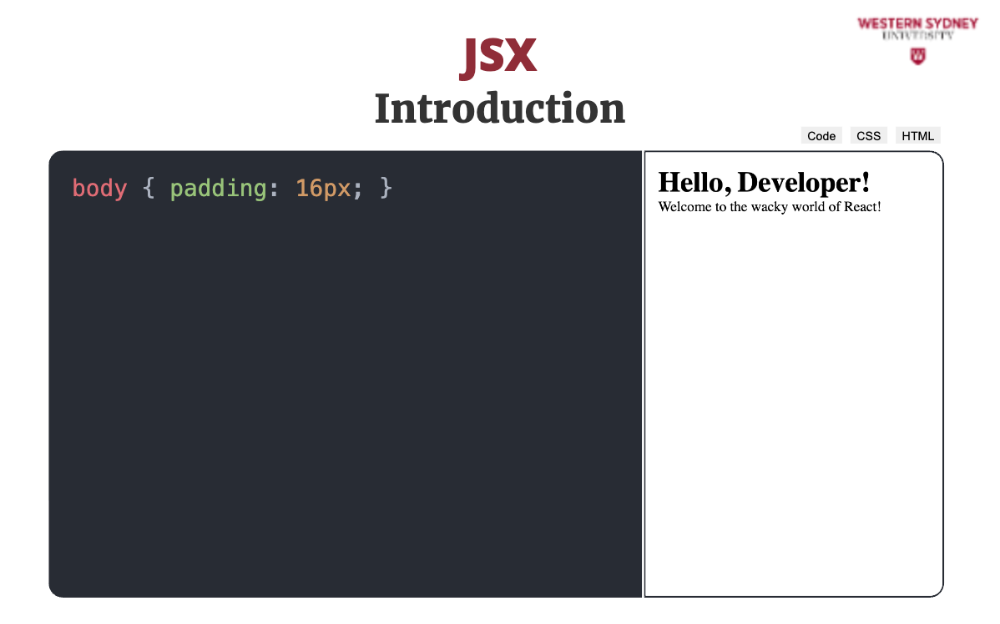
When you render this component in your browser, it will show the header and the paragraph of text, but some magic is taking place behind the scenes. Let's explore!
Let's explore the mental model behind JSX. The most important thing to realise is that JSX is not HTML. It is Javascript.
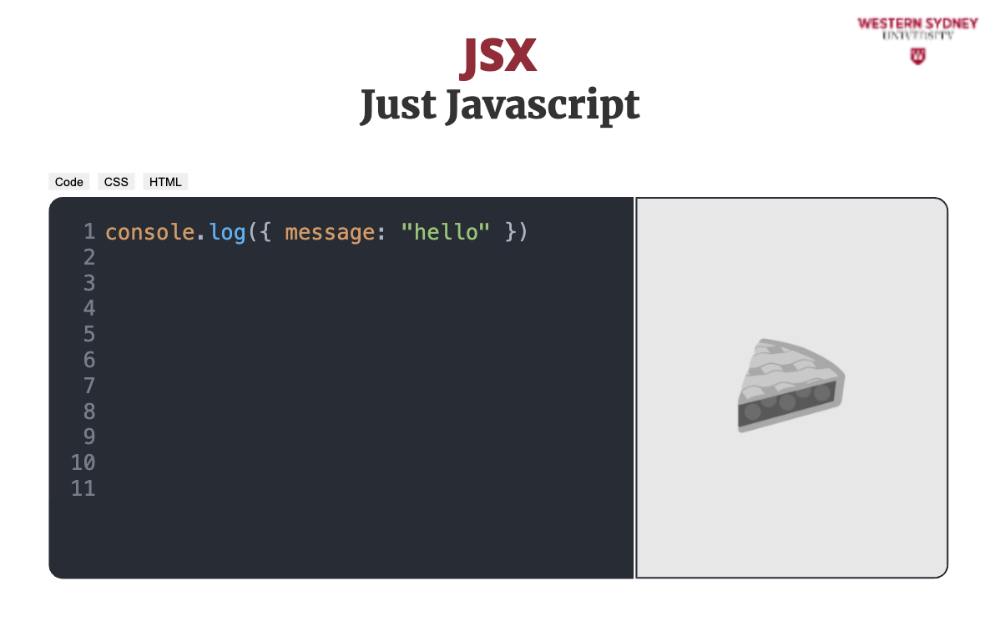
Consider this javascript statement: logging an object to the javascript console.
When you execute this code, you will see the object structure in the console with field message and its value "hello".
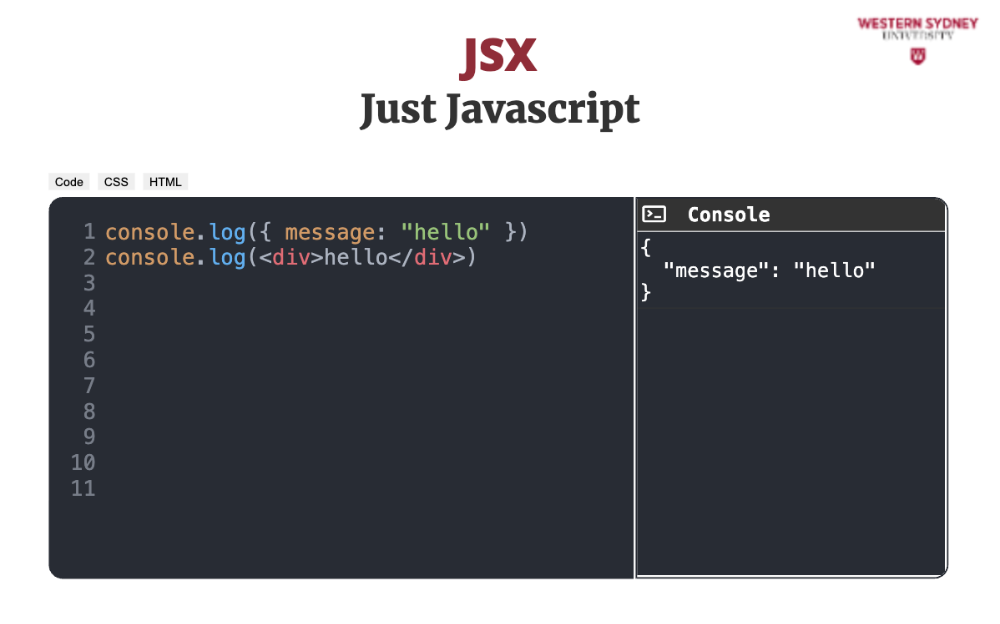
Now, guess what will happen if we log the JSX code into the console? Will it be rendered HTML with the text hello?
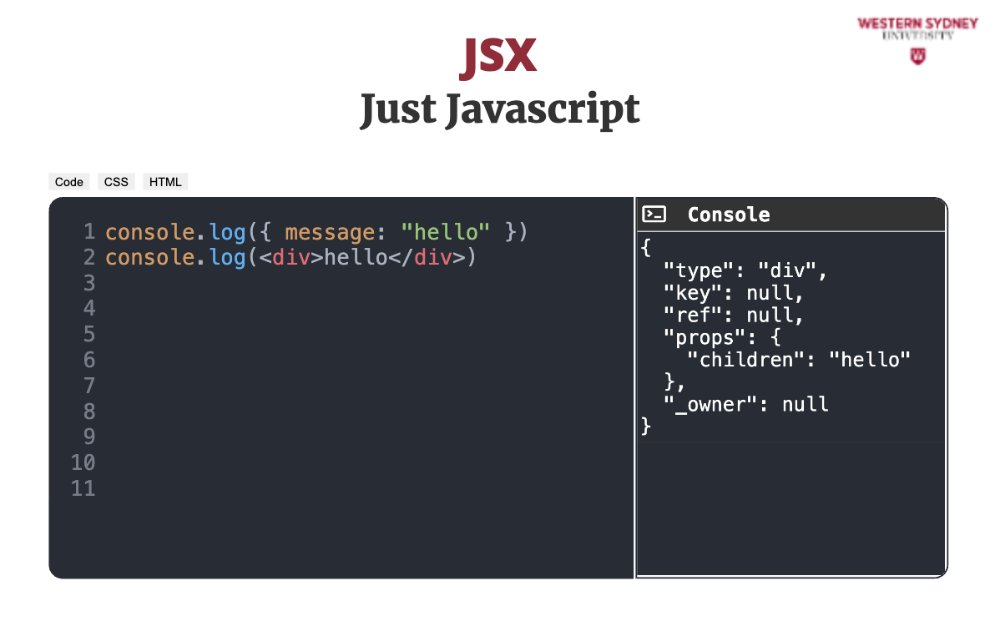
No! The result is, again, just an object.
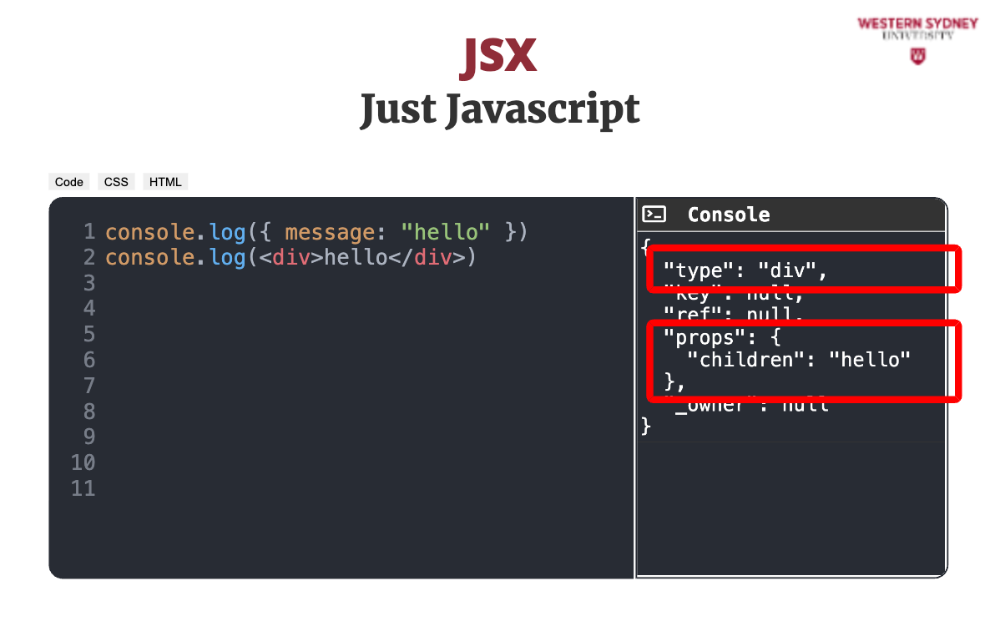
This object defines the HTML element we are creating, specifying the tag name in the "type" field and the rendered text in the children field.
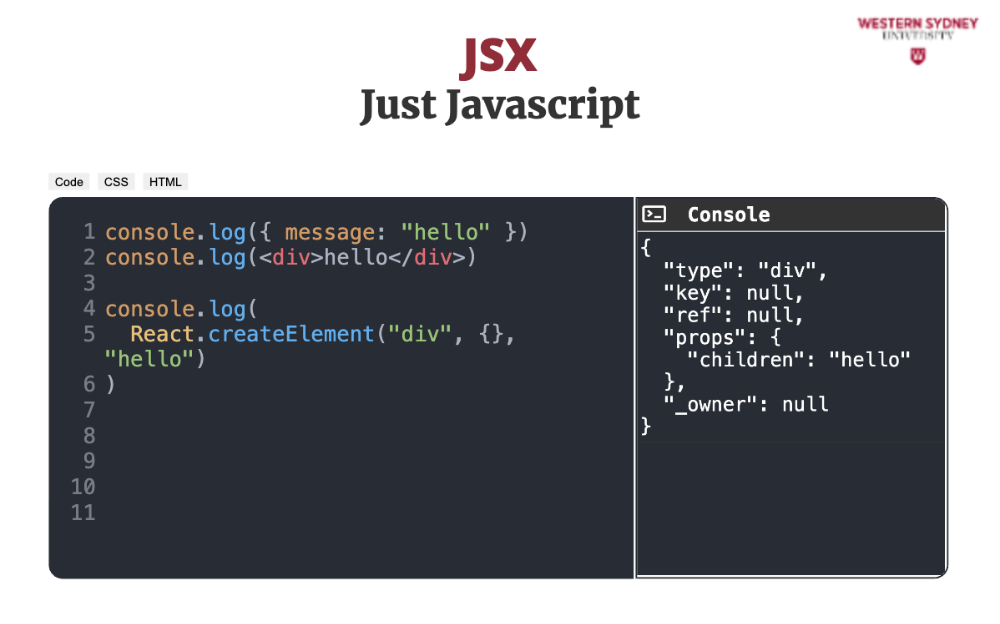
Under the hood, your transpiler converted the JSX statement to a React function call, creating a div element with a child of the div element specified as string value "hello" of property children. Both statements on line 2 and lines 4 to 6 do the same thing.
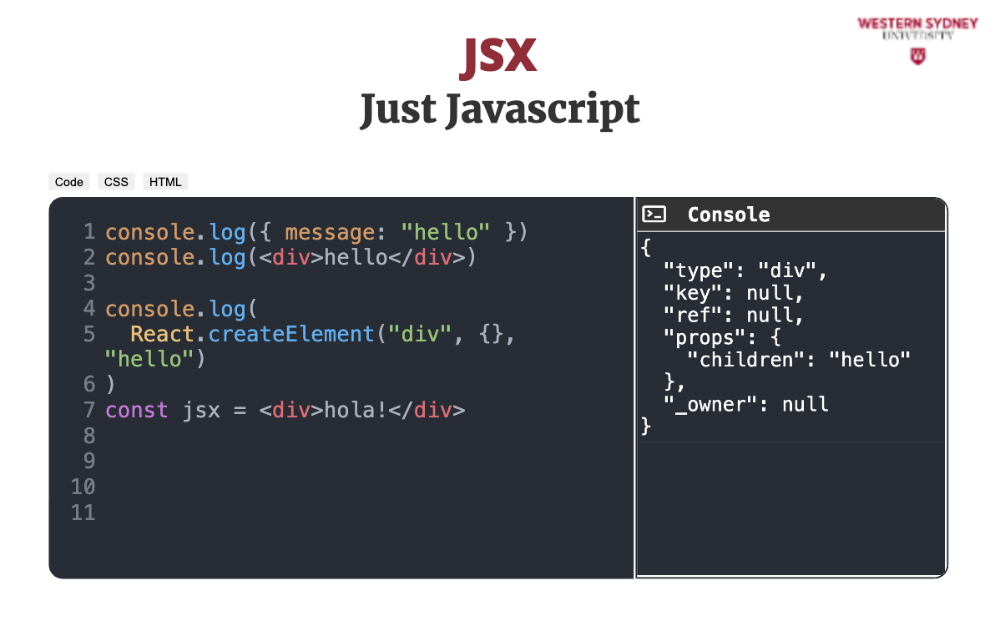
Now consider that JSX is just a javascript object. This means that you can store it in a variable and pass as an argument to functions or reuse its value.
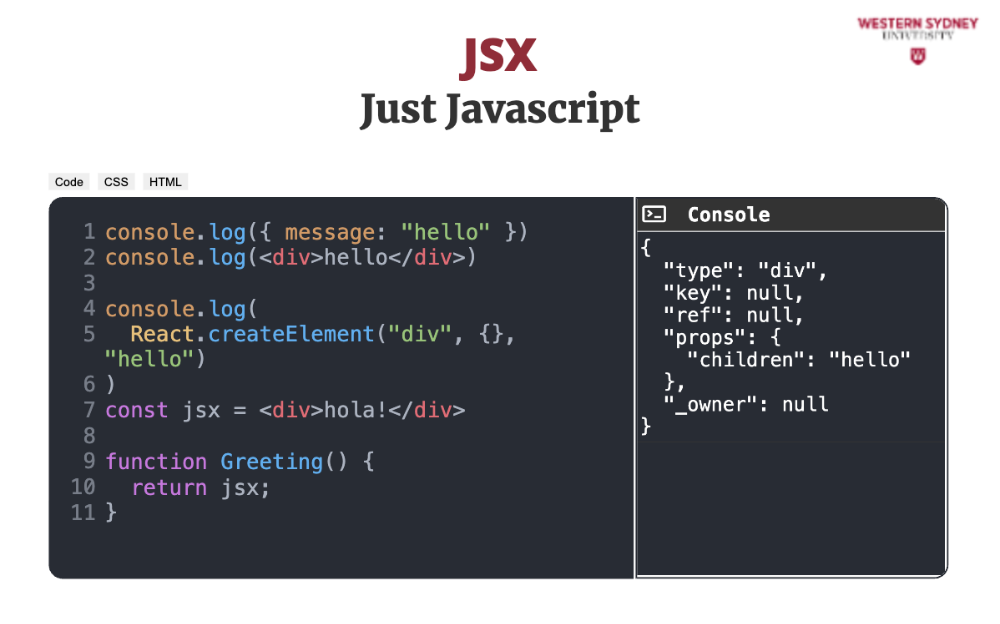
For example, this Greeting component renders the value stored in the jsx variable. Pretty cool huh?
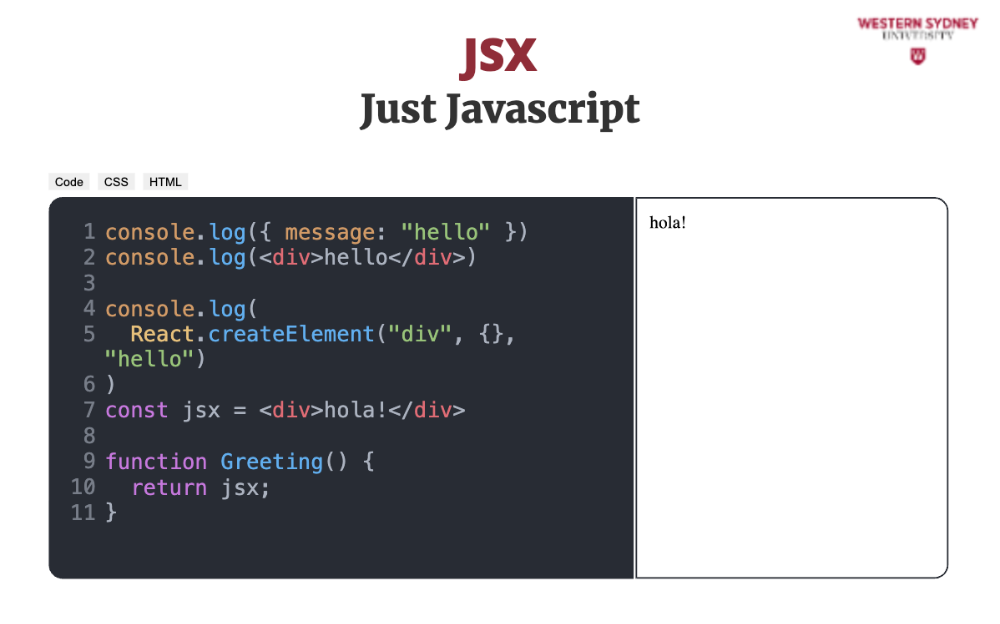
When we render this component, it should not be surprising that it renders the text "hola!".
Let's take a look at different JSX elements.
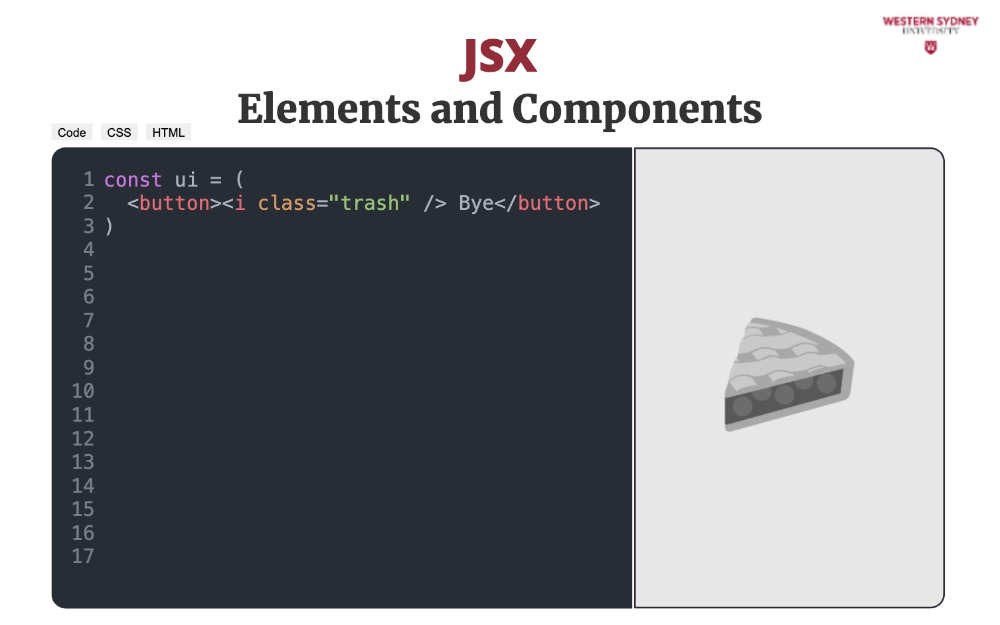
First, we have the standard HTML elements, such as buttons, divs, and spans. We always write these elements in lowercase.
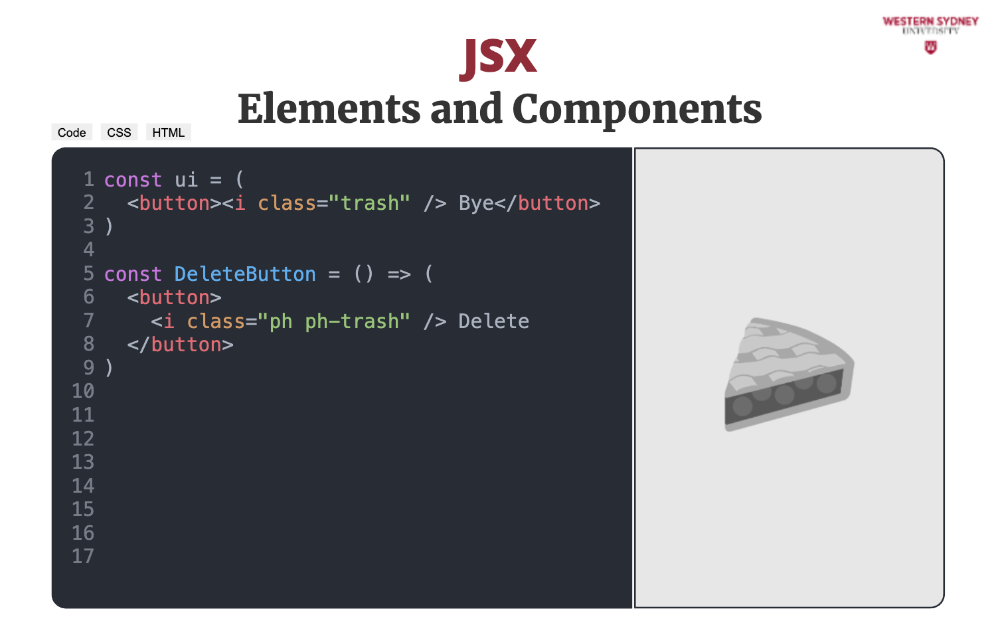
But, the true power of React lies in the capability to define custom elements, which we call components. React components are functions whose names start with capital letters. In this case, we used an arrow function notation instead of standard function notation. You can choose your preference.
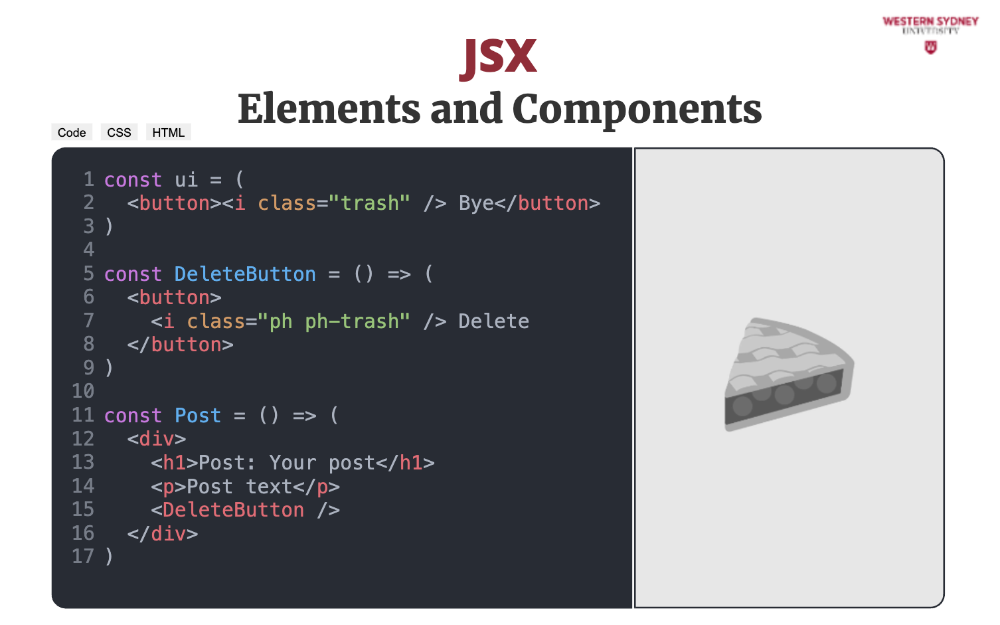
When using the custom DeleteButton react component, we use standard html notation. Since we use capital letters, react components stand out from the standard html element.
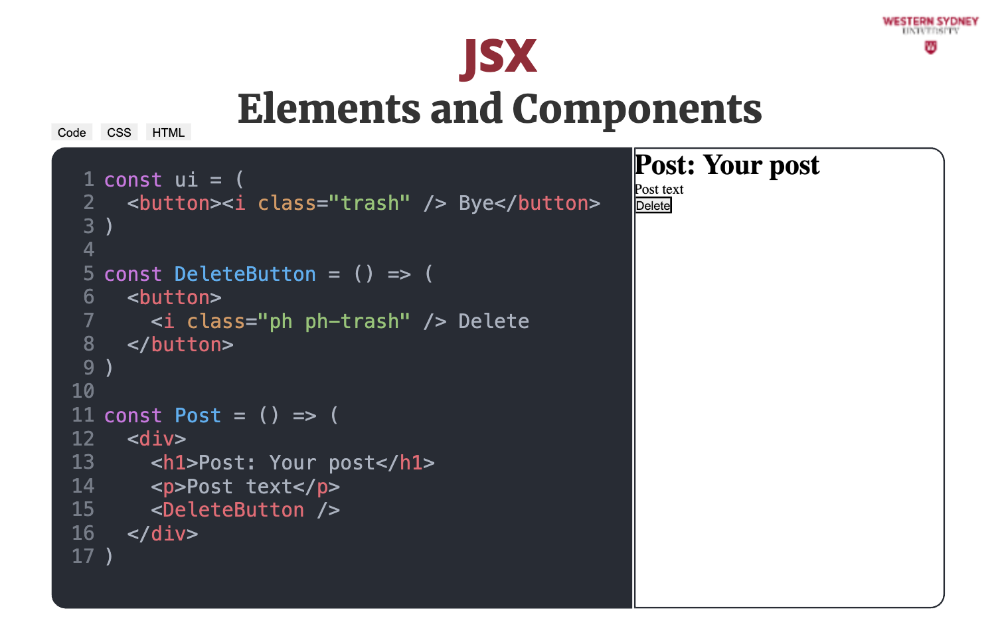
When we run this example, we see the custom button at the bottom of the post. Pretty cool, huh? But let's take a look at the implications of React being just javascript and how we can use it to our benefit.
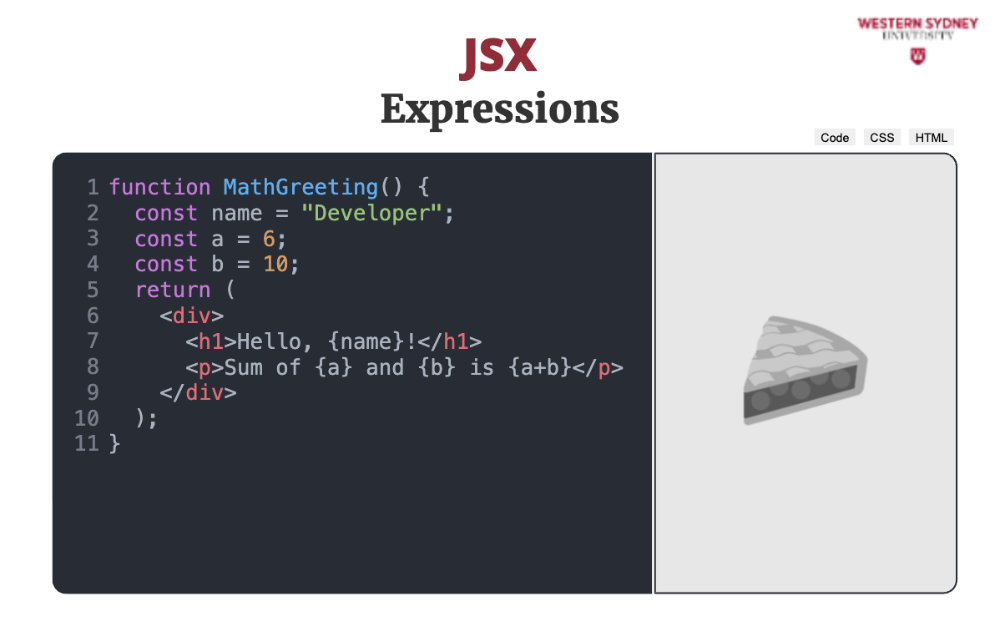
JSX allows you to use JavaScript expressions inside your HTML by wrapping them in curly braces, called string interpolations. Check out the following example.
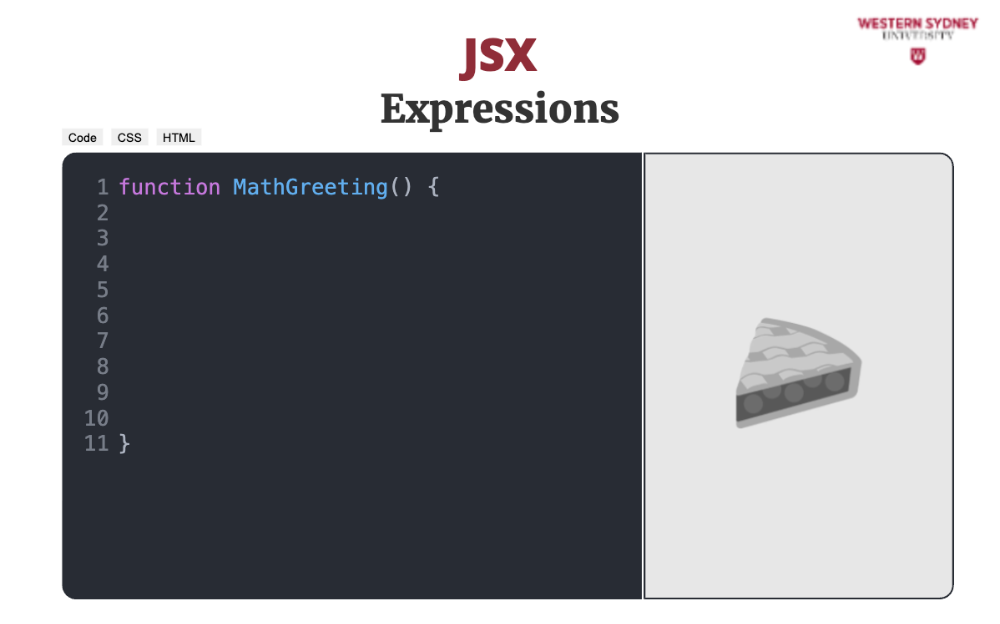
We define a new React component called MathGreeting.
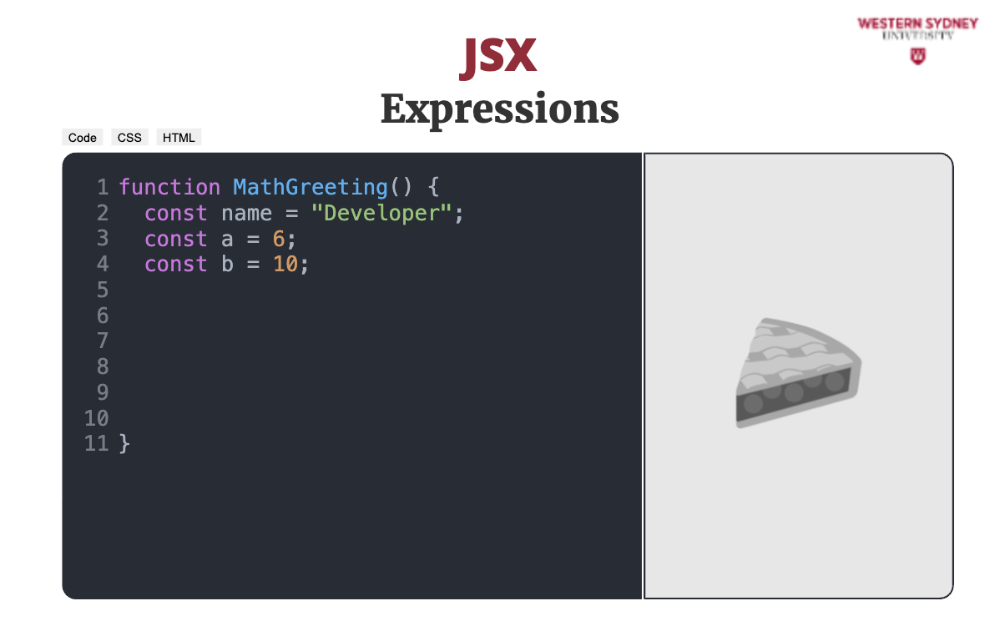
Then, we define the variable "name" of the type string and two number variables, a and b.
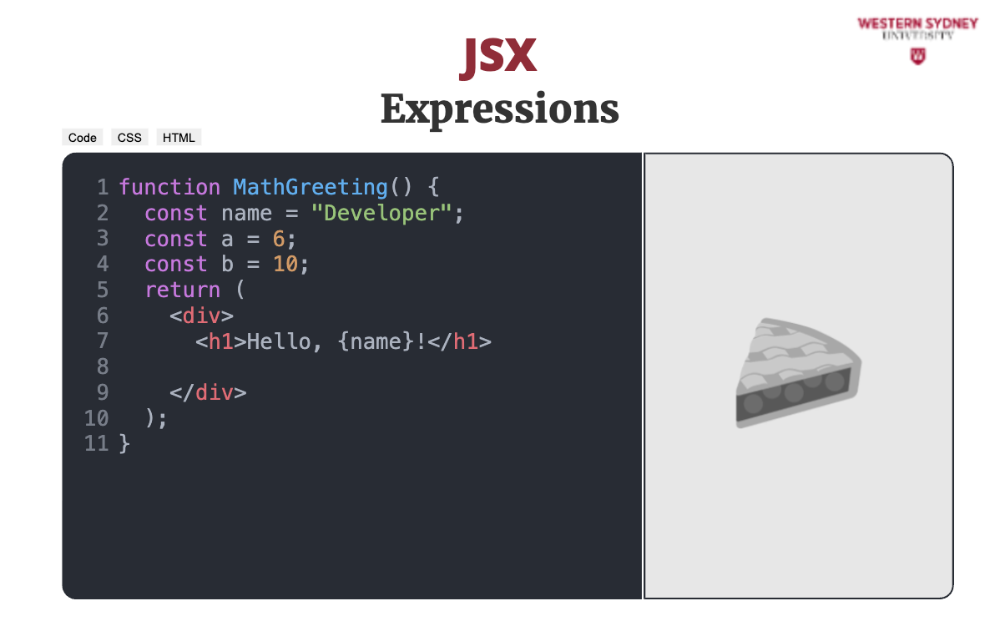
We use interpolation to show the value of the name variable in the h1 tag
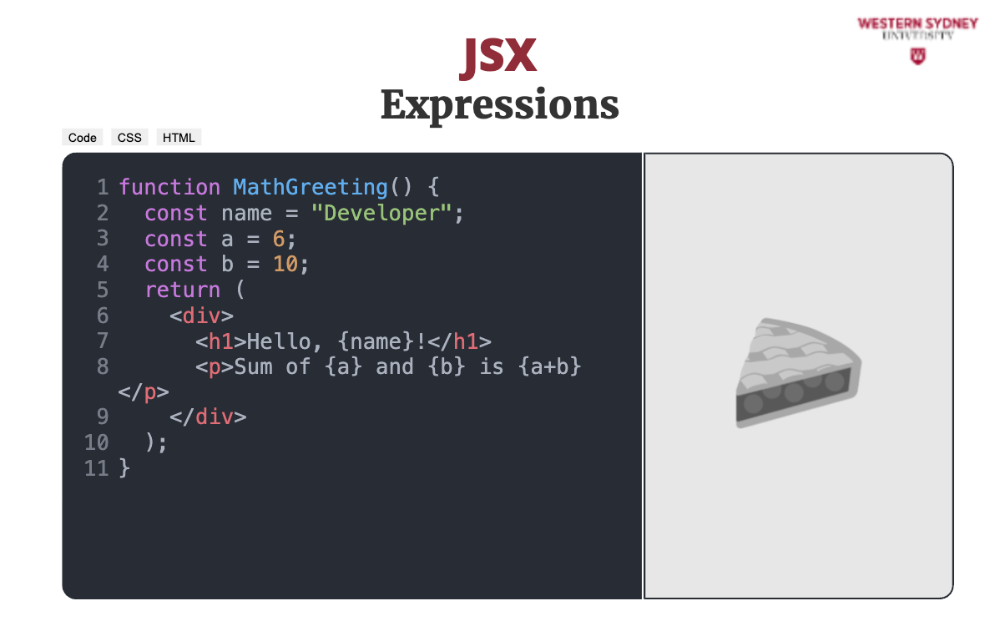
Also, with interpolation we show the value of a and b and their sum. In reality, you can execute any Javascript expression inside curly braces.
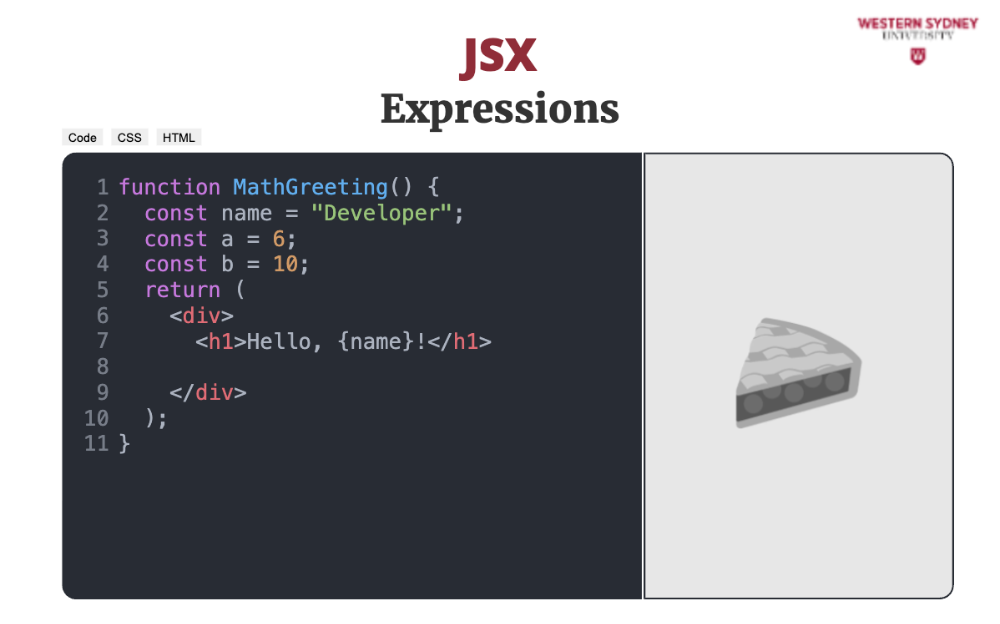
When we render this component, we see that the variable values are correctly displayed.
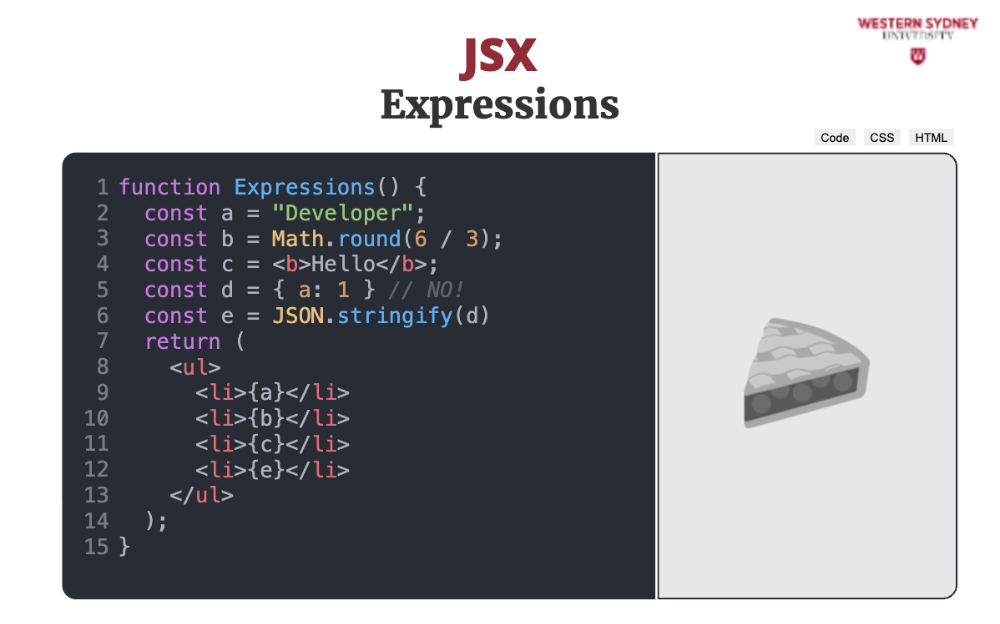
Let's take a look at some examples of expressions we can interpolate in React components
First, we define a new component called Expressions
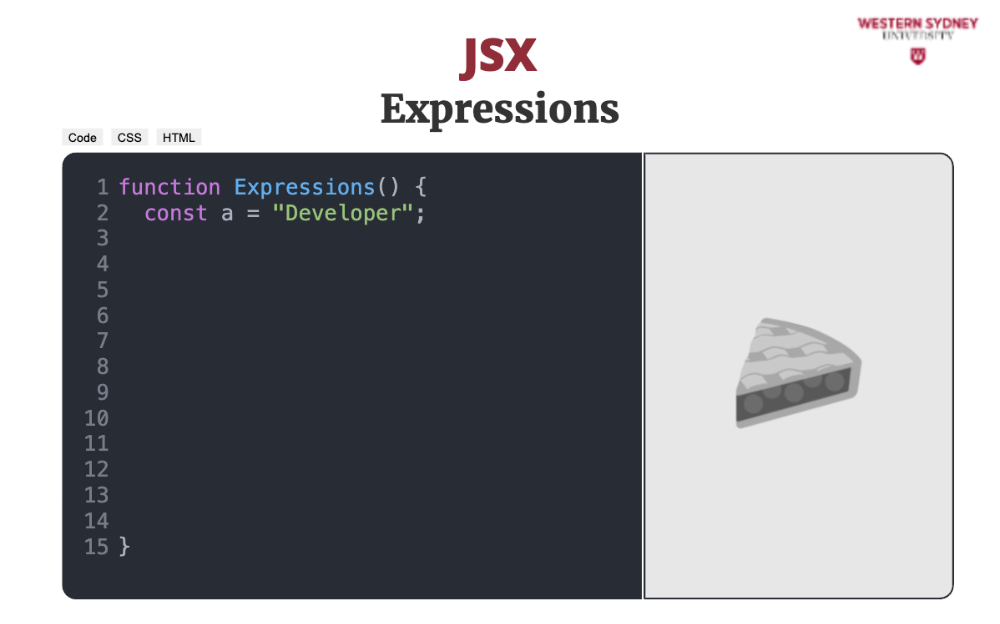
The simplest one is a string value.
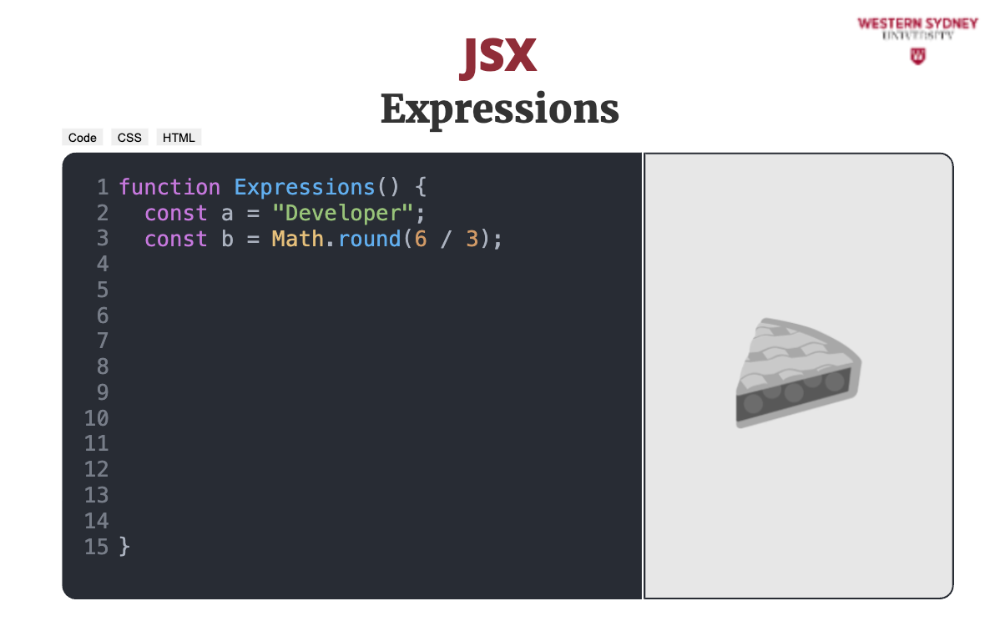
You can of course store any kind of value into your variable you want to interpolate. In this case it is a number value.
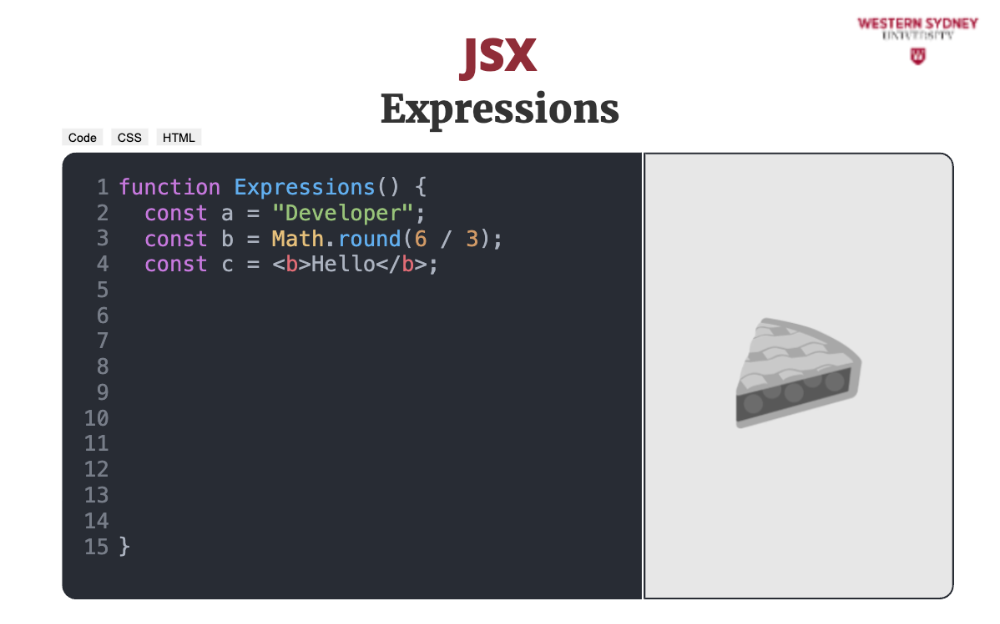
Of course, you can interpolate other JSX expressions, which are special Javascript objects.
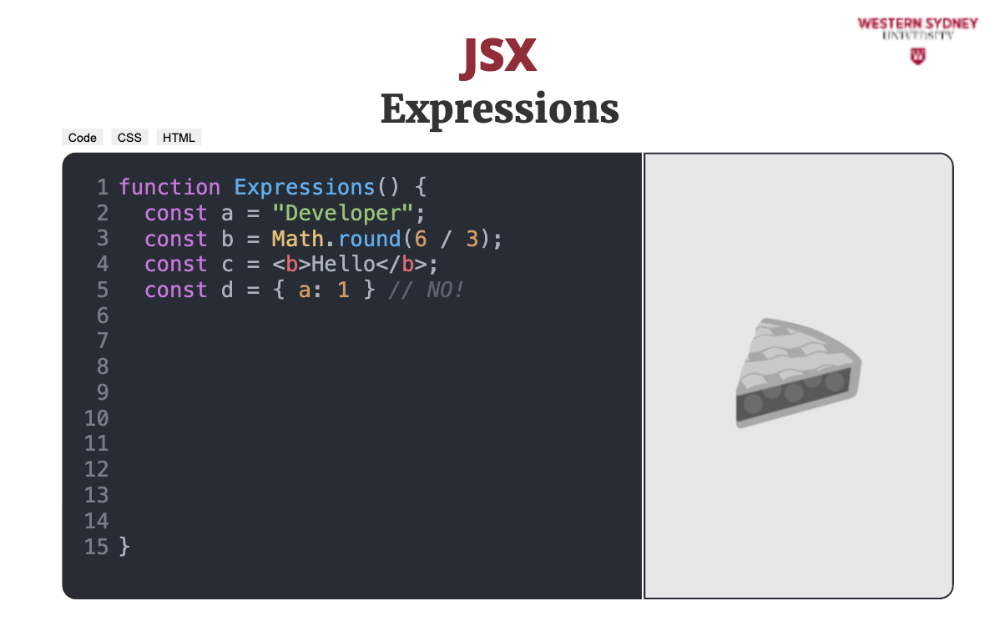
But, you cannot interpolate regular javascript objects, and your application will throw an error when you attempt this.
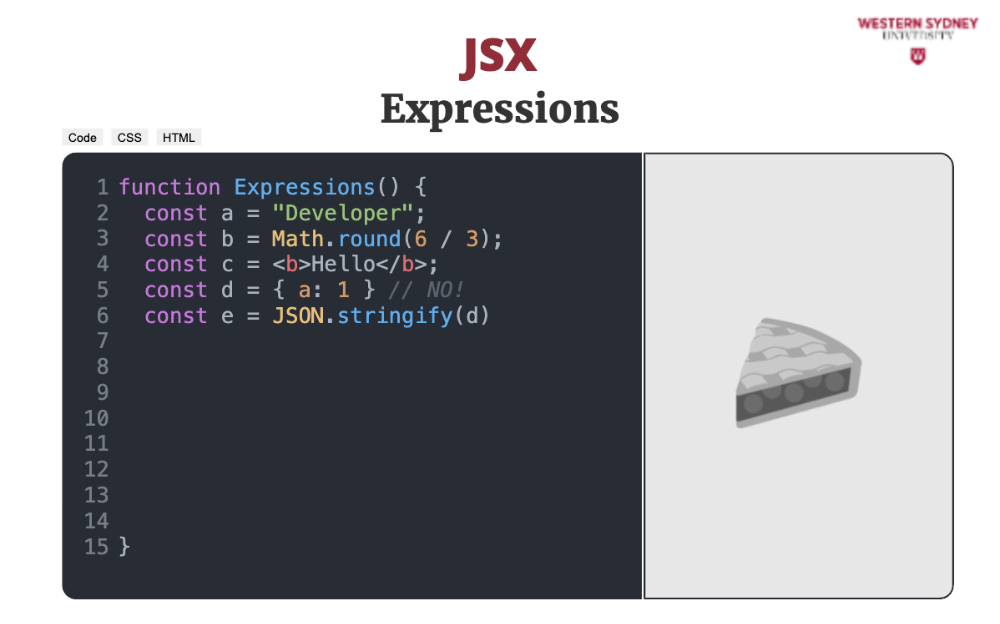
But, you can easily convert any object to string and interpolate it this way!
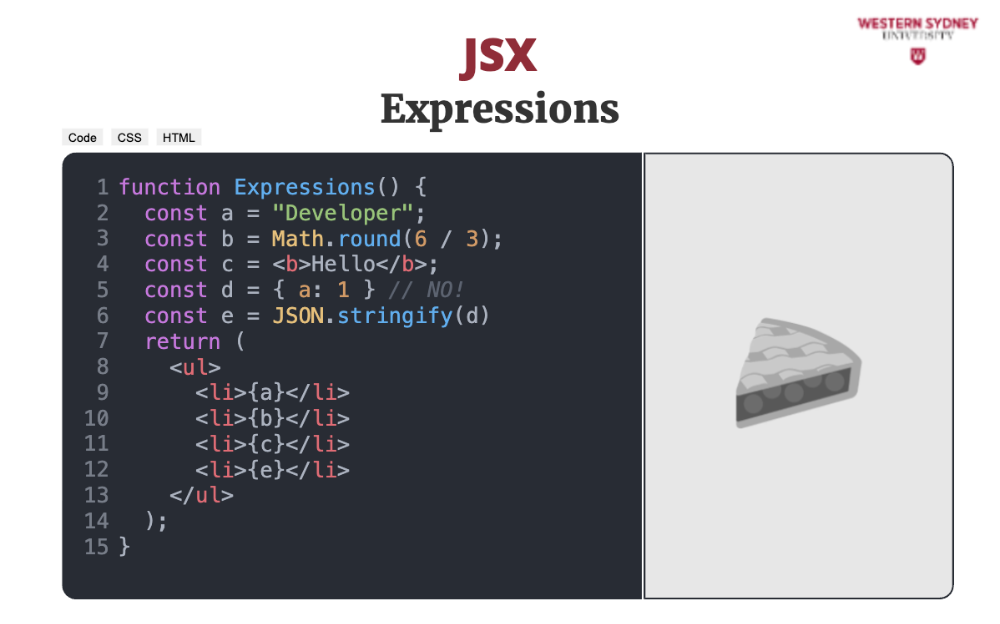
Here, we show all the values in a list
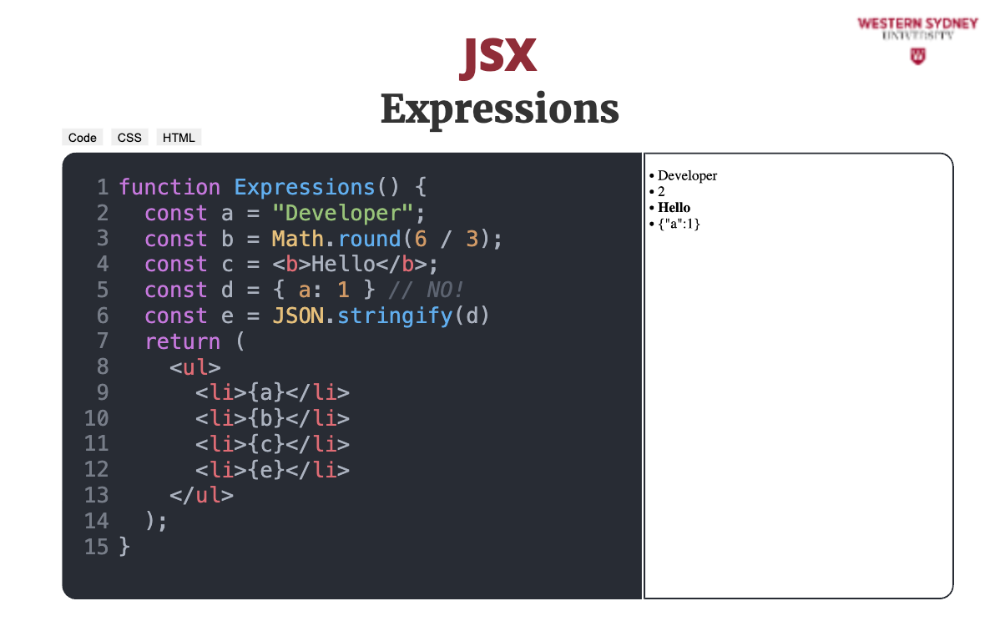
When we run this example, it shows all the interpolated values including the JSX expression and stringified javascript object.
If you want to play with the example from the previous page, pause the presentation and hit the Edit button. As an exercise try to show the summary of three different numbers. Please continue, once you are done.
With JSX you can also seamlessly create and manipulate complex, reusable React components.
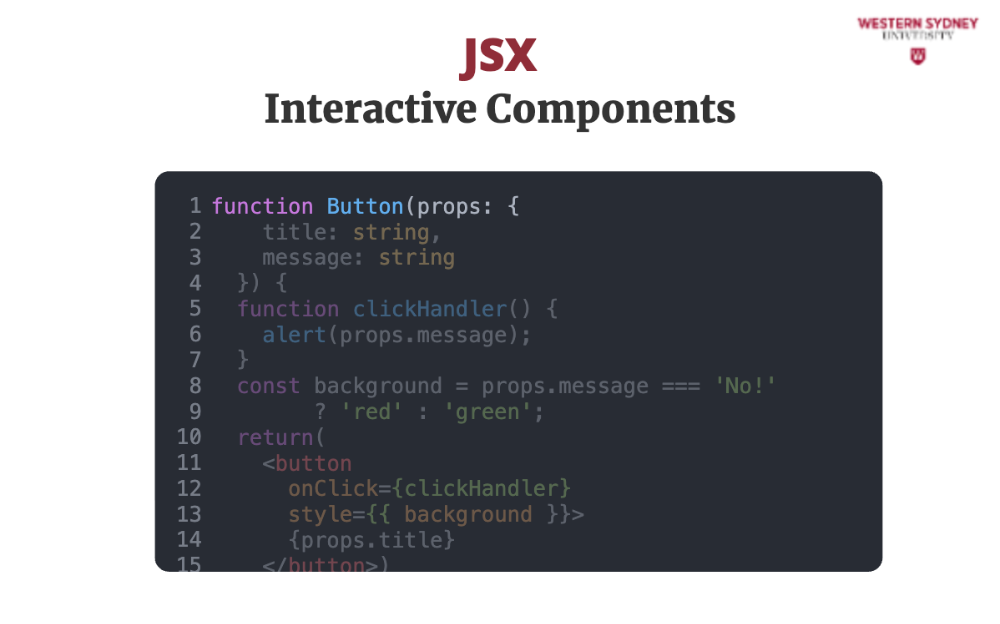
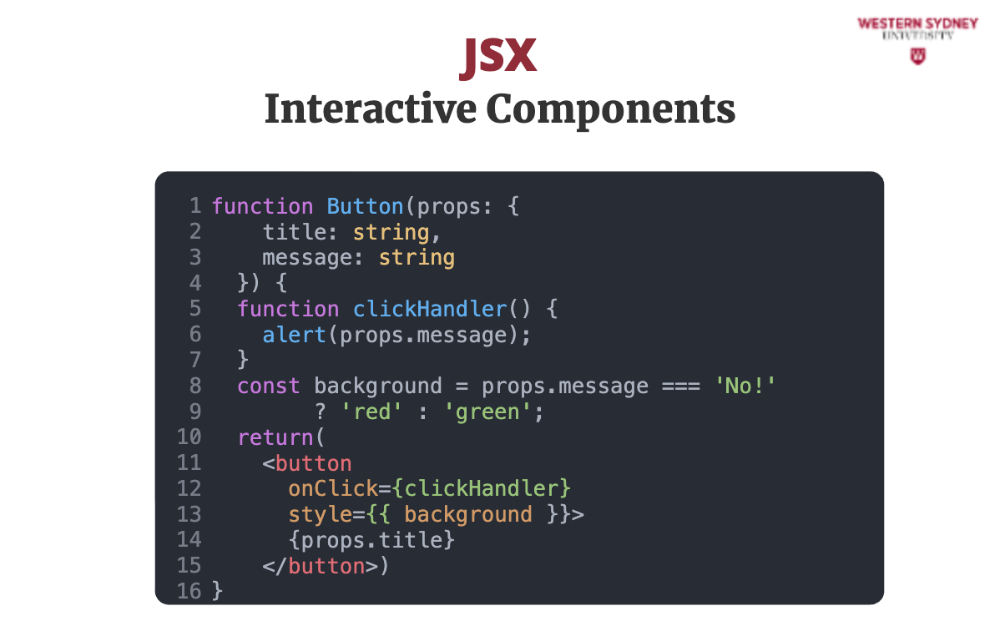
For example, let's create a Button component. On the next page, you will be able to play with this component.
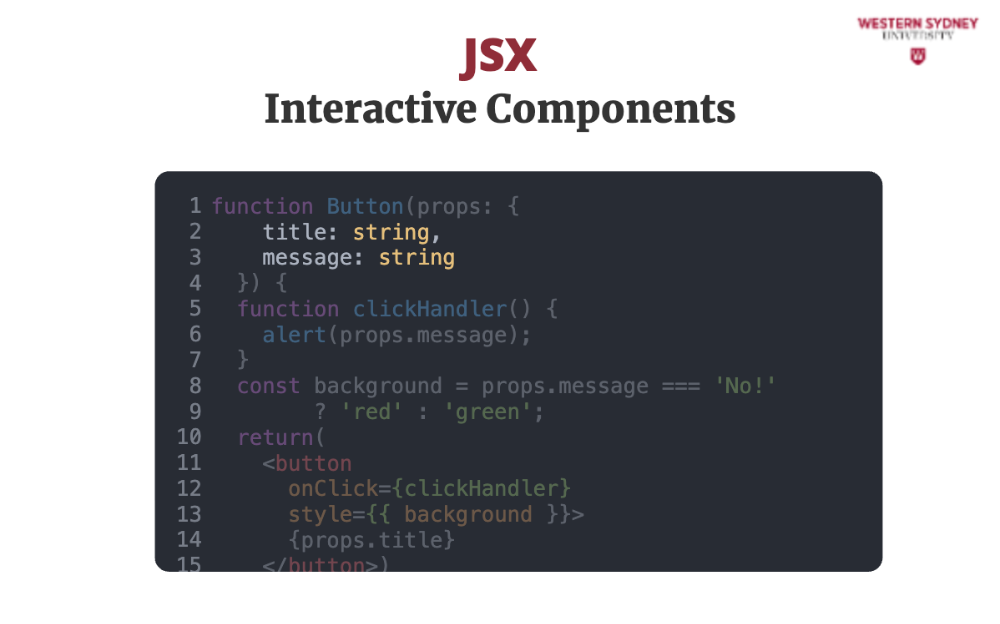
This component accept two props, title and message. We will talk about props later in this course, for now, please note that the Button component must specify title and message.
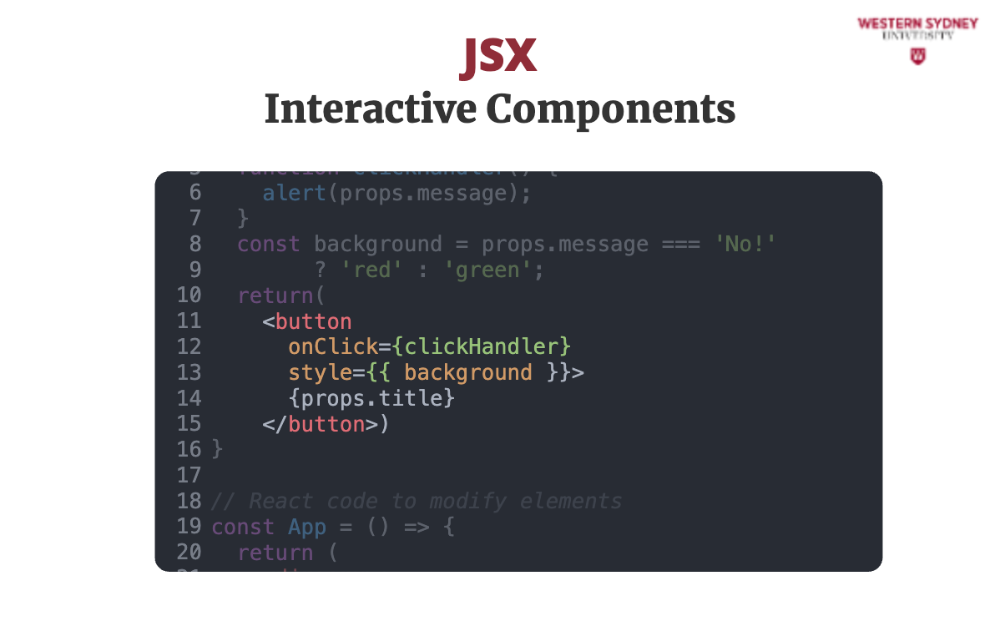
The component renders a styled button with action handled on button click. Let's take a closer look.
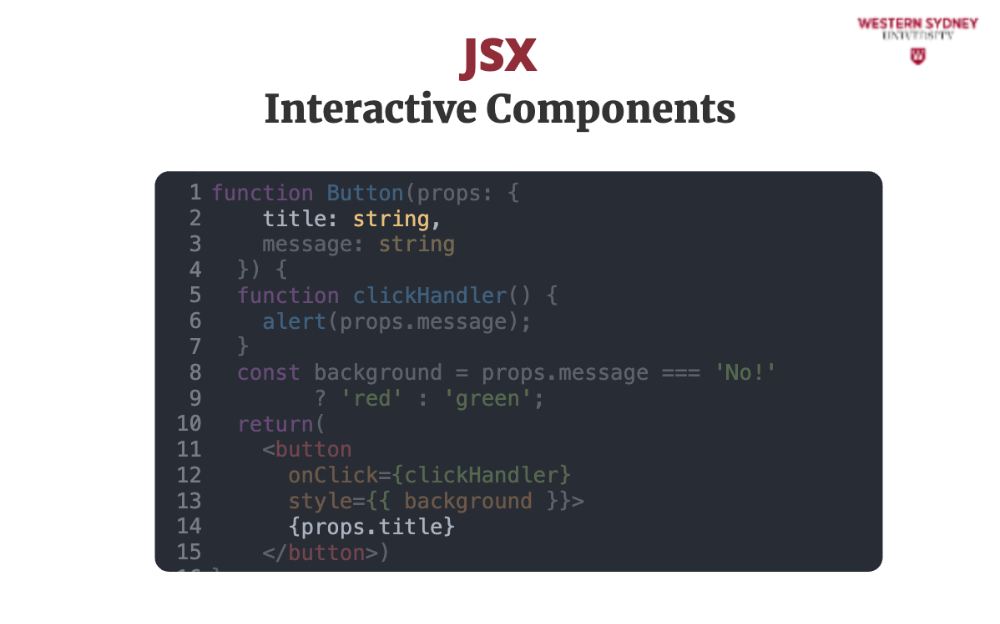
The title prop is rendered in the content of the button.
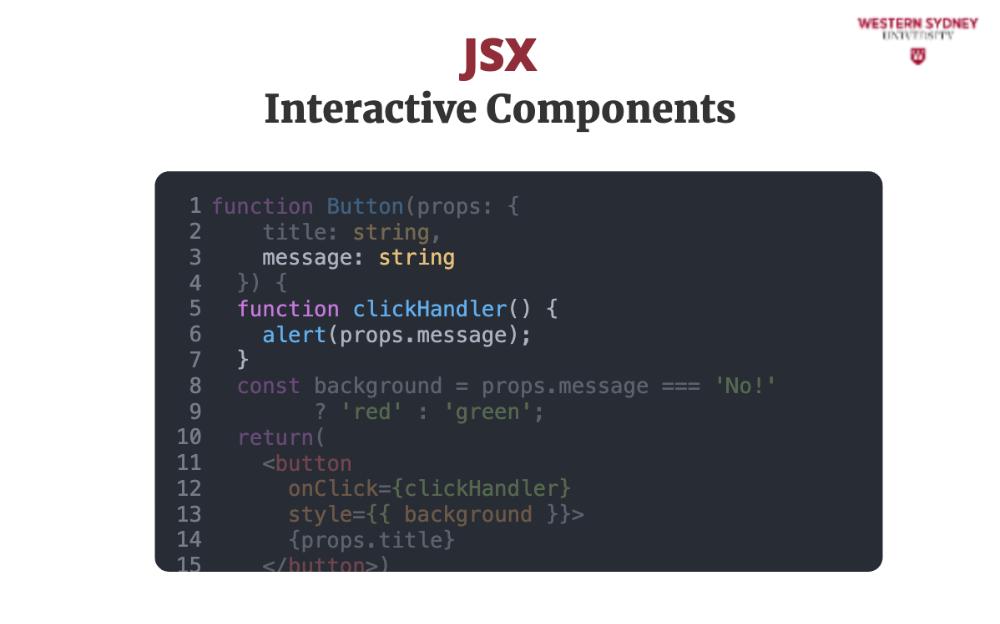
The message prop is used in the clickHandler function to alert the message when user clicks on the button.
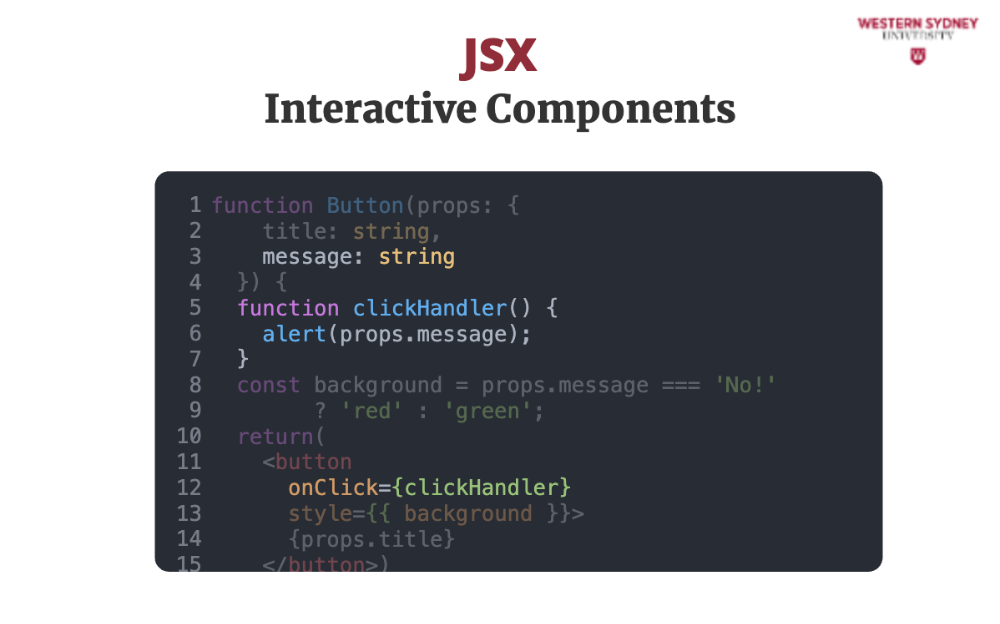
We pass the clickHandler to the onClick prop of the button. The onClick handles the click activity, similarly we have other button handlers such as mouseDown, mouseUp, blur or others.
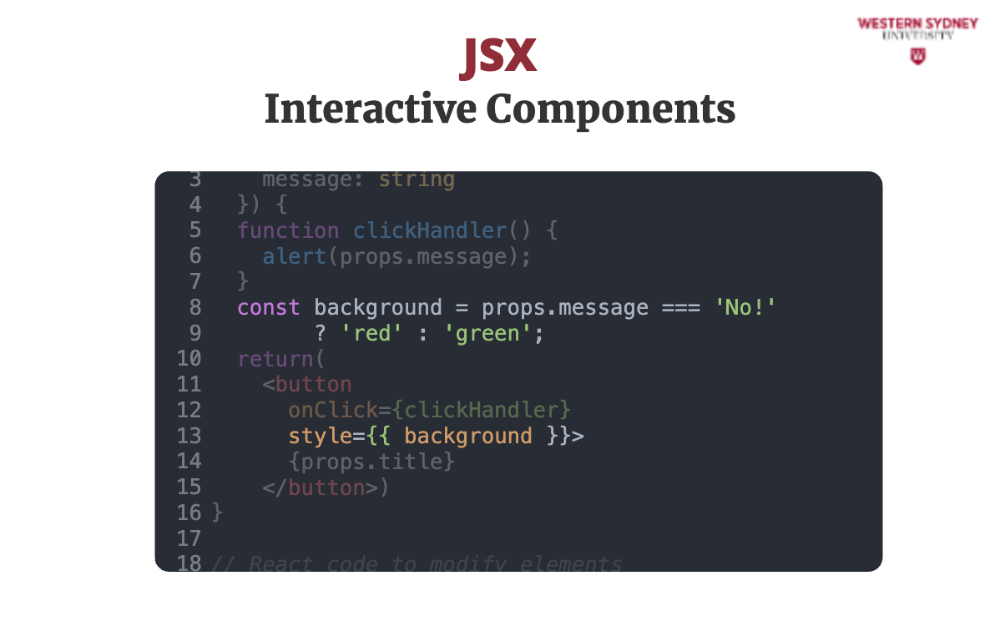
We will also conditionally style the button. If the value of the message is "No!" we will render a button with red background, otherwise with green background.
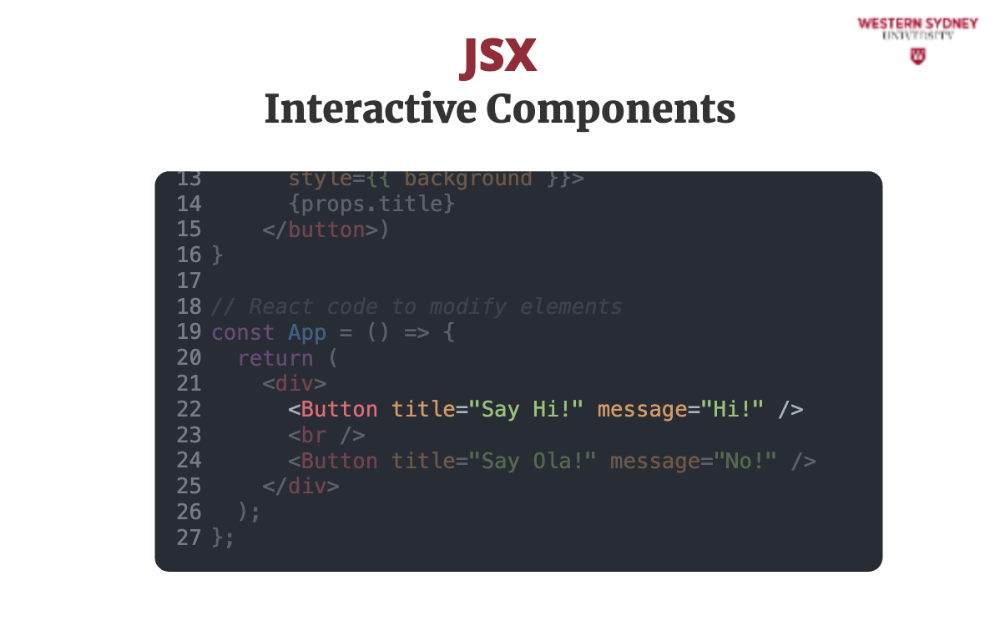
Last, let's check out how to use this Button component. Remember that we defined the component with the title and message prop, naming it Button with capital B. Thus we we have create a custom JSX element Button and use it same as any other HTML element.
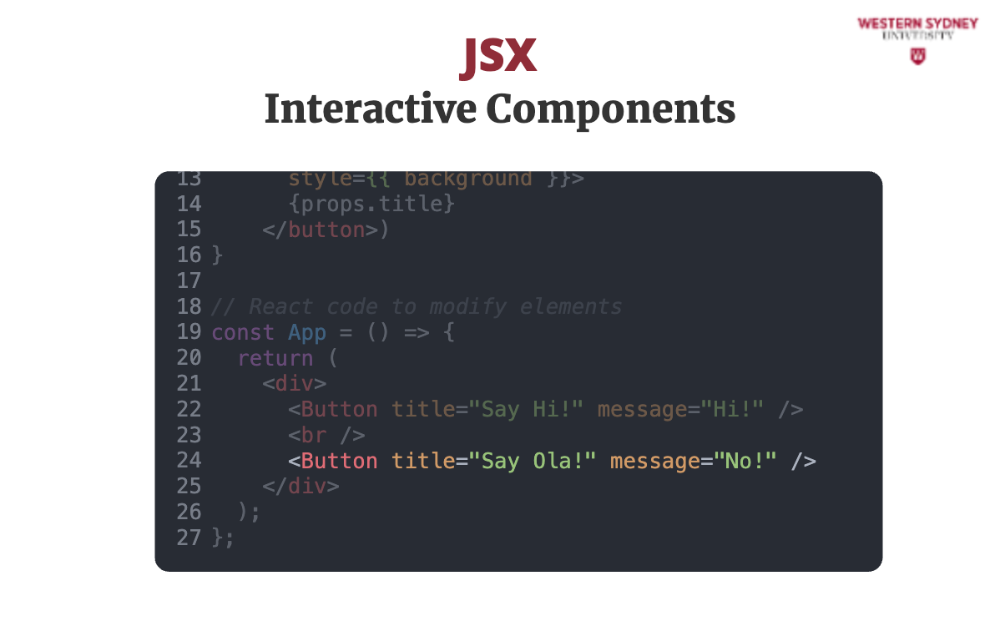
If we want to render a different button, we simply change the input props. It is React standard to name components in Pascal case and keep html components in lower case. Let's play!

If you want to play with the example from the previous page, pause the presentation and hit the Edit button. As an exercise try to add a third button with italian flavour showing "Say Ciao!". Please continue, once you are done.
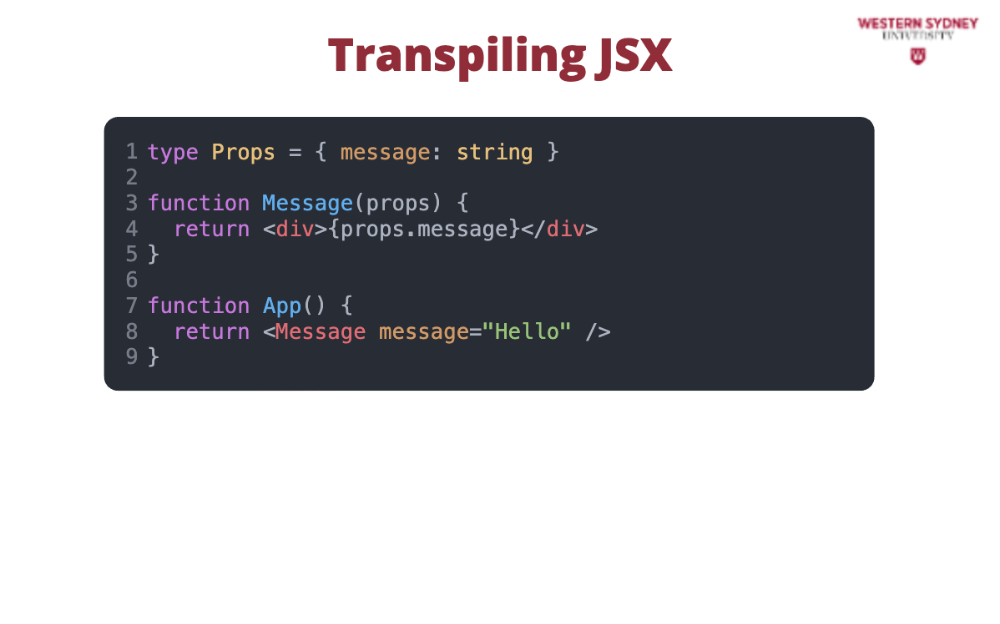
You might be wondering, "But wait, isn't JSX just like HTML?" Well, not quite. JSX is a syntax extension for JavaScript, which means it gets transpiled (or converted) into regular JavaScript code that browsers can understand using transpilers such as Babel or Typescript.
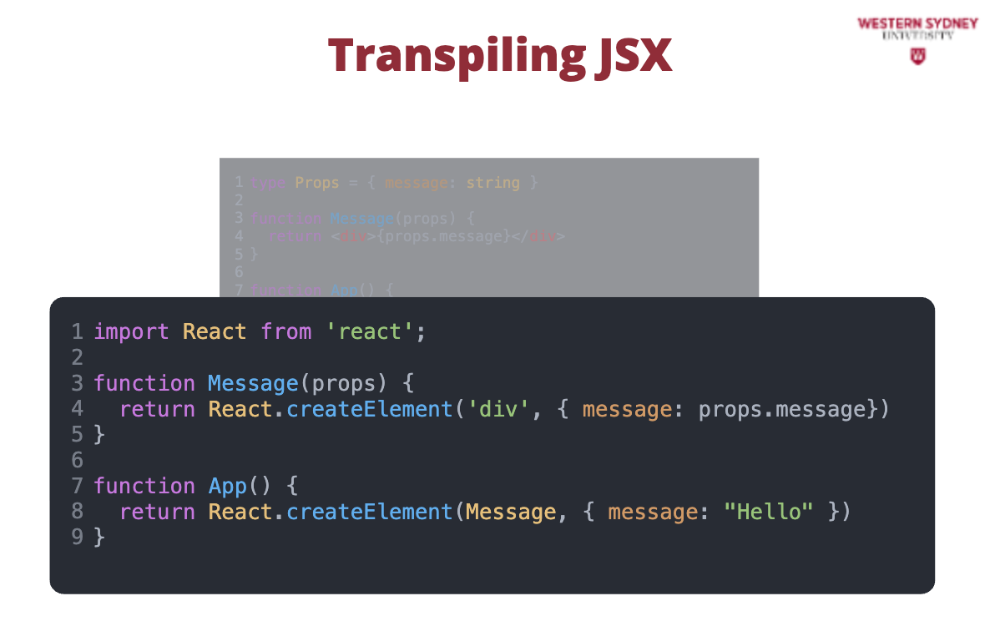
Check out the transpiled version of the code above. Observe, that it is just a regular javascript with very simple function calls!. In reality, you do not need to write React apps using JSX, but it is much more comfortable.
Don't worry if JSX seems a bit strange at first – it's a powerful tool that makes writing React components much more intuitive and readable. With practice, you'll get the hang of it and start appreciating its quirky charm!
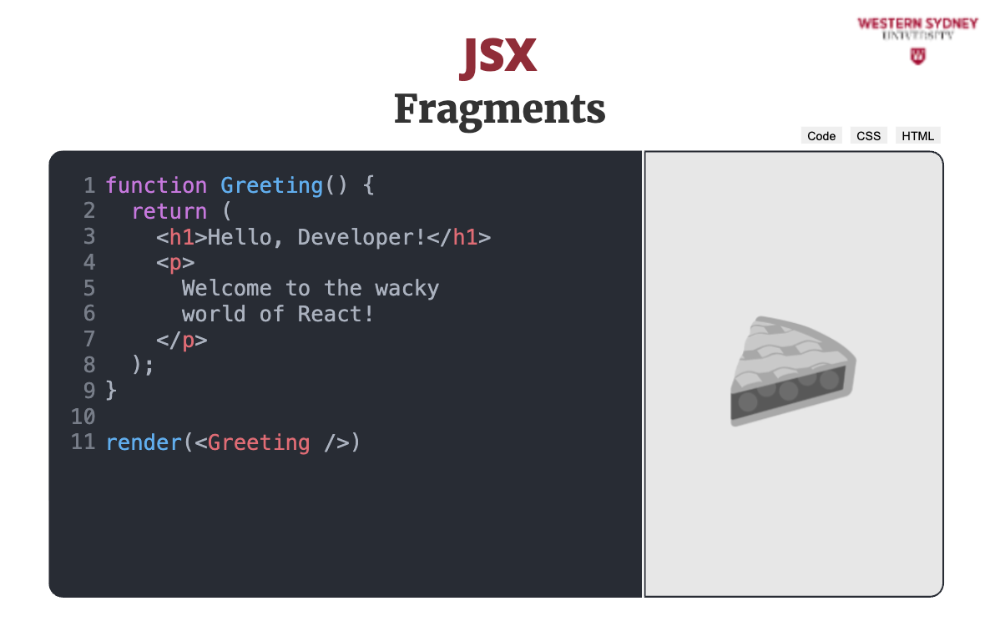
One of the limitations of React is that the component has to have a root-level component or return an array of elements.
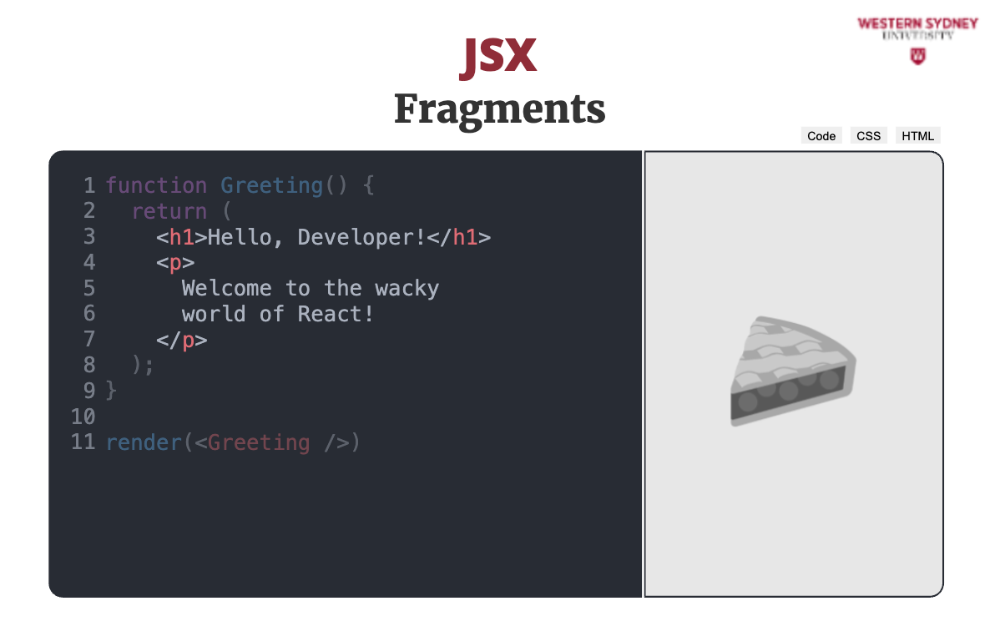
The Greeting component returns two components, h1 and p.
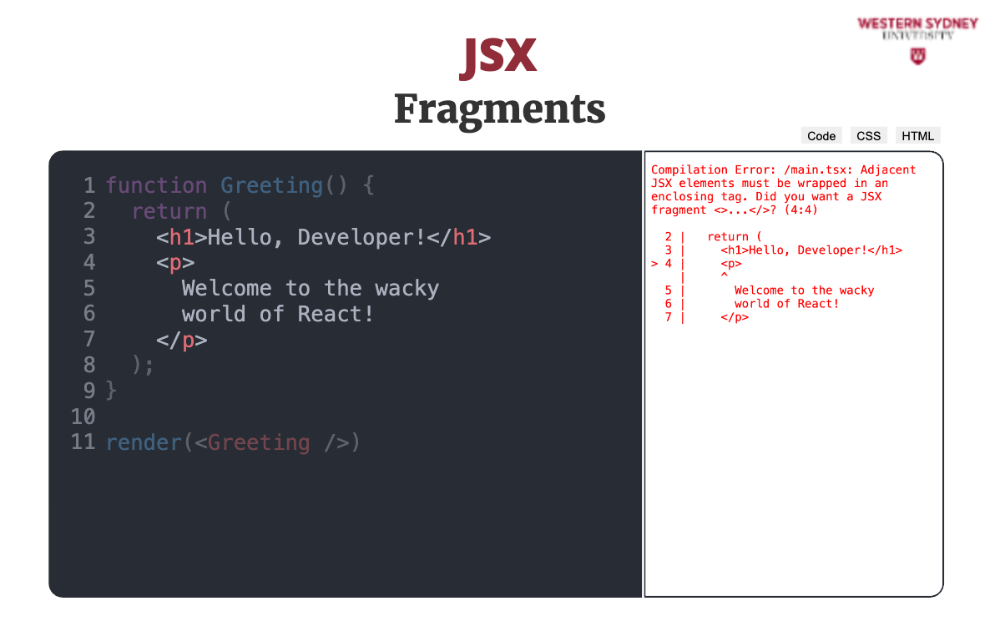
When you run this example, you will receive an error telling you that the adjacent JSX element must be wrapped in an enclosing tag.
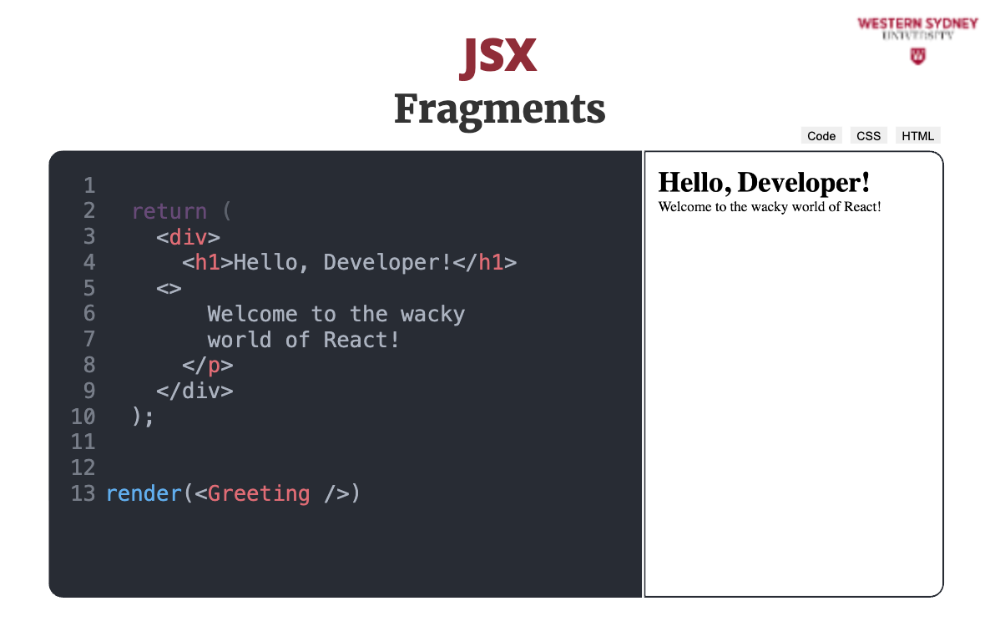
A potential solution is to wrap your element with a parent div. But this introduces unnecessary elements in dom that can wreak havoc when styling your application or optimising it for responsive use.
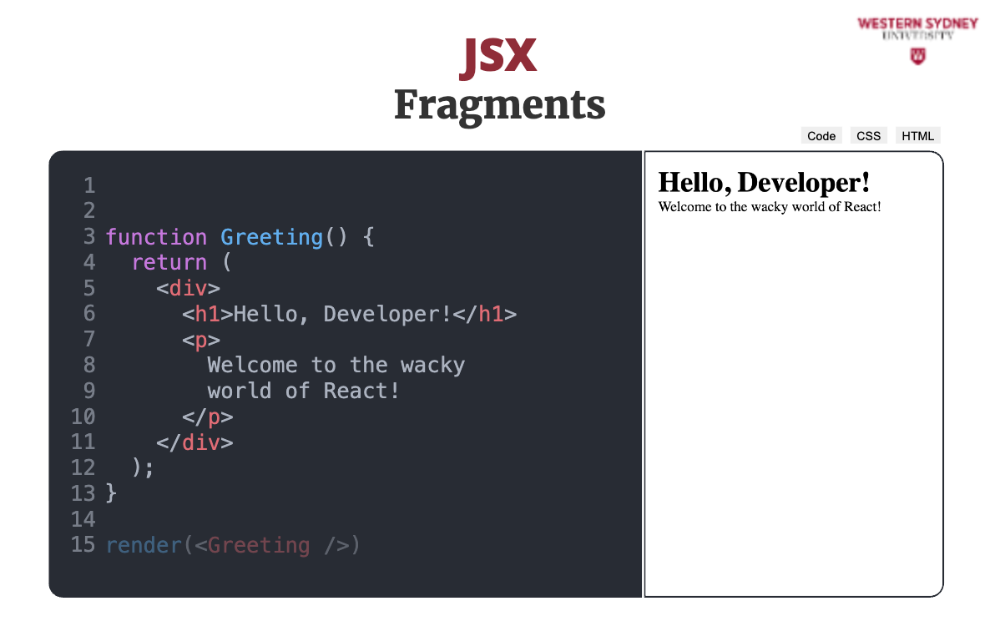
When you execute this code, it will work!
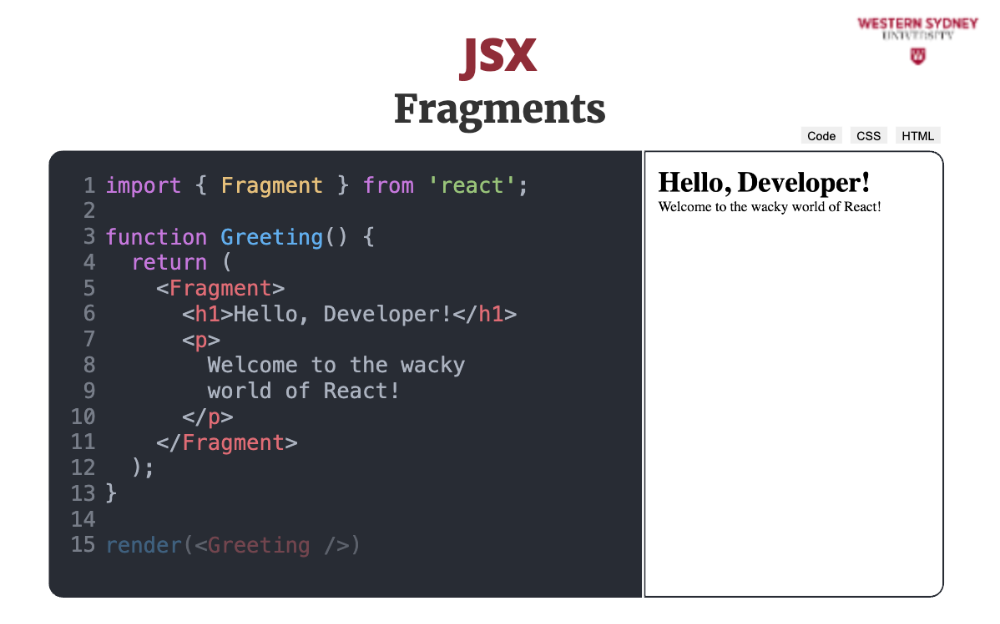
If you want to avoid introducing unnecessary elements, React introduces a custom component called Fragment, which allows you to render your elements without the need for a parent Element.
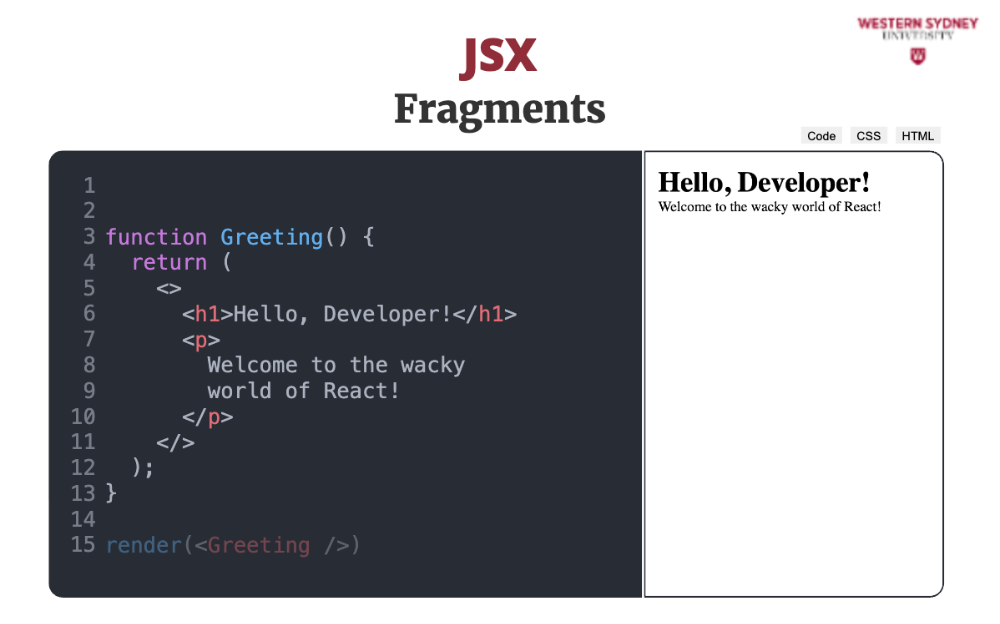
You will do this so often, that React also introduces a shorthand notation, without the necessity to import the custom Fragment element.
