| Name | Progress |
|---|---|
| Introduction | Not Read |
| 🍰 Player | Not Read |
| Name | Progress |
|---|---|
| Software Installation | Not Read |
| Project Setup | Not Read |
| Running and Testing | Not Read |
| React and ReactDOM | Not Read |
| 💡 Assignment 1: Welcome Message | Not Attempted |
| Submissions | Not Read |
| Name | Progress |
|---|---|
| Pure Components - memo | Not Read |
| Lifecycle - useEffect | Not Read |
| Expensive? - useMemo | Not Read |
| DOM Interactions - useRef | Not Read |
| forwardRef | Not Read |
| useImperativeHandle | Not Read |
| 👾 useImperativeHandle | Not Attempted |
| Context | Not Read |
| useCallback | Not Read |
| useId | Not Read |
| useReducer | Not Read |
| Name | Progress |
|---|---|
| Database | Not Read |
| NextAuth and Github Authentication | Not Read |
| Prisma and ORM | Not Read |
| Project Setup | Not Read |
| Project Authentication | Not Read |
| Name | Progress |
|---|---|
| APIs | Not Read |
| APIs - Slides | Not Attempted |
| Rest APIs | Not Read |
| Rest APIs - Express.js | Not Read |
| ReastAPIs - Next.js | Not Read |
| Securing APIs | Not Read |
| Securing APIs - NextAuth | Not Read |
| Name | Progress |
|---|---|
| tRPC | Not Read |
| tRPC - Routers | Not Read |
| tRPC - Server Rendering | Not Read |
| tRPC - Client Rendering | Not Read |
| Persisting Data | Not Read |
| Assignment 3: APIs | Not Read |

Event handlers in React are functions that are triggered when user interactions occur, such as clicking a button, typing in an input field, or submitting a form. Let's explore them!
Before diving into examples, let's consider the few critical points about React events and event handlers.
React events are similar to HTML DOM events but are wrapped in React's synthetic event system for consistency across browsers.
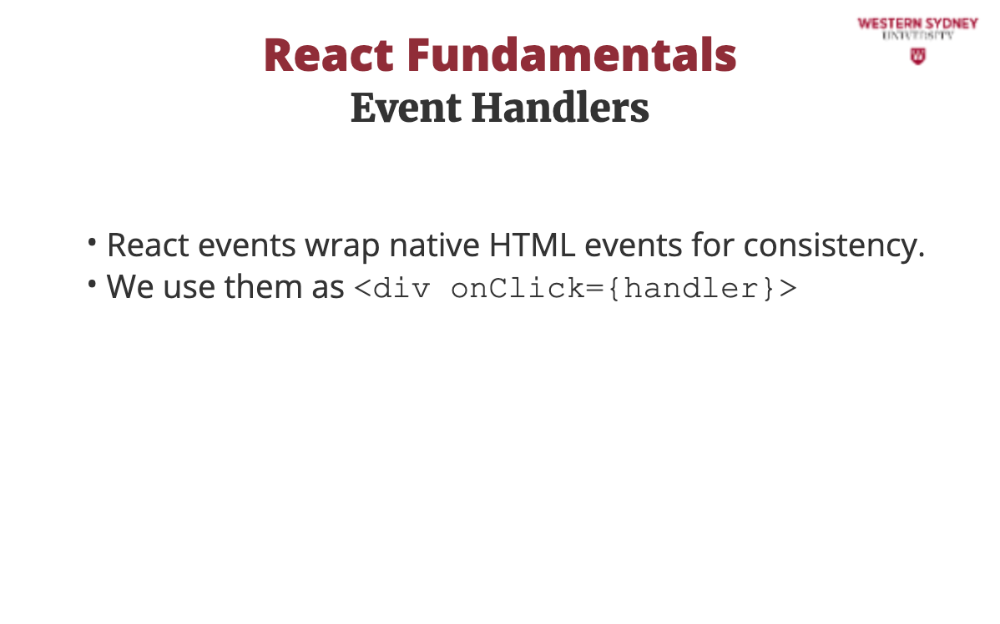
Event handlers are added to elements as attributes using camelCase (e.g., onClick, onChange).
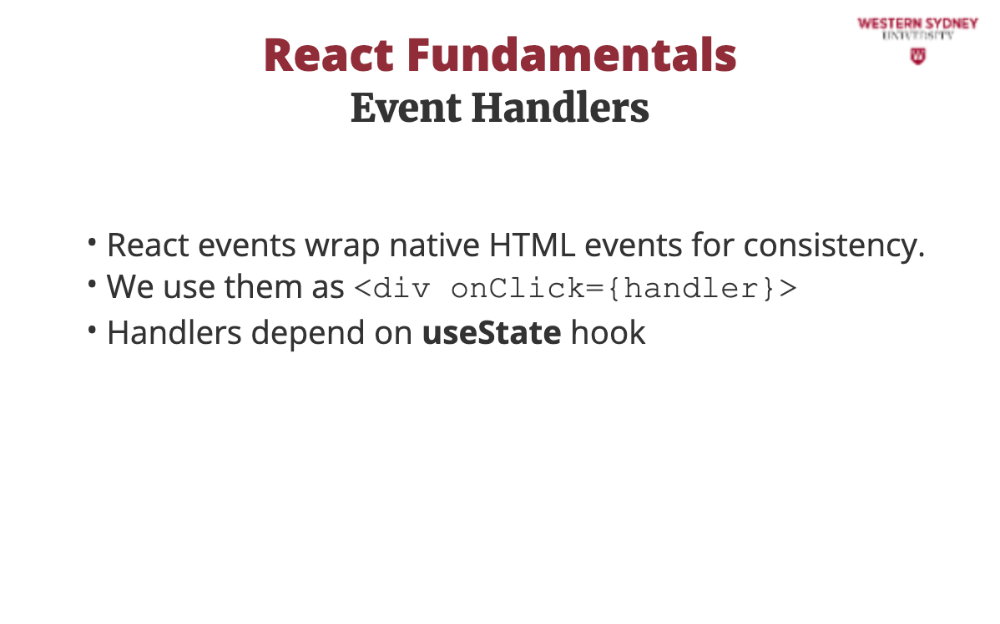
The handler function often uses the state hook to interact with the component state.
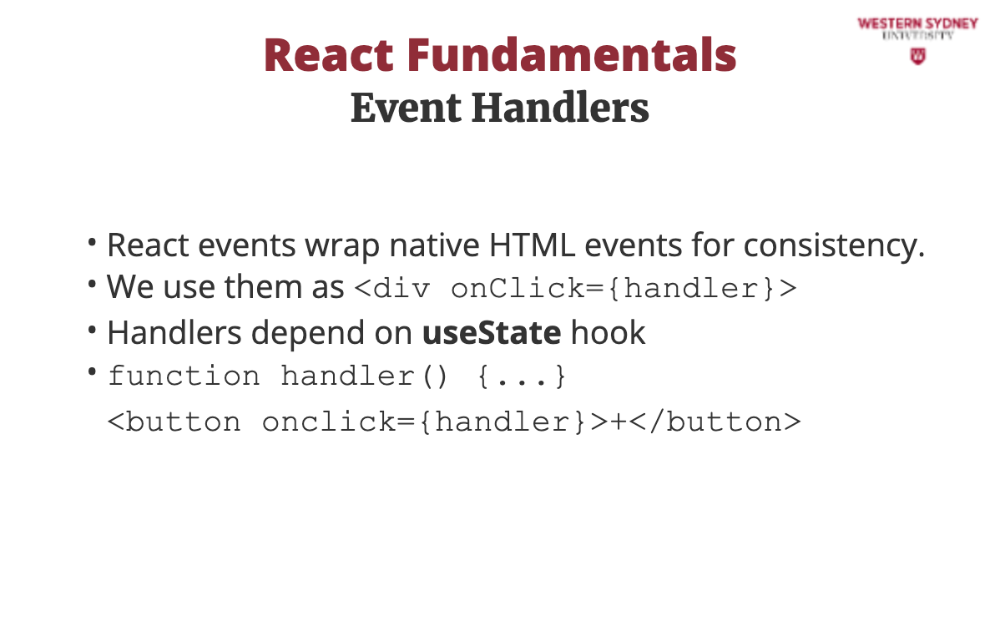
To handle events you either create custom event handler functions ...
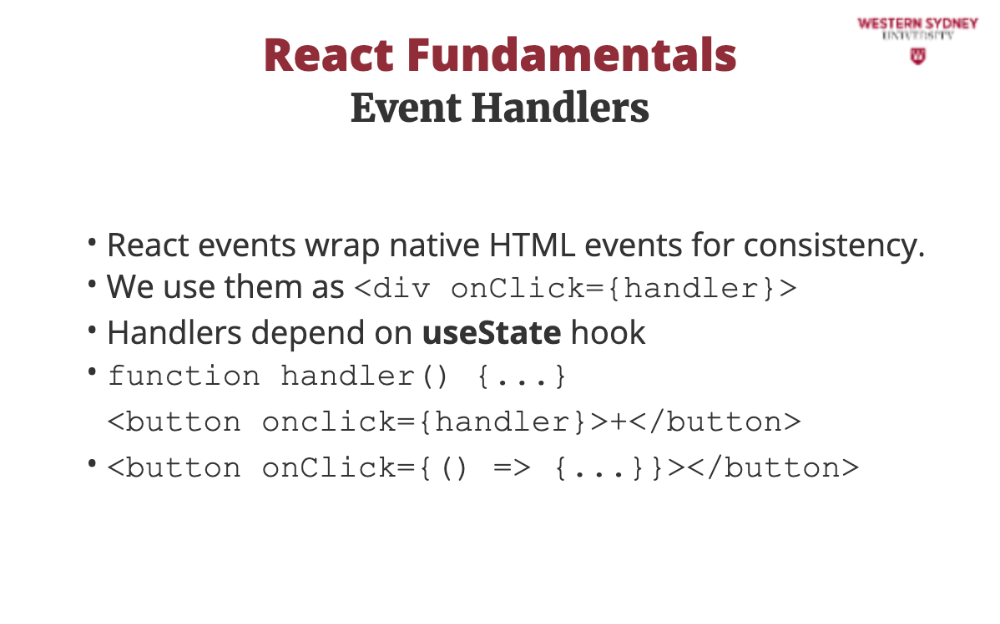
... or use arrow functions in place of props.
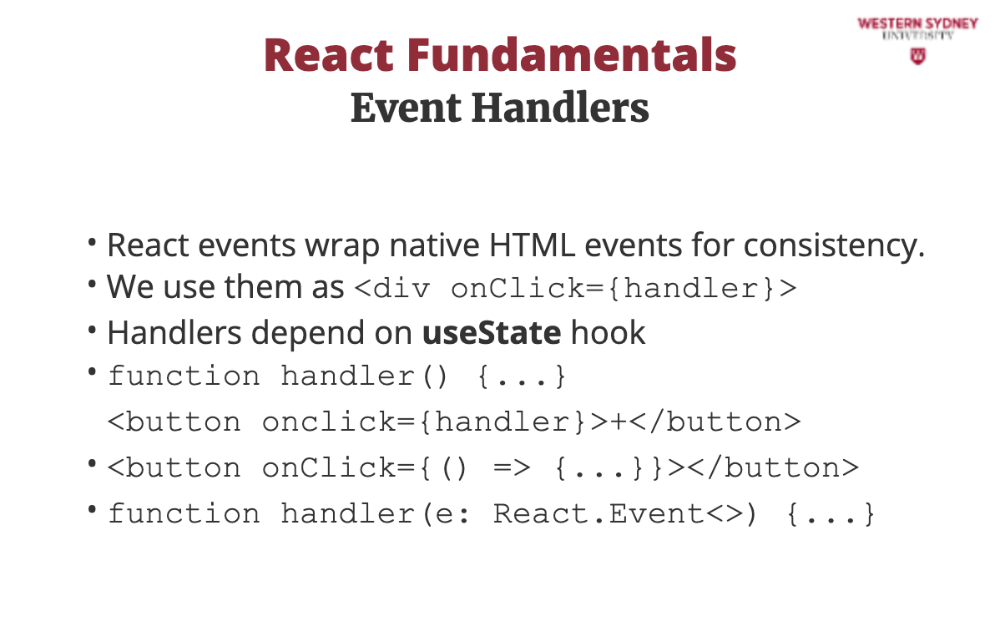
Last, if you create custom event handlers, you must type them manually.
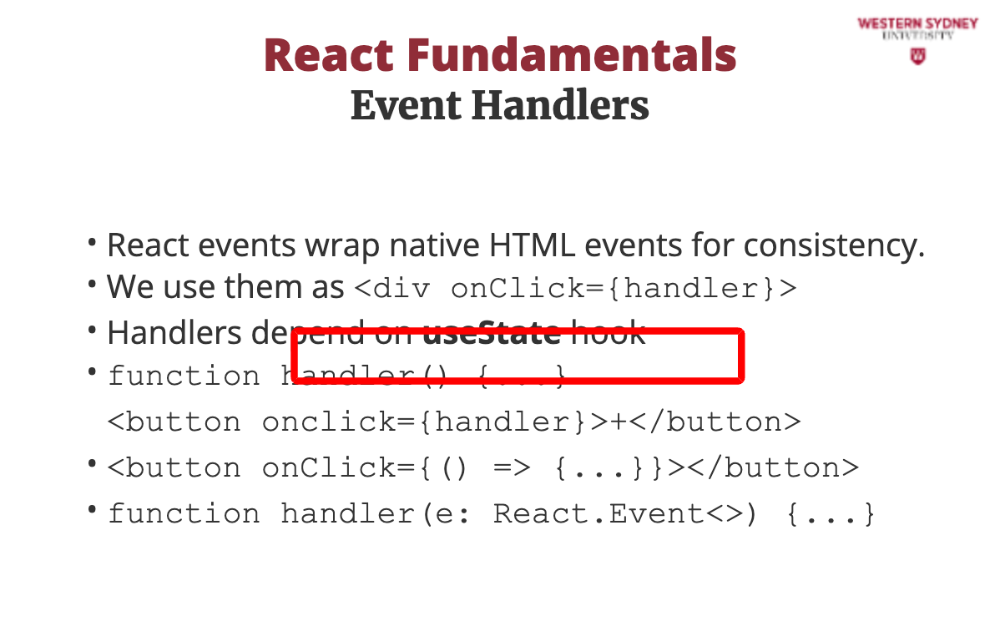
If you are not sure what type to use, you can always just hove over the prop in your code editor to reveal the type.
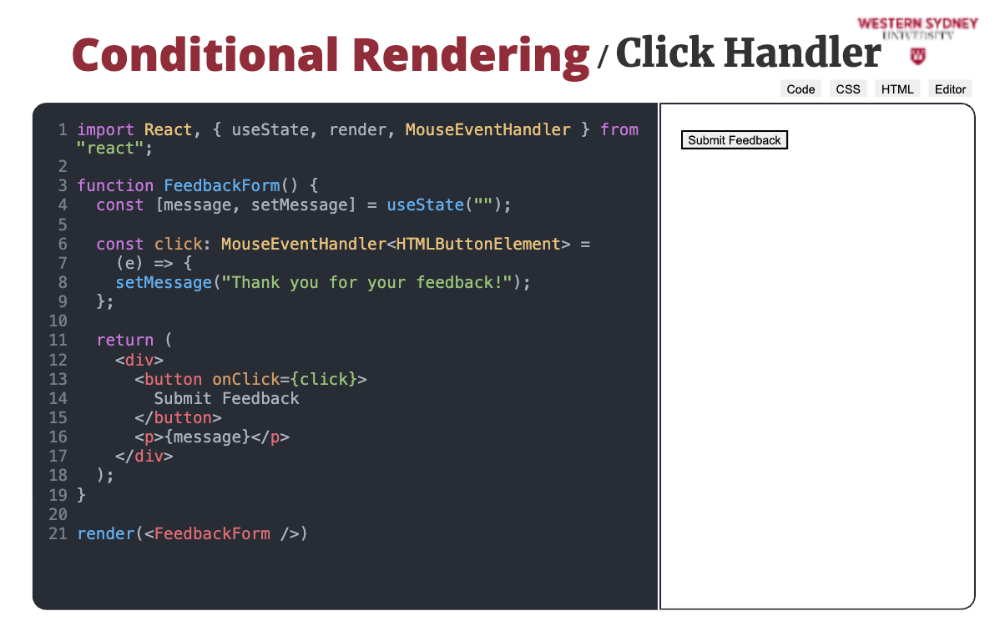
In this course, we already used a click handler in several places. For example, consider this react code, where clicking on the button changes the component state and shows a user message.
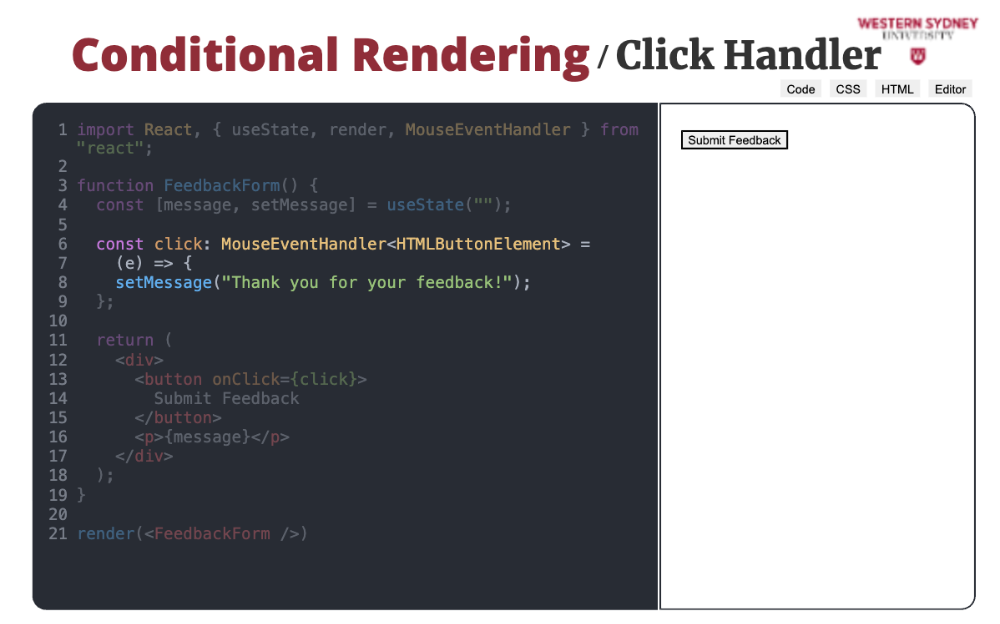
In this example, note the manual type of the event e in the event handler. You can easily find out the type of event handler by hovering your mouse over the events in editors such as Visual Studio Code.
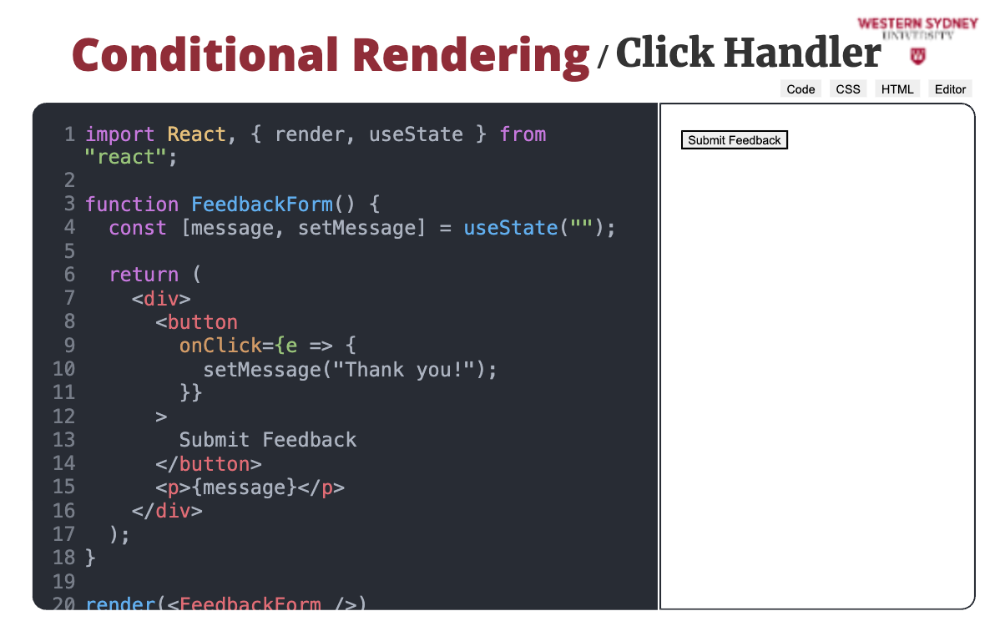
The other option to create handlers is using the array functions.
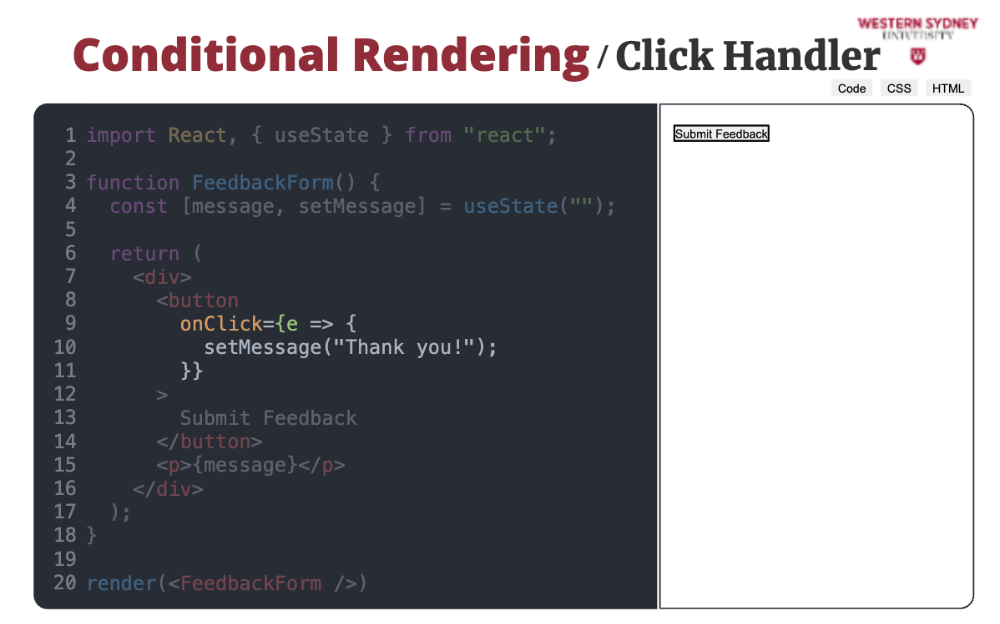
This way, you create the handler in place of the prop. Note that the type notation is unnecessary, as typescript automatically selects the type of the event.
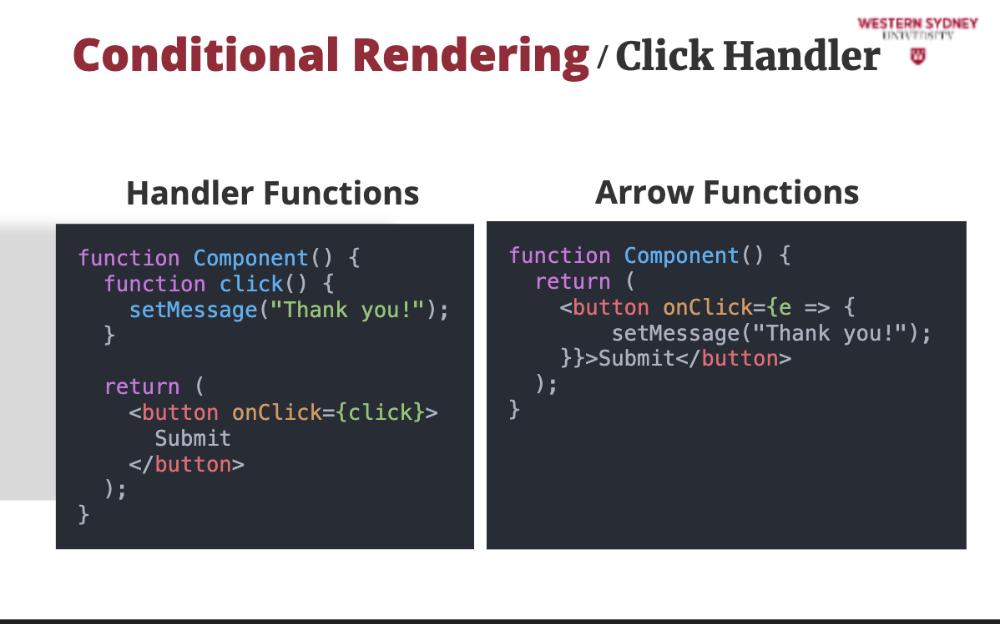
You can always choose the method you write your components, but try to be consistent. Still, using the handler function delivers cleaner code with a definite separation of duties, allowing JSX to view your code and functions to take care of reactivity.
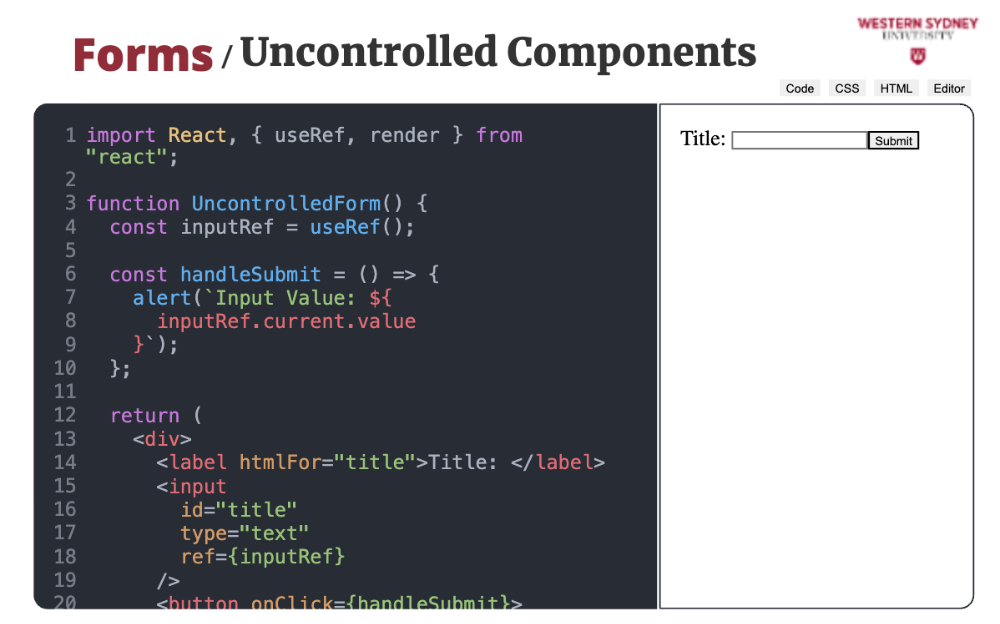
HTML introduces several form elements which you can use to collect data from your users. The form components can either be controlled or uncontrolled. Let's take a look.
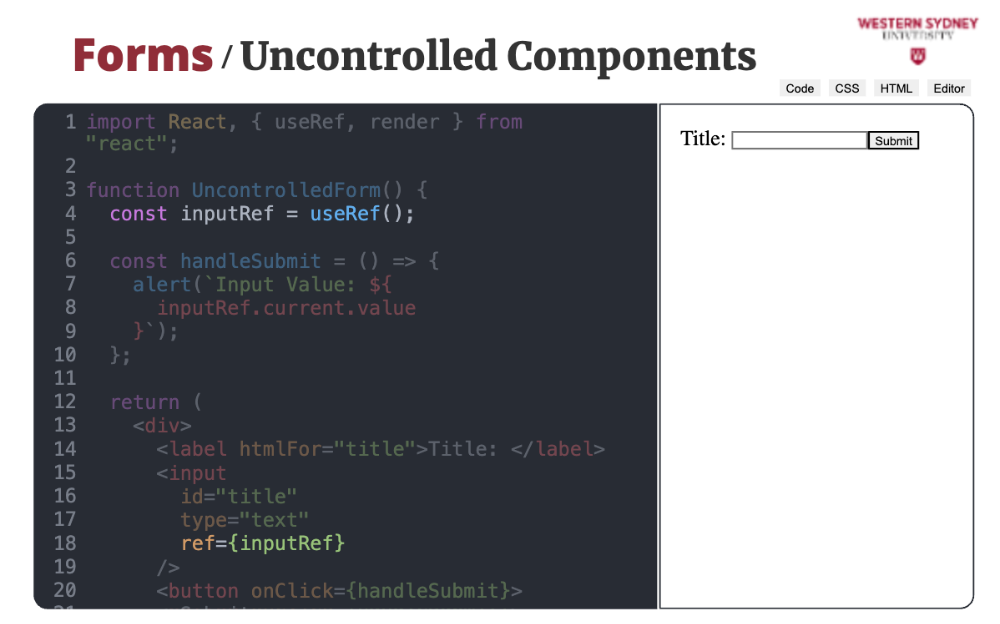
In an uncontrolled component, the form element maintains its own internal state, and React does not directly control its value. Instead, you use a ref and the newly itroduced useRef hook to access the current value when needed. With ref, React knows which HTML element it deals with.
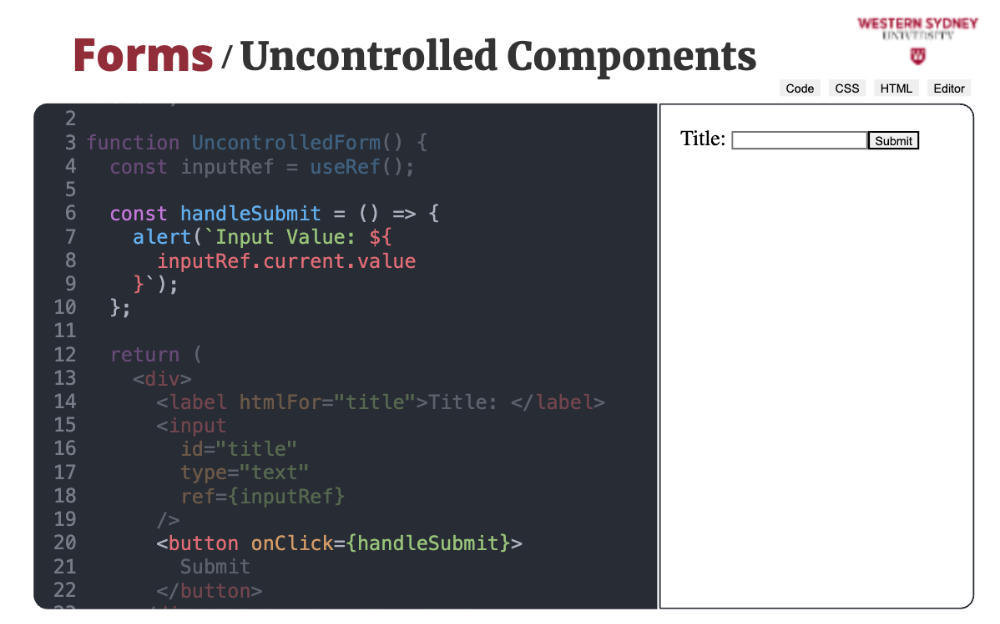
In the click handler, we want to show the content of the input. The referenced input is accessible through the property "current". Once have the reference we can access all the properties of the DOPM element, such as value.
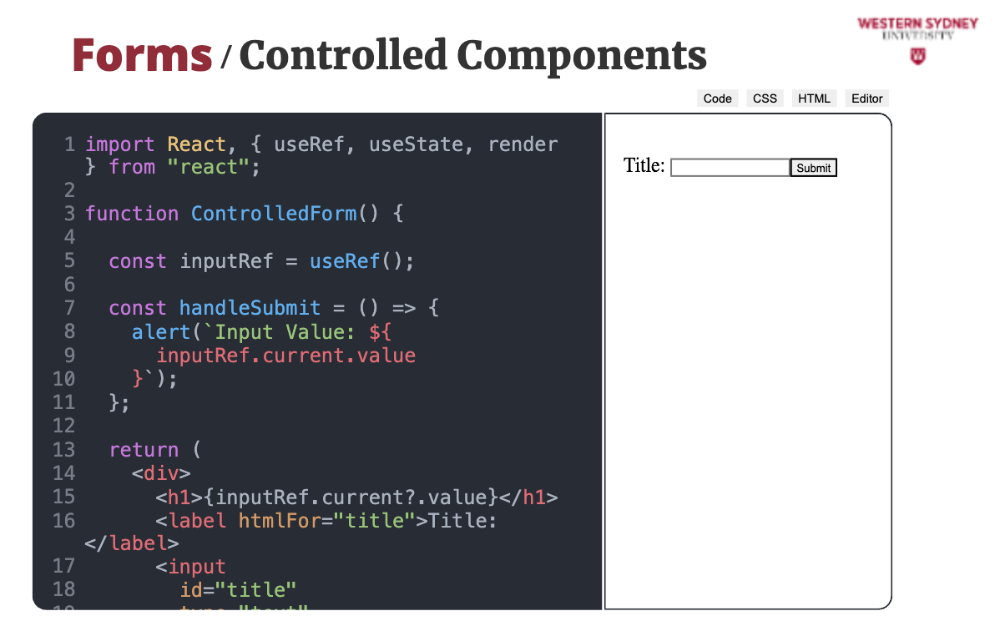
While the advantage of uncontrolled form is simple code, it also differs from the React way. It brings additional complexity down the road, for example, if we want to display the value from the input reactively.
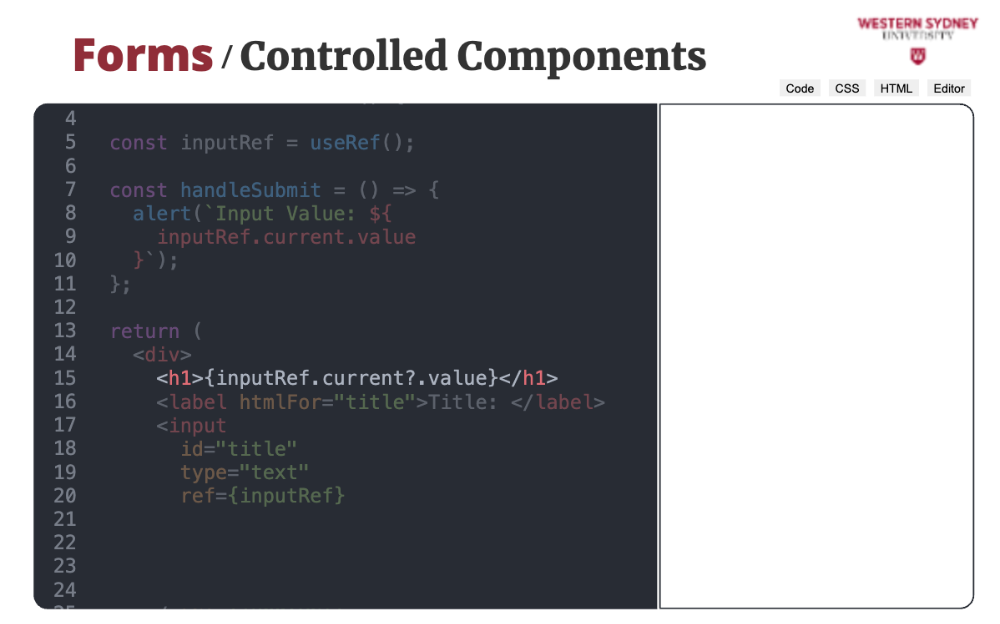
Consider that we want to display the current title in the header element reactively. Of course, this approach will not work, as accessing the current value of a referenced uncontrolled component does not trigger reactivity. Let's fix that!
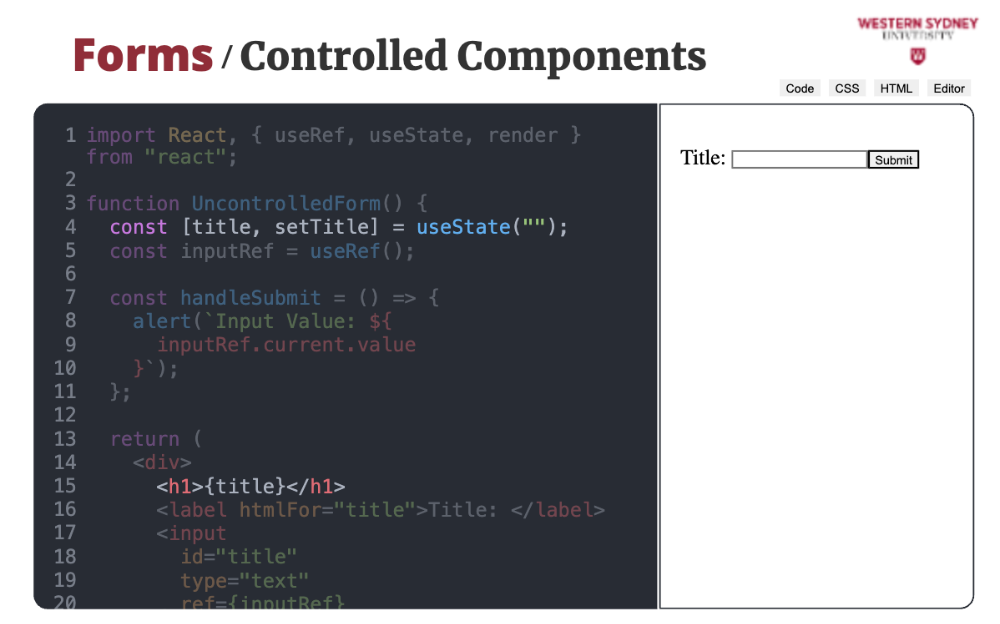
Let's create a new state where we will track the value of the title. and show the value of the title in the header.
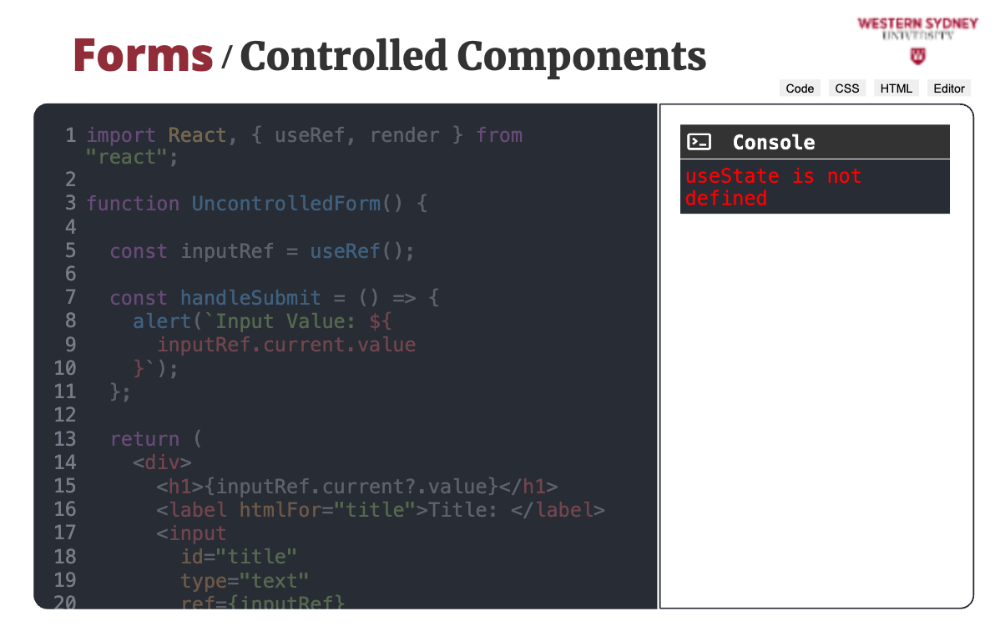
We will tell input to show the title value from the component state.
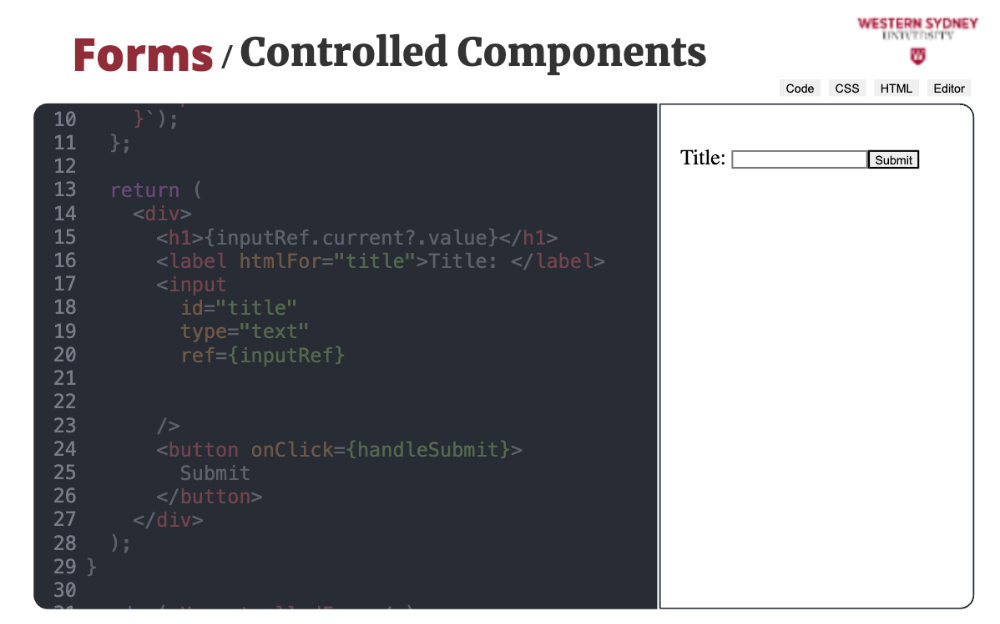
If you run this code, you realise you can no longer modify the input value! The reason is that the input is now controlled and displays the value of the title at all times. Consequently, no matter what you type into input will not affect what the input displays. Let's fix that!
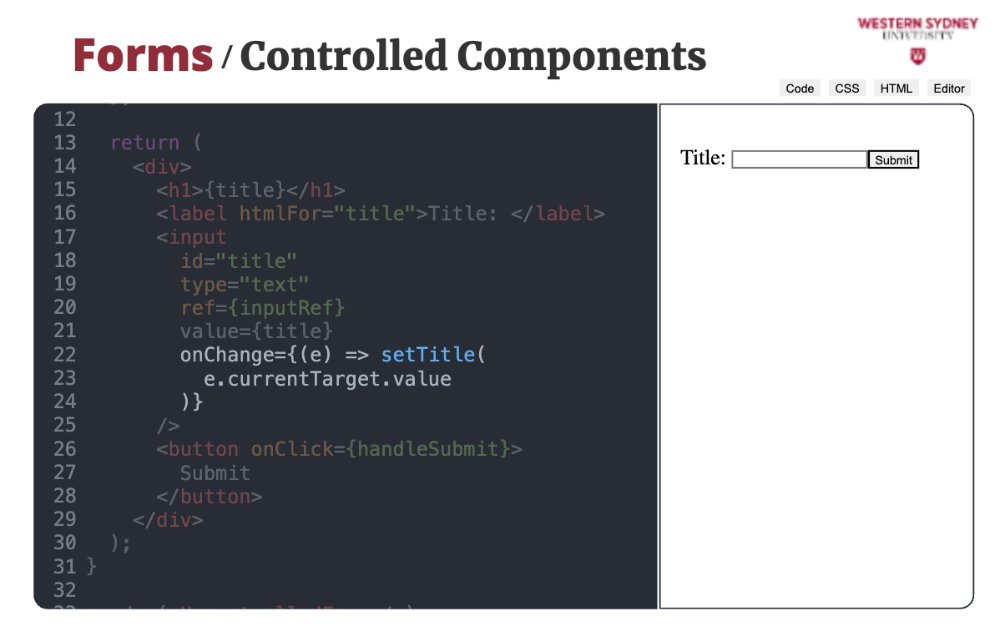
What we are missing is the event handler, which will change the value of the title in the state based on the current value in the input element. This way, the controlled input will always display the state value as well as will be able to modify it.
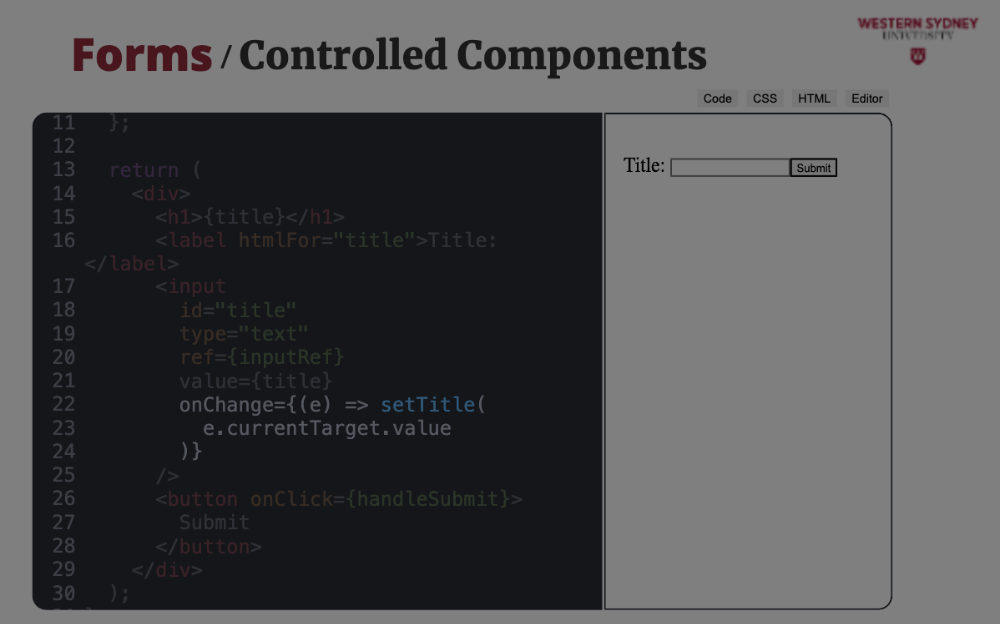
When we execute this code, we see that we can type into the input and reactively display the value of the title. Profit!
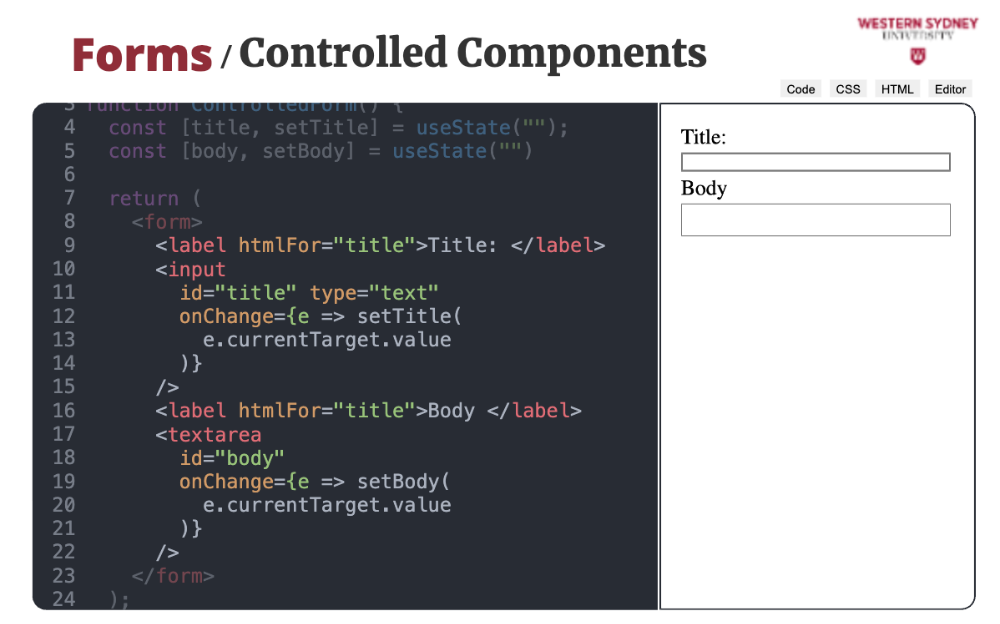
Now, what if you have a more complex form with several form elements?
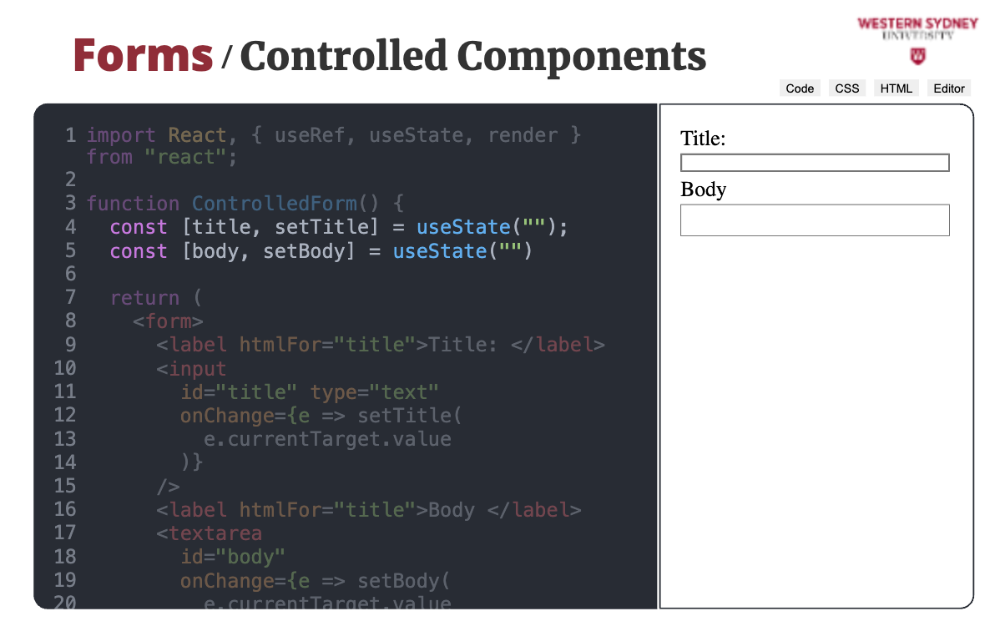
Well, you can track each form value in a separate state, but this can quickly become confusing.
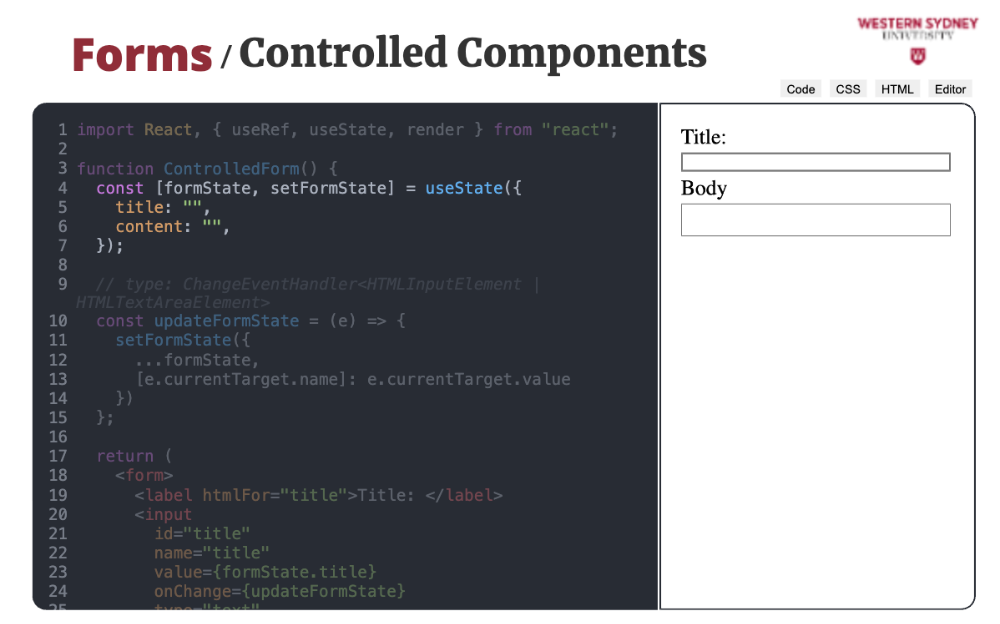
Instead, let's track the form state as an object, with each for element represented by its own key.
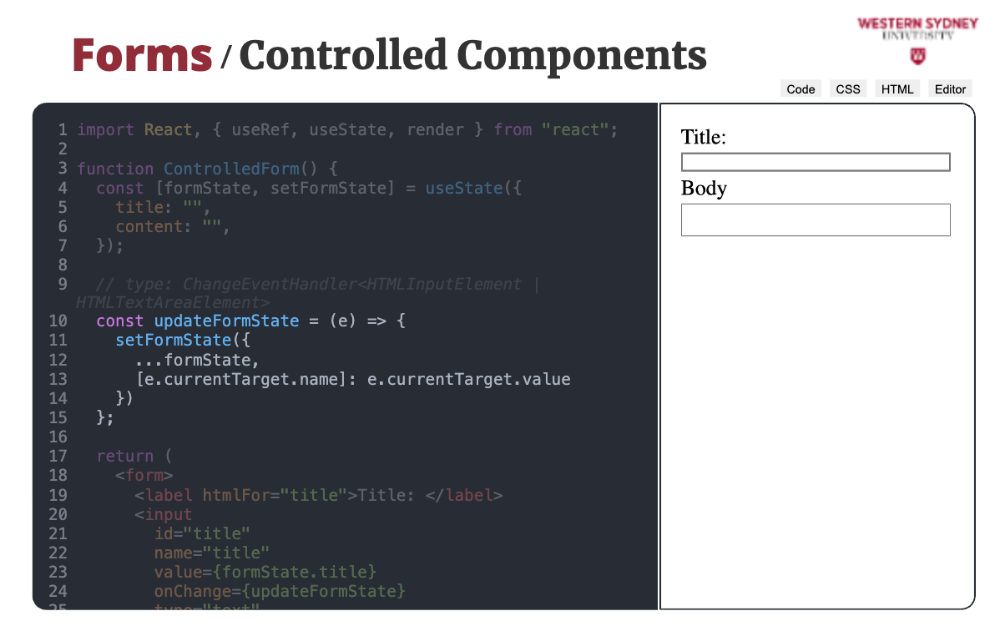
We also add a common form handler that will update the state. We will annotate each form element with a name attribute, which will specify under which key the state value is stored. We can then reuse this value to update the state correctly.
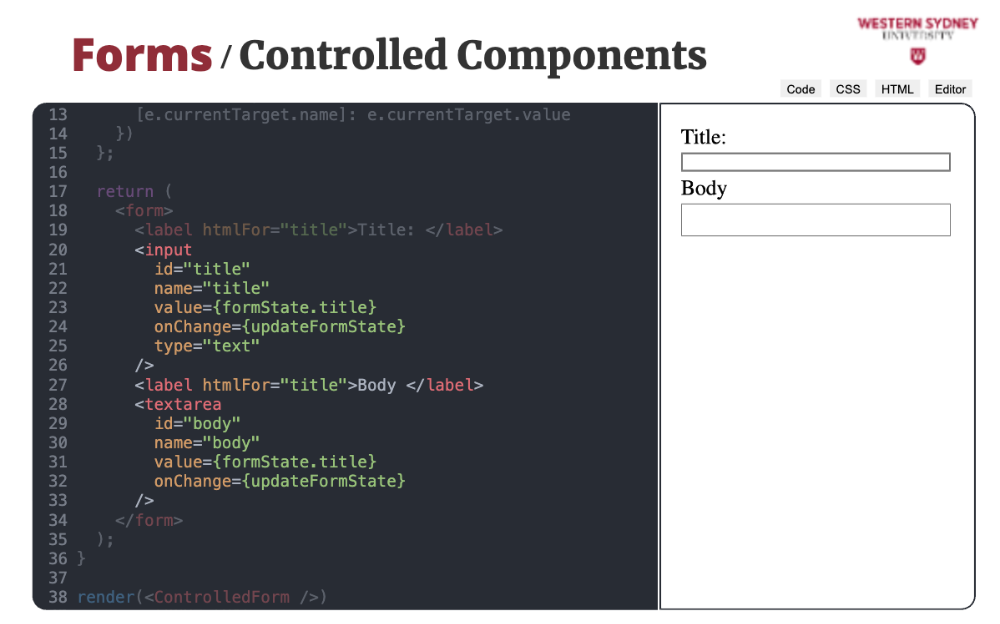
Then, all we have to do is annotate the form elements with the correct name attribute values and assign the form handler. This is already much cleaner.
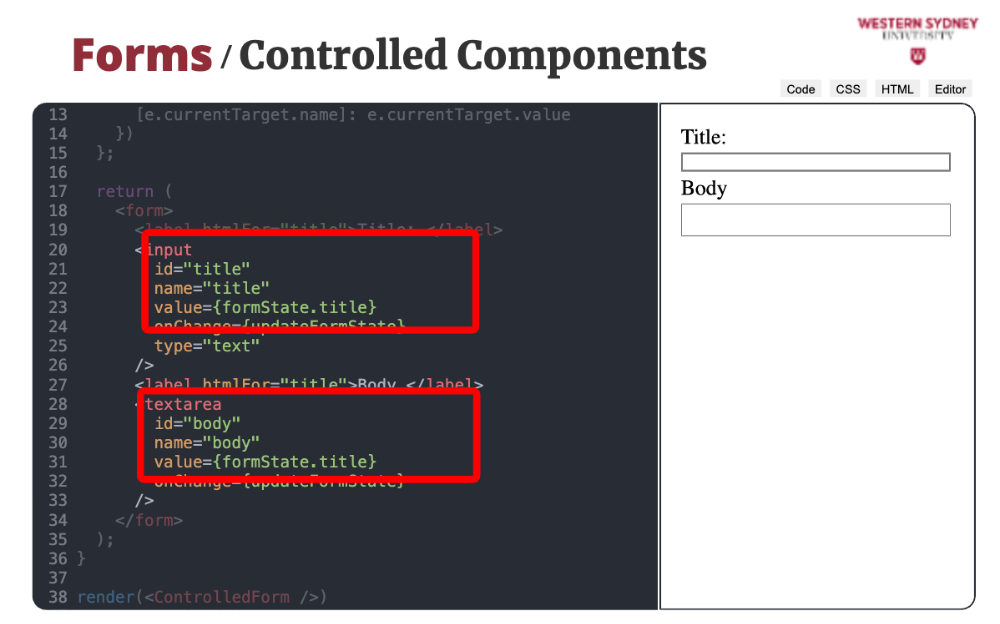
But, if you look at the props of form elements, they are quite repetitive, with name, id, value and onChange . Let's simplify that!
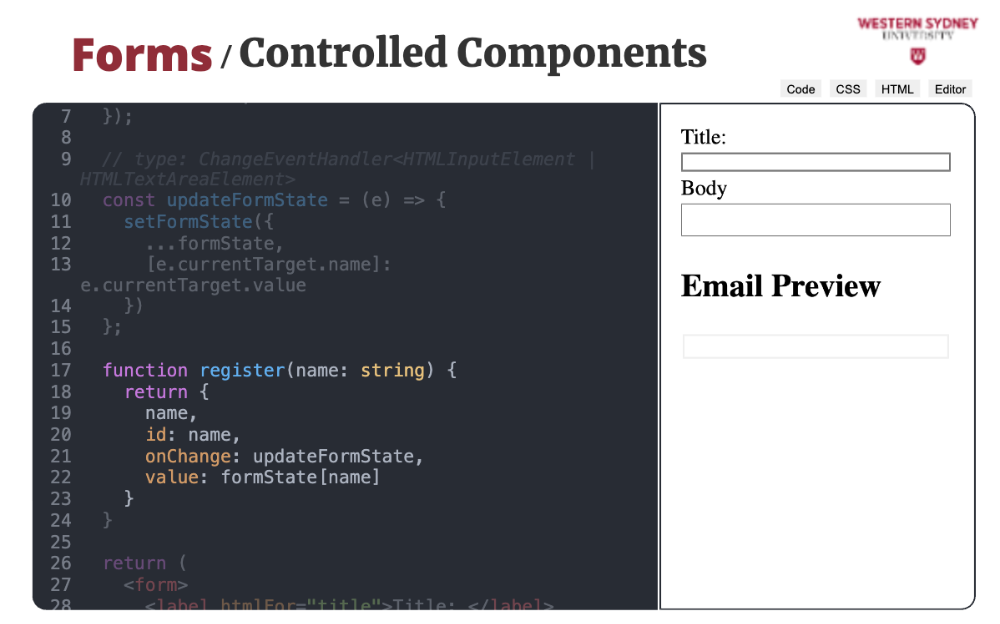
We add the following function, which assigns the form element's name, value and id and sets the onChange handler.
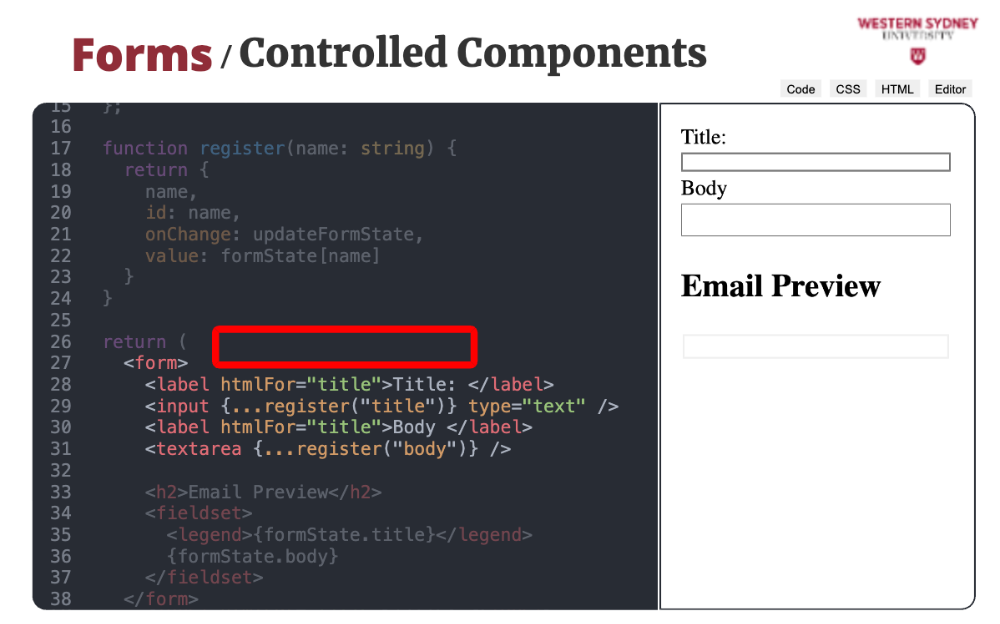
All we have to do is spread these props on each form element, calling the helper function with the form element's name. Look how simple the JSX code is now! But, as always, there is room for improvement! You will most probably be using multiple forms in your application. Let's create a reusable hook that you can use with any form!
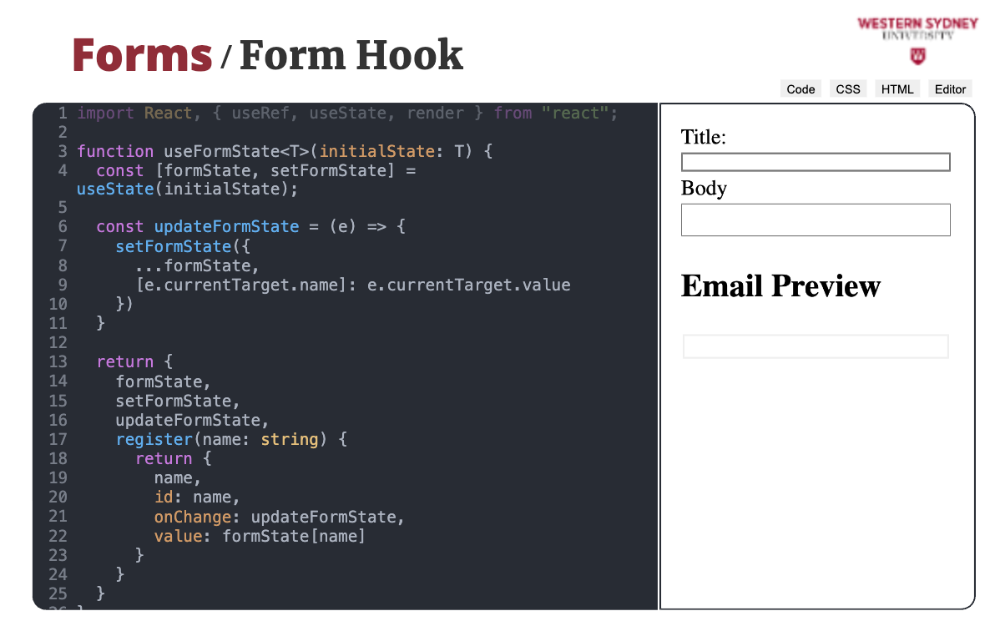
We create a very simple form hook, that ...
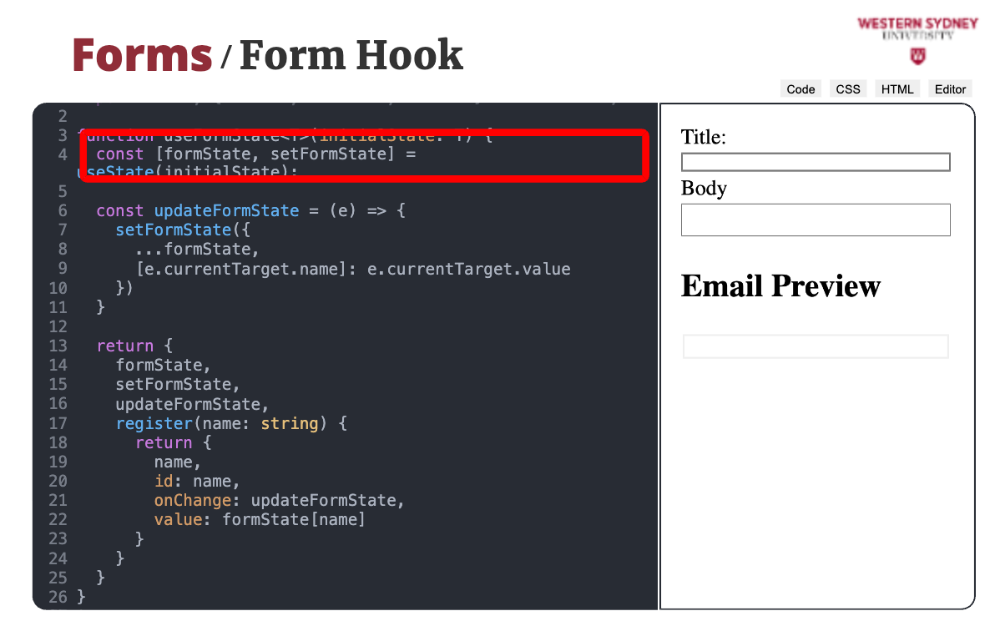
... initialises the form state and creates a form change handler function. Not the use of generics for type safety.
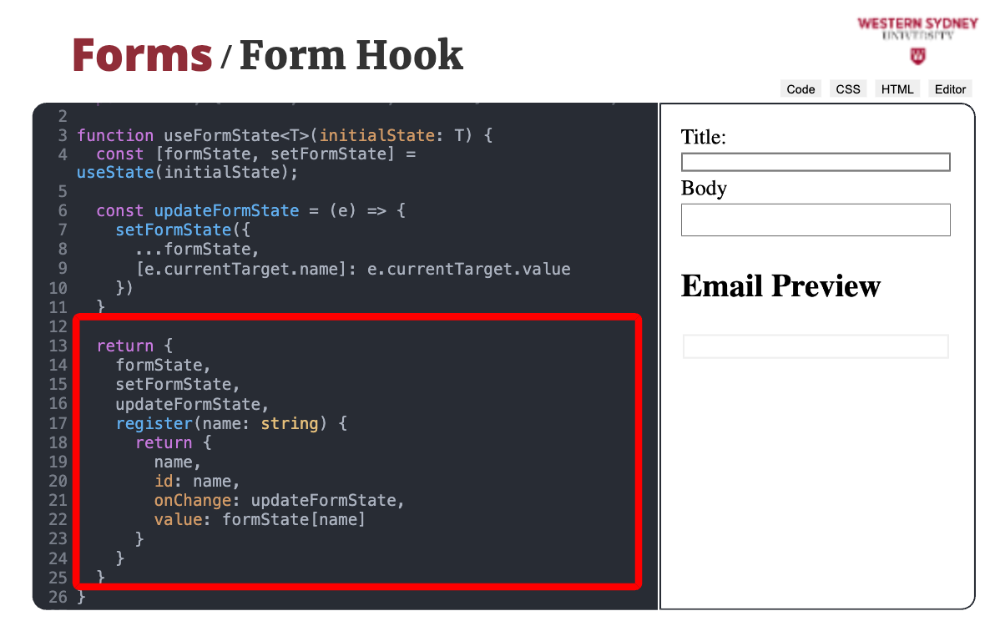
Then, we return the current form state, state change handler and the helper registration function to annotate form elements with required props.
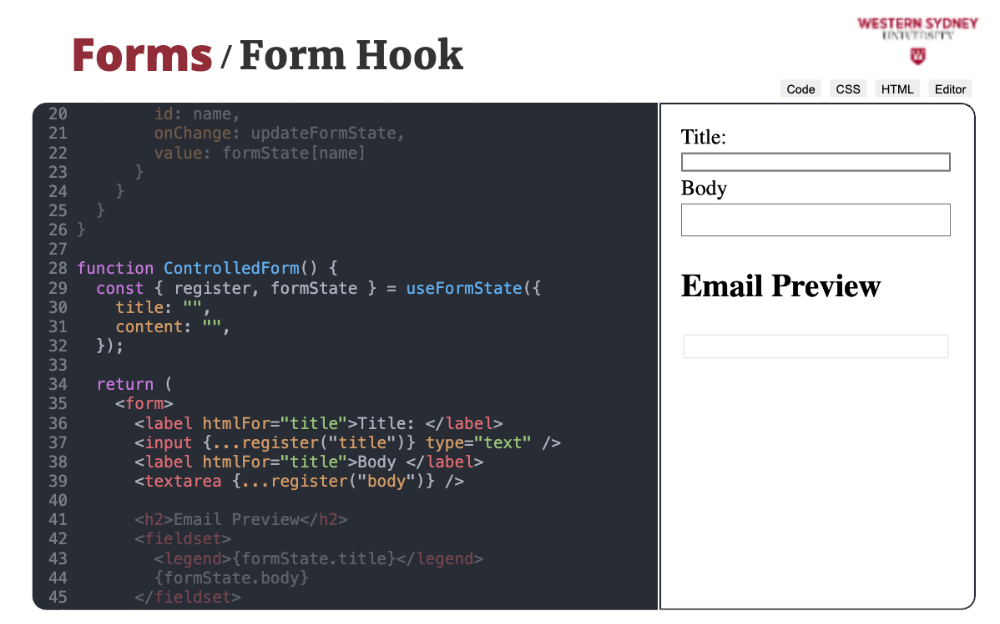
Check out how short the form code is now! That is pretty incredible, showcasing the true power of React, allowing you to build reusable code shared across your many applications. As an exercise, we will try to expand the functionality of this new hook to provide for validations, showing errors.
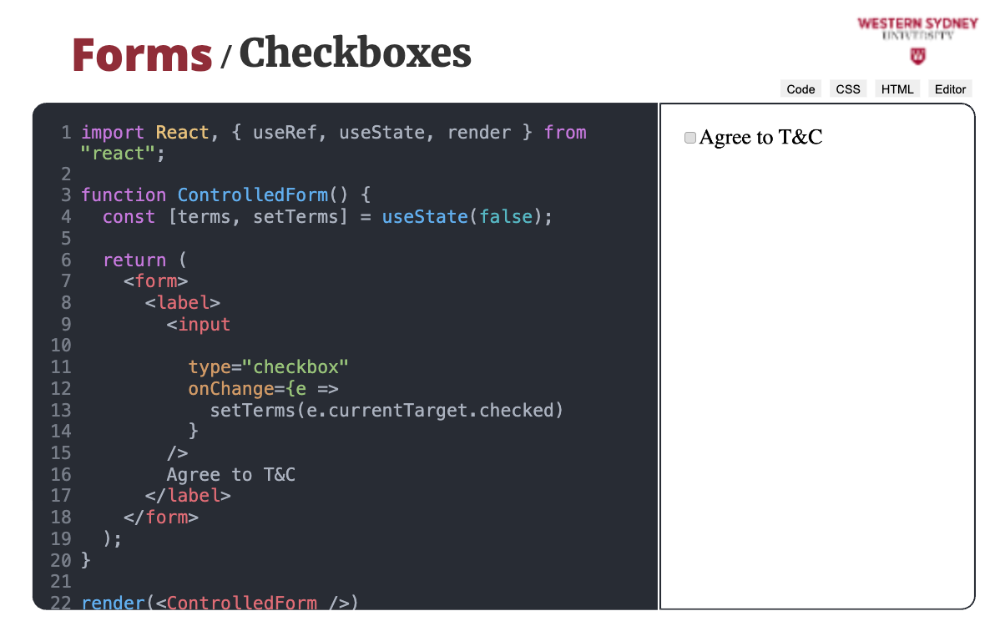
There is nothing complicated about using checkboxes.
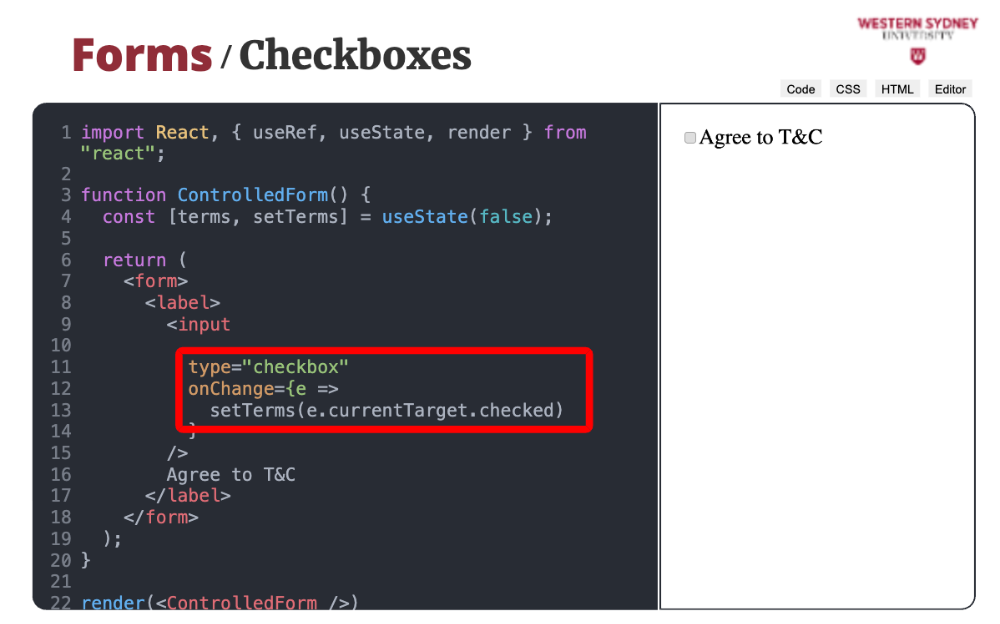
Instead of using the value property from input, we use the checked property. The rest is exactly the same as in inputs. Yet, our example is not working properly. Users tend to click on the text next to the checkbox instead of the checkbox itself. You have two options to make it work ...
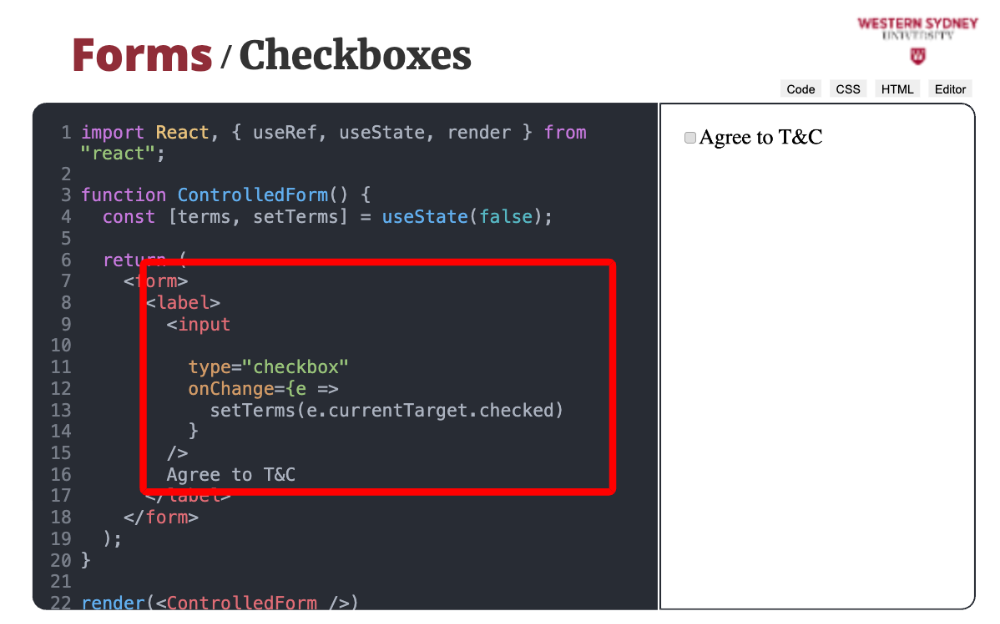
You can make input a child label element, as in our case ...
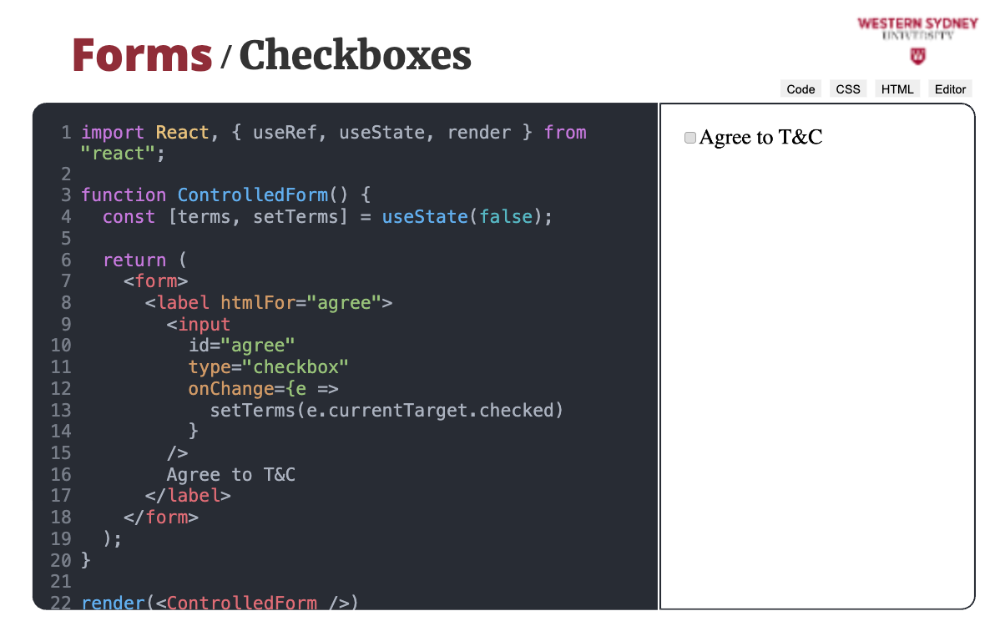
... or you assign the htmlFor property to a label and the related ID on the input. In general, it is a good practice to assign these props as it helps screen readers for visually impaired users.
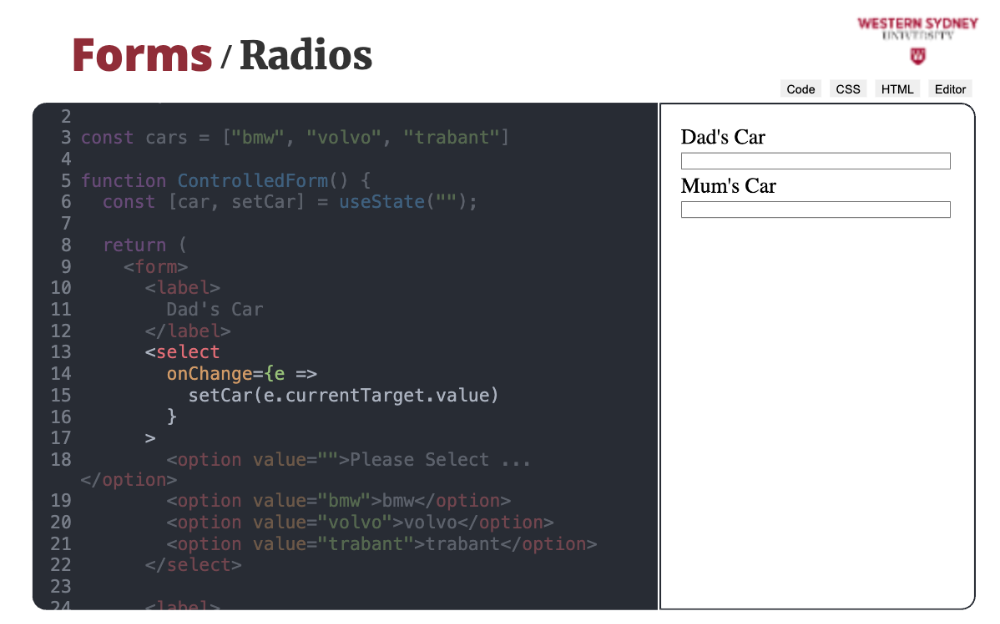
Selects use the same change handler as inputs, tracking the element's value., no surprises there. But let's take a look at how you can create a select element.
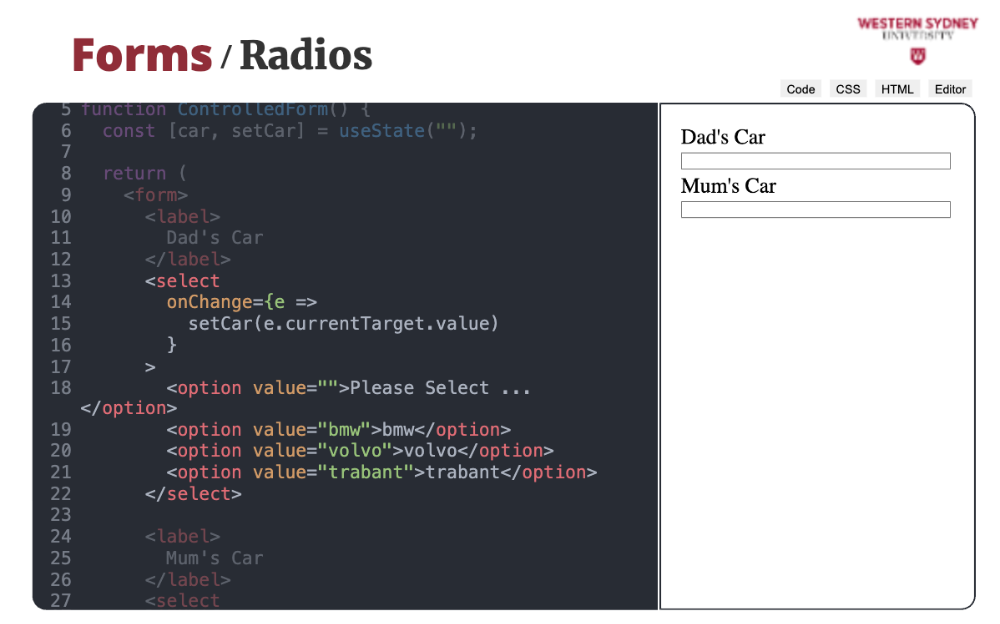
Traditionally, you would list all the options in the JSX code as option elements. But his can become hard to maintain and is not dynamic.
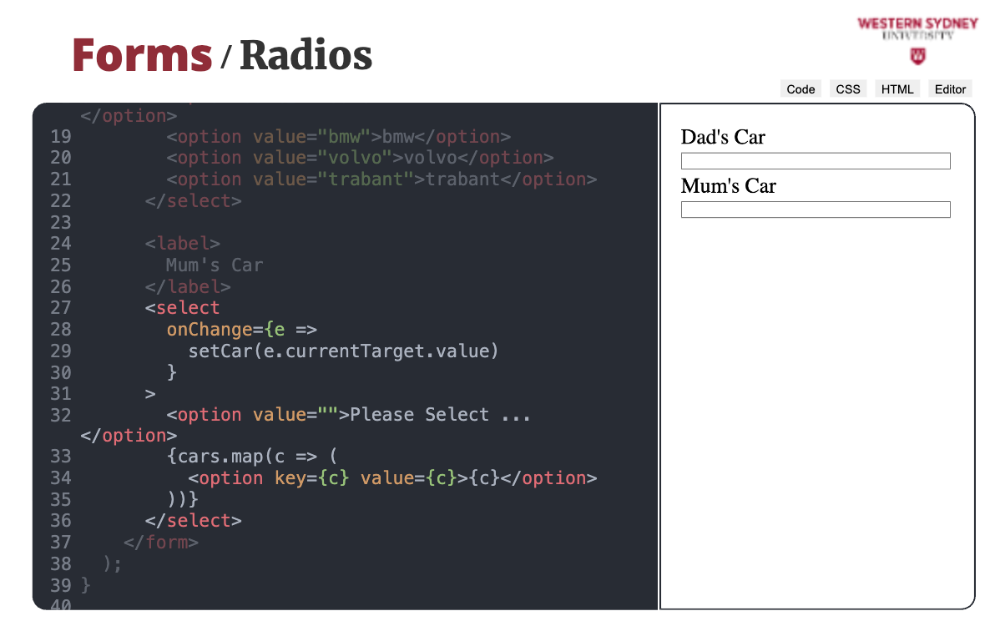
Instead, you can create re-usable Select elements, passing the list of values as arrays and creating options dynamically. Make sure you do not forget that pesky key attribute!
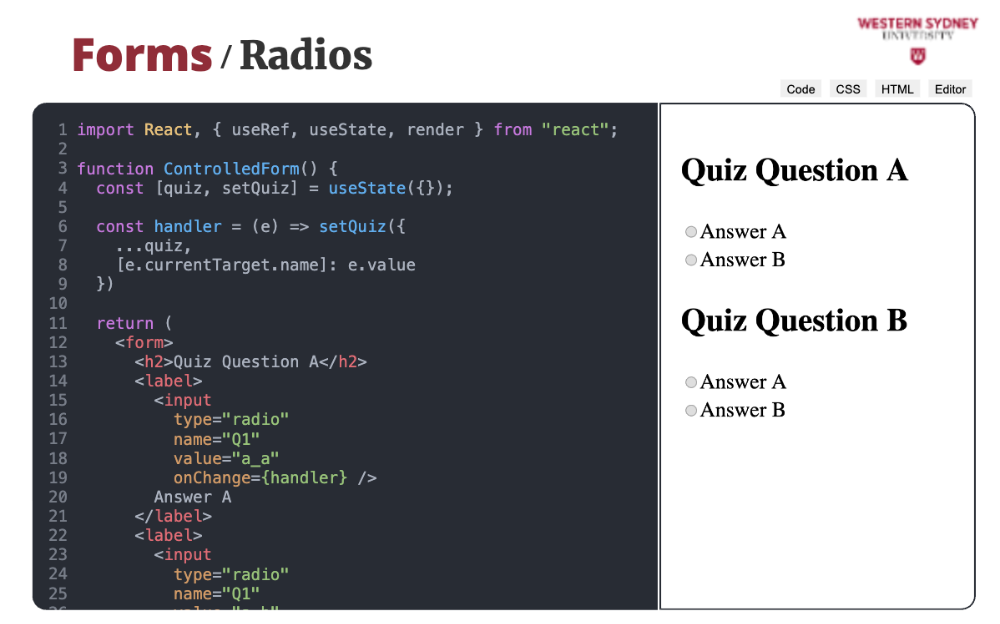
Last, let's take a look at radios, which are handled similarly to checkboxes.
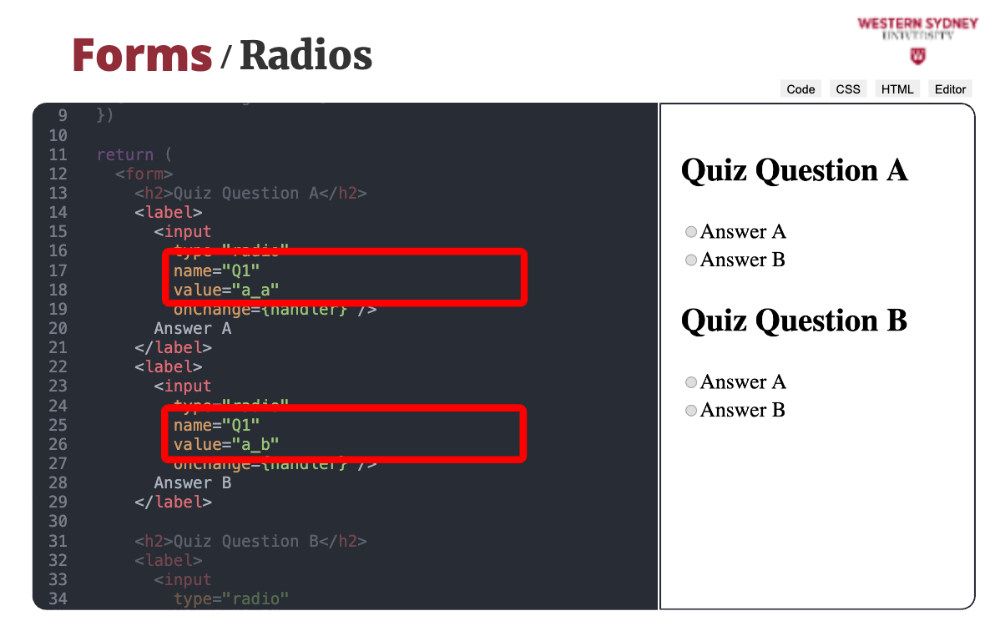
The only difference is that you use value prop instead of checked prop. To differentiate different radio groups we use name property. This concludes all of the form elements. Next, we will take a look at other hooks that take care of React component life cycle.
Event handlers in React are functions that are triggered when user interactions occur, such as clicking a button, typing in an input field, or submitting a form.
Key Takeways:
In this course, we already used a click handler in several places. For example, consider this react code, where clicking on the button changes the component state and shows a user message.
import React, { useState } from "react";

function FeedbackForm() {
  const [message, setMessage] = useState("");

  const handleClick = (e: MouseEventHandler<HTMLButtonElement>) => {
    setMessage("Thank you for your feedback!");
  };

  return (
    <div>
      <button onClick={handleClick}>Submit Feedback</button>
      <p>{message}</p>
    </div>
  );
}
In the example above, note the manual type of the event e in the event handler. You can easily find out the type of the event handler, by hovering your mouse over the events in your editor.
The other option to create your ecent handlers is in place of the prop using the array notation. We can rewrite the avove example as following:
function FeedbackForm() {
  const [message, setMessage] = useState("");

  return (
    <div>
      <button
        onClick={(e: MouseEventHandler<HTMLButtonElement>) => {
          setMessage("Thank you for your feedback!");
        }}
      >
        Submit Feedback
      </button>
      <p>{message}</p>
    </div>
  );
}
We leave it up to you to choose which method you prefer, but the first one delivers cleaner code with a clear sepearation of functionality, leaving JSX to view your code and yor functions to take care of reactivity.
HTML introduces several form elements which you can use to collect data from your users. The form components can either be controlled or uncontrolled. Let's take a look.
In an uncontrolled component, the form element maintains its own internal state, and React does not directly control its value. Instead, you use a ref and the newly itroduced useRef hook to access the current value when needed. With ref, React knows which HTML element it deals with. The value of the referenced element is accessible through current property. Check out this example:
import React, { useRef } from "react";

function UncontrolledForm() {
  const inputRef = useRef();

  const handleSubmit = () => {
    alert(`Input Value: ${inputRef.current.value}`);
  };

  return (
    <div>
      <label htmlFor="title">Title</label>
      <input id="title" type="text" ref={inputRef} />
      <button onClick={handleSubmit}>Submit</button>
    </div>
  );
}
While the advantage of this approach is a simple code, it also is not the React way, bringing additional complexity down the road, for example if we would want to reactively display the value from the input.
Let's add a new onChange handler that will track the value of the title and control the value displayed in the component.
import React, { useRef } from "react";

function UncontrolledForm() {
  const [title, setTitle] = useState();

  const changeTitle = (e: ChangeEventHandler<HTMLInputElement>) => {
    setTitle(e.currentTarget.value)
  };

  return (
    <div>
      <h1>{title ?? "No title"}</h1>
      <label htmlFor="title">Title</label>
      <input id="title" value={title} type="text" onChange={changeTitle} />
    </div>
  );
}
Try removing the onChange handler from the input component and type a new value. What do you observe? Why changing value does not work?
With more complicated forms, you do not want to create a separate state per each component. Instead, you can use form element attributes to create a more generate event handler:
import React, { useRef } from "react";

function UncontrolledForm() {
  const [formState, setFormState] = useState({
      title: "",
      content: ""
  });

  const updateFormState = (e: ChangeEventHandler<HTMLInputElement | HTMLTextAreaElement>) => {
    setFormState({
        ...formState,
        [e.currentTarget.name]: e.currentTarget.value
    })
  };

  return (
    <div>
      <h1>{title ?? "No title"}</h1>
      <label htmlFor="title">Title</label>
      <input name="title" value={title} type="text" onChange={updateFormState} />
      <label htmlFor="content">Content</label>
      <textarea name="content" value={content} type="text" onChange={updateFormState} />
    </div>
  );
}
Let's make this example even more resilient to human error. For example, we want the title to be a compulsory value. When user loses focus (blurs) from the title input and does not type anything, we will paint it red and show an error message.
import React, { useRef } from "react";

// new error display component
function Error({ children }) {
    return (
        <div style={{ color: 'red', fontWeight: 'bold'}}>
            ⚠️ {error}
        </div>
    )
}

function UncontrolledForm() {
  const { formState, updateFormState } = useformState({
      title: "",
      content: ""
  });

  // new state holding errors
  const [errors, setErrors] = useState({
      title: "",
      content: ""
  });

  // validation function
  const validate = () => {
      const errors = {
          title: "",
          content: ""
      }
      if (title == '') {
          errors.title = "Title is required";
      }
      if (content.length < 20) {
          errors.content = "Too short"
      }
      setErrors(errors);
  }

  const updateFormState = (e: ChangeEventHandler<HTMLInputElement | HTMLTextAreaElement>) => {
    setFormState({
        ...formState,
        [e.currentTarget.name]: e.currentTarget.value
    });
    validate();
  };

  return (
    <div>
      <h1>{title ?? "No title"}</h1>
      <label htmlFor="title">Title</label>
      <input
          name="title"
          value={title}
          type="text"
          onChange={updateFormState}
          onBlur={validate}
      />
      {errors.title && <Error>{errors.title}</Error>}
      <label htmlFor="content">Content</label>
      <textarea
          name="content"
          value={content}
          type="text"
          onChange={updateFormState}
          onBlur={validate}
      />
      {errors.content && <Error>{errors.content}</Error>}
    </div>
  );
}
Let's simplify things a bit and introduce a custom hook to help us with a form state:
import React, { useRef } from "react";

function useformState<T>(initialState<T>) {
  const [formState, setFormState] = useState(initialState);
  const [errors, setErrors] = useState<T>({});

  return {
      formState,
      setFormState(partialState: Partial<T>) {
          setFormState({
              ...formState,
              ...partialState
          })
      }
      updateFormState(e: ChangeEventHandler<HTMLInputElement>) {
          setFormState({
              ...formState,
              [e.currentTarget.name]: e.currentTarget.value
          })
      }
      errors,
      setErrors
  }
}

function Form() {
  const { formState, updateFormState, errors, setErrors } = useFormState({
      title: "",
      content: ""
  });

  // validation function
  const validate = () => {
      const errors = {
          title: "",
          content: ""
      }
      if (title == '') {
          errors.title = "Title is required";
      }
      if (content.length < 20) {
          errors.content = "Too short"
      }
      setErrors(errors);
  }

  return (
    <div>
      <h1>{title ?? "No title"}</h1>
      <label htmlFor="title">Title</label>
      <input
          name="title"
          value={title}
          type="text"
          onChange={updateFormState}
          onBlur={validate}
      />
      {errors.title && <Error>{errors.title}</Error>}
      <label htmlFor="content">Content</label>
      <textarea
          name="content"
          value={content}
          type="text"
          onChange={updateFormState}
          onBlur={validate}
      />
      {errors.content && <Error>{errors.content}</Error>}
    </div>
  );
}
But what about Selects and Checkboxes? Let's take a look at some examples:
With checkboxes, we use “checked” property of input to track the state:
import React, { useRef } from "react";

function Form() {
  const { formState, setFormState } = useFormState({ agree: false });

  return (
    <div>
      <input
          id="agree"
          name="agree"
          checked={formState.agree}
          type="checkbox"
          onChange={setFormState} />
      <label htmlFor="agree">Title</label>
    </div>
  );
}
For this we will have to update our custom hook:
updateFormState(e: ChangeEventHandler<HTMLInputElement>) {
  setFormState({
      ...formState,
      [e.currentTarget.name]: e.type === 'checkbox'
          ? e.currentValue.checked
          : e.currentTarget.value
  })
}Similarly we can handle selects:
import React, { useRef } from "react";

function Form() {
  const { formState, setFormState } = useFormState({ agree: false });

  return (
    <div>
      <label htmlFor="agree">Title</label>
      <select
          id="car"
          name="car"
          value={formState.agree}
          type="checkbox"
          onChange={setFormState}
      >
          <option value="">Please Select</option>
          ["Mazda", "Toyota", "BMW"].map(t => <option key={t} value={t}>{t}</option>)
      </select>
    </div>
  );
}
There is a lot of room for improvement, as we can handle better the form state, or include form validation in our custom hook. But, before you go creating overly complex form handling mechanism, check out one of the existing form libraries for react https://dev.to/ansonch/5-best-libraries-to-develop-reactjs-forms-2024-49k3.

