Rest APIs
Motivation: Why REST APIs Matter
Imagine you’re using our blogging app. You tap a button to see posts tagged “coding,” write a new post about your latest project, or delete an old draft—all from your browser or phone. How does this happen so seamlessly? The answer is REST APIs—Representational State Transfer Application Programming Interfaces. They’re the digital couriers that shuttle your requests to the server and bring back the data, all over HTTP, the same system that powers the web.
REST APIs are everywhere—think social media feeds, online stores, or even the projects you’ll build in this course. Today, we’ll explore their foundation, how to use them with the fetch API on the client side, and best practices to make them work for our blogging app. Here’s a fun question: Ever thought an app “knows” what you did last time you used it? With REST, it doesn’t—and that’s a superpower we’ll unpack soon!
Busting a Misconception
Some of you might think REST APIs are just random URLs you click. Not true! They’re a structured way to manage resources—like blog posts—using specific rules and HTTP methods, and we’ll use fetch to talk to them from the client.
Section 1: The Foundation of REST APIs
REST APIs are built on simplicity and a few core ideas that make them powerful. Let’s lay the groundwork with our blogging app in mind.
Key Principles
- Statelessness: Every request you send—like “Show me coding posts”—must include all the info the server needs. The server doesn’t store session data between requests, making it scalable.
- Example: You fetch posts with
fetch("https://myblog.com/api/posts?tag=coding")—the server starts fresh each time.
- Example: You fetch posts with
- Uniform Interface: REST uses standard HTTP methods—GET, POST, PUT, DELETE—that always do the same job, keeping things predictable.
- Example: GET fetches, POST creates—consistent every time!
- Resource-Based: Everything is a “resource” (posts, users, tags) with a unique URL.
- Example:
https://myblog.com/api/posts/1is post #1.
- Example:
- Client-Server Architecture: The client (your app) and server (data storage) are separate, talking only through the REST API.
- Example: Your app uses
fetchto ask for posts; the server doesn’t care what the app looks like.
- Example: Your app uses
Surprise Twist
You might think the server remembers your last request. Nope! Statelessness means it forgets after each one—surprising, but it’s why REST handles millions of users so well.
Section 2: Using REST APIs with Fetch – Hands-On Examples
Let’s put REST to work in our blogging app using the fetch API, a built-in JavaScript tool for making HTTP requests from the client. We’ll use TypeScript for type safety and walk through each HTTP method with complete, working examples.
Setting Up the Basics
First, here’s the Post interface we’ll use across all examples:
interface Post {
  id: number;
  title: string;
  tag: string;
  content?: string; // Optional for some operations
}
1. GET – Fetching Data
- Purpose: Retrieve posts from the server.
- Simple Example: Get all posts.
async function fetchAllPosts(): Promise<Post[]> {
  const response = await fetch("https://myblog.com/api/posts");
  if (!response.ok) throw new Error("Failed to fetch posts");
  const posts: Post[] = await response.json();
  return posts;
}

fetchAllPosts()
  .then(posts => console.log(posts))
  .catch(error => console.error(error));
- How It Works:
fetchsends a GET request to/api/posts.- The server responds with JSON, like
[{"id": 1, "title": "Learning REST", "tag": "coding"}].
- Advanced Example: Filter posts by tag.
async function fetchPostsByTag(tag: string): Promise<Post[]> {
  const response = await fetch(`https://myblog.com/api/posts?tag=${tag}`);
  if (!response.ok) throw new Error(`Failed to fetch ${tag} posts`);
  const posts: Post[] = await response.json();
  return posts;
}

fetchPostsByTag("coding")
  .then(posts => console.log(posts))
  .catch(error => console.error(error));
- How It Works: Adds a query parameter (
?tag=coding) to filter results.
2. POST – Creating Data
- Purpose: Add a new post as an admin.
async function createPost(newPost: Post): Promise<{ id: number; message: string }> {
  const response = await fetch("https://myblog.com/api/posts", {
    method: "POST",
    headers: { "Content-Type": "application/json" },
    body: JSON.stringify(newPost),
  });
  if (!response.ok) throw new Error("Failed to create post");
  const result = await response.json();
  return result;
}

const newPost: Post = { id: 0, title: "My API Journey", tag: "coding", content: "So cool!" };
createPost(newPost)
  .then(result => console.log(result)) // e.g., { id: 2, message: "Post created" }
  .catch(error => console.error(error));
- How It Works:
fetchsends a POST request with a JSON payload.- The server saves it and returns a new ID.
3. PUT – Updating Data
- Purpose: Update an existing post.
async function updatePost(postId: number, updatedPost: Post): Promise<{ message: string }> {
  const response = await fetch(`https://myblog.com/api/posts/${postId}`, {
    method: "PUT",
    headers: { "Content-Type": "application/json" },
    body: JSON.stringify(updatedPost),
  });
  if (!response.ok) throw new Error("Failed to update post");
  const result = await response.json();
  return result;
}

const updates: Partial<Post> = { title: "Learning REST – Updated" };
updatePost(1, updates)
  .then(result => console.log(result)) // e.g., { message: "Post updated" }
  .catch(error => console.error(error));
- How It Works:
PUTtargets a specific post (/posts/1) and sends updated fields.
4. PATCH – Updating Partial Data
- Purpose: Update portions of existing post. Allows to send less data.
async function updatePost(postId: number, updatedPost: Partial<Post>): Promise<{ message: string }> {
  const response = await fetch(`https://myblog.com/api/posts/${postId}`, {
    method: "PATCH",
    headers: { "Content-Type": "application/json" },
    body: JSON.stringify(updatedPost),
  });
  if (!response.ok) throw new Error("Failed to update post");
  const result = await response.json();
  return result;
}

const updates: Partial<Post> = { title: "Learning REST – Updated" };
updatePost(1, updates)
  .then(result => console.log(result)) // e.g., { message: "Post updated" }
  .catch(error => console.error(error));
- How It Works:
PATCHtargets a specific post (/posts/1) and sends updated fields.Partial<Post>allows flexibility—update only what’s needed.
4. DELETE – Removing Data
- Purpose: Delete a post.
async function deletePost(postId: number): Promise<{ message: string }> {
  const response = await fetch(`https://myblog.com/api/posts/${postId}`, {
    method: "DELETE",
  });
  if (!response.ok) throw new Error("Failed to delete post");
  const result = await response.json();
  return result;
}

deletePost(1)
  .then(result => console.log(result)) // e.g., { message: "Post deleted" }
  .catch(error => console.error(error));
- How It Works:
DELETEtargets a specific post and removes it.- The server confirms with a success message.
Expanding the Example
Imagine a user flow:
- Fetch all posts with
fetchAllPosts(). - Filter to “coding” posts with
fetchPostsByTag("coding"). - Add a new post with
createPost(). - Update its title with
updatePost(). - Delete an old draft with
deletePost(). Each step usesfetchto talk to the REST API, building a complete app experience.
Section 3: Best Practices for REST APIs with Fetch
Using REST APIs with fetch is powerful, but doing it right takes some tips. Let’s explore best practices and pitfalls, tied to our blogging app.
Best Practices
- Clear Endpoints
- Good:
fetch("/api/posts"),fetch("/api/posts/1") - Bad:
fetch("/api/getPosts")(GET is implied!) - Why: Keeps URLs resource-focused and intuitive.
- Good:
- Handle Errors
- Example: Check
response.okin everyfetchcall. - Why: Catches issues like 404 (post not found) early.
- Example: Check
- Use HTTP Status Codes
- Example: Expect 201 for POST success, 200 for GET.
- With Fetch:
if (response.status === 201) console.log("Created!"). - Why: Gives clear feedback on what happened.
- Keep Payloads Lean
- Good: Send only
{ title: "New Post" }in POST. - Bad: Sending the entire app state!
- Why: Avoids overfetching or slow requests.
- Good: Send only
Advantages
- Scalability: Statelessness lets any server handle
fetchrequests—great for our blog’s growth. - Interoperability:
fetchworks in browsers and Node.js (with polyfills), talking to any REST API. - Maintainability: Uniform methods make debugging
fetchcalls straightforward.
Disadvantages – And Fixes
- Overfetching/Underfetching:
- Problem:
fetch("/api/posts/1")might return too much or too little. - Fix: Use query params:
fetch("/api/posts/1?fields=title,tag").
- Problem:
- Stateless Overhead:
- Problem: Every
fetchrepeats auth tokens. - Fix: Add headers:
fetch(url, { headers: { Authorization: "Bearer token" } }).
- Problem: Every
- Multiple Requests:
- Problem: Need posts and comments? Two
fetchcalls. - Fix: Fetch combined data:
fetch("/api/posts/1?include=comments").
- Problem: Need posts and comments? Two
Advanced Fetch Example
Filter posts by tag and date:
async function fetchFilteredPosts(tag: string, date: string): Promise<Post[]> {
  const response = await fetch(`https://myblog.com/api/posts?tag=${tag}&date=${date}`);
  if (!response.ok) throw new Error("Failed to fetch filtered posts");
  const posts: Post[] = await response.json();
  return posts;
}

fetchFilteredPosts("coding", "2025-04")
  .then(posts => console.log(posts))
  .catch(error => console.error(error));
- Why It’s Great: Combines filters for efficiency, showing REST’s flexibility with
fetch.
Conclusion: Mastering REST APIs with Fetch
REST APIs are the glue that connects our blogging app’s client to its server, and fetch is your tool to make it happen. Here’s what to remember:
- Foundation: REST is stateless, resource-based, and uses HTTP methods—perfect for scalable apps.
- Usage: With
fetch, you can GET posts, POST new ones, PUT updates, and DELETE drafts—all from the client. - Best Practices: Write clear endpoints, handle errors, use status codes, and keep requests lean for smooth performance.
In our blogging app, fetch powers everything from browsing posts to managing them as an admin. As you build projects in this course, you’ll use REST APIs and fetch to create dynamic, real-world apps. Next time you load a webpage or save a post, think: “That’s REST and fetch at work!”—and now, you can make it work too!
Slides

Let's talk about the most common approach to creating APIs and the ways to communicate with them in NextJS.
A REST API—Representational State Transfer Application Programming Interface—lets apps talk to servers using HTTP protocol. It’s how your blogging app fetches posts or saves new ones!
Imagine tapping the coding tag on our blogging app to see tagged posts instantly. REST APIs make that happen by carrying your request to the server and bringing back the data.
You’ll use REST APIs in every web project—social media, shopping apps, even your coursework. Today, we’ll build and use them with Next.js and fetch.

Some think REST is just URLs. Nope! It’s a system for managing resources like blog posts, with rules we’ll explore.

REST is simple but powerful. Here’s what makes it tick:
Each API request stands alone. The server forgets you after replying, so you can not maintain a "conversation" with your API unless you provide all previous data. This is scalable and surprisingly powerful!
REST uses standard methods such as GET, POST, PUT, DELETE—they are same everywhere, so you always know what’s what.

Posts live at a URL such as /api/posts. Each has a unique address!
Unfortunately POST APIs do not pack type safety, but there are some code generation libraries that can help!
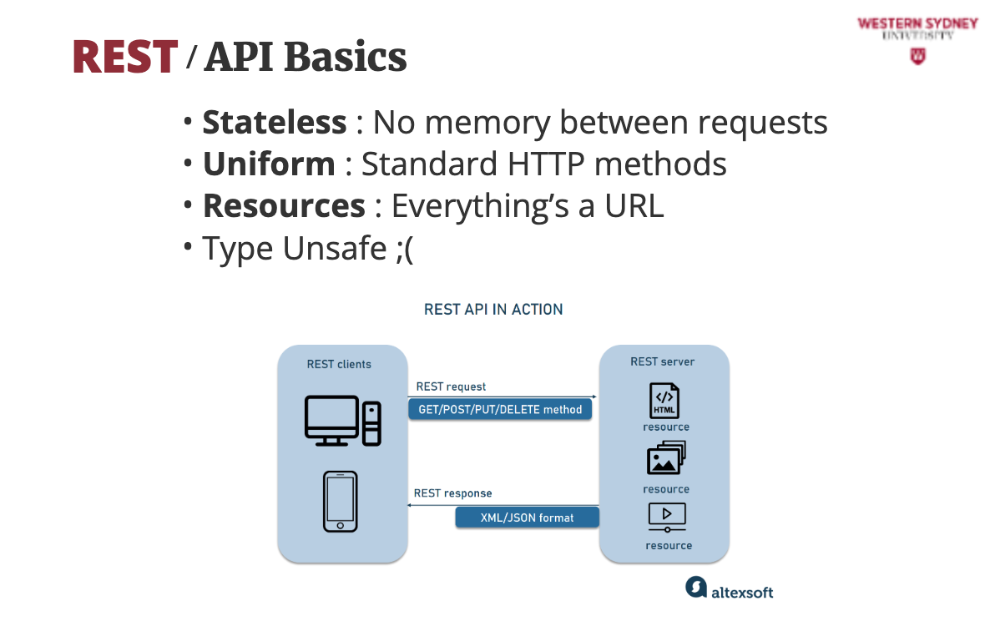
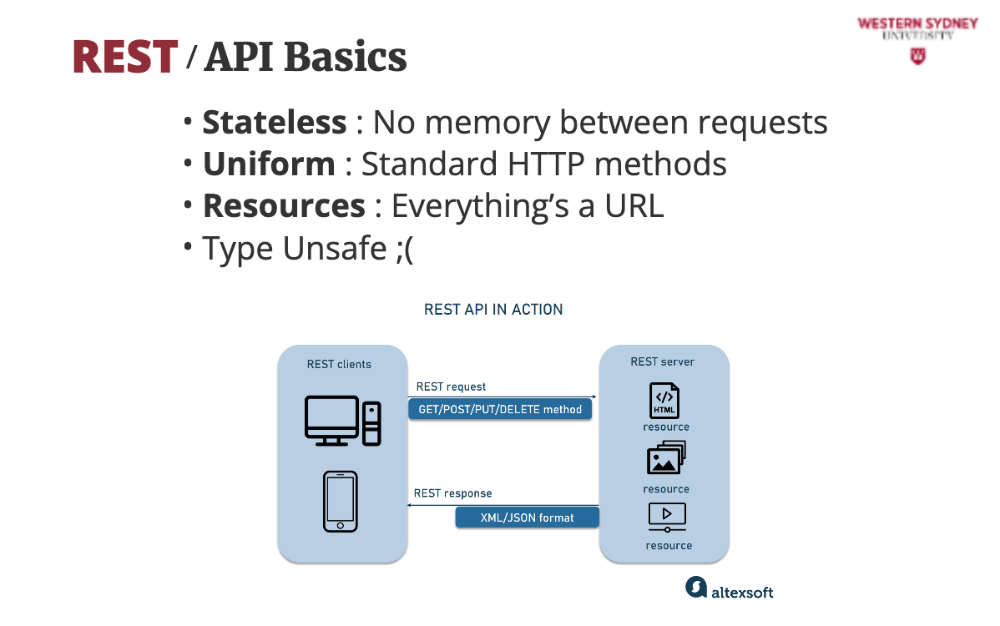
REST Requests follow a standard client-server architecture.
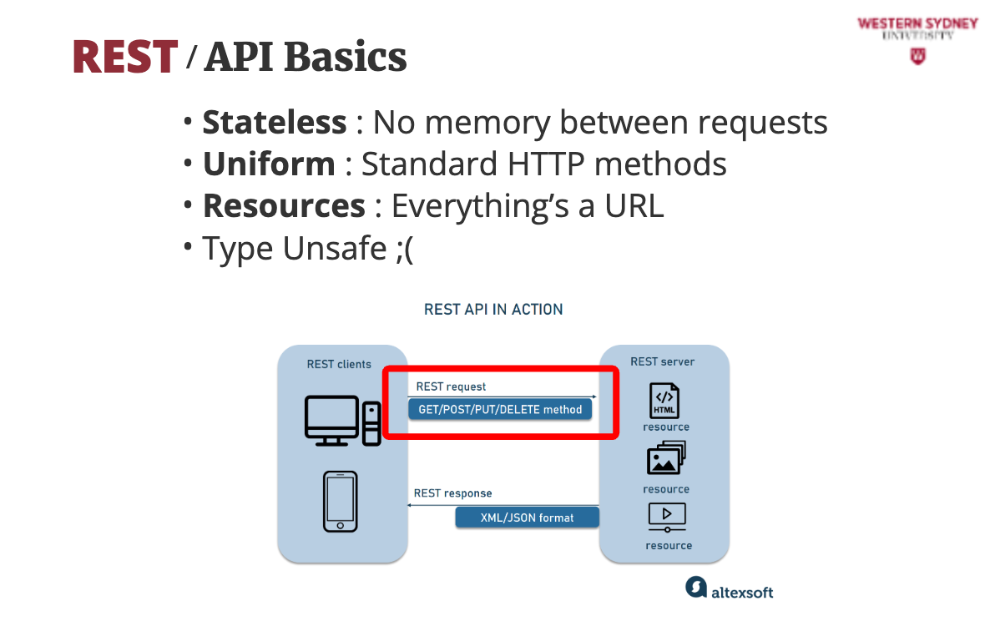
First, the client calls the REST Endpoint providing details of what data is requested in URL and message body.
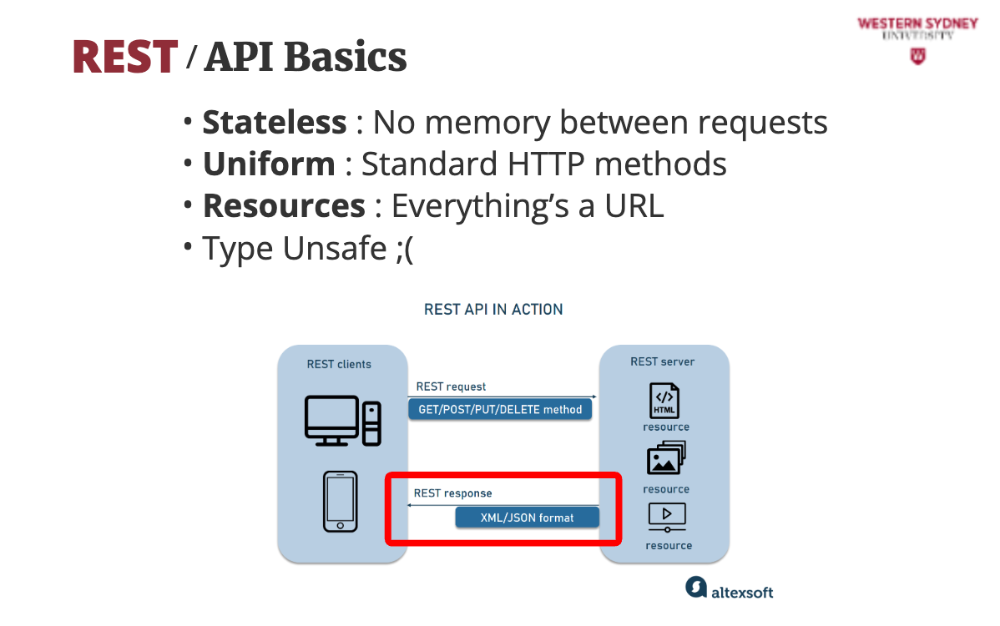
Server responds with the type of data the user has requested, for example plain text, html, json or xml.
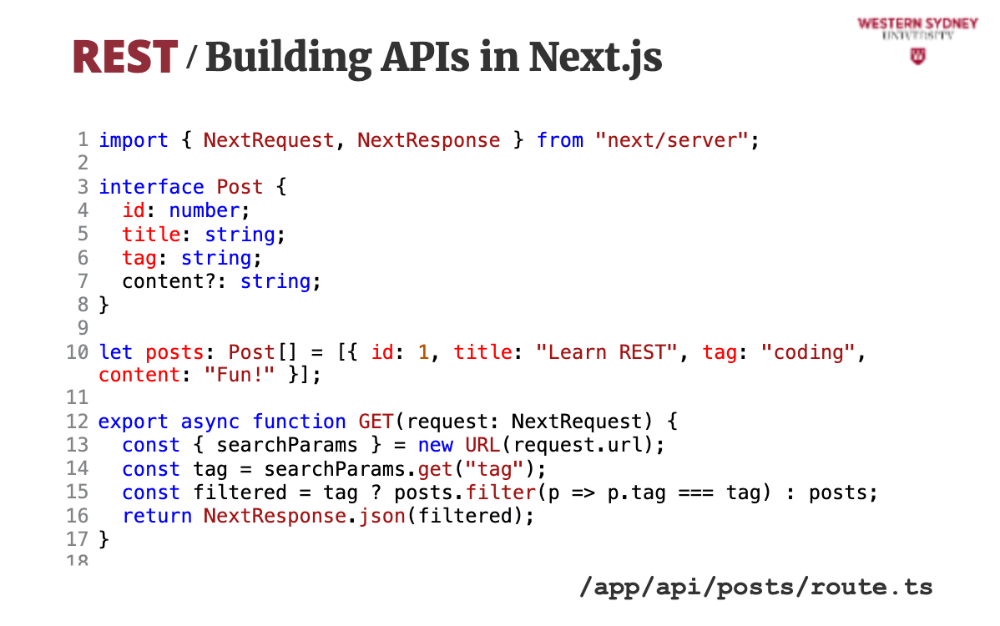
Next.js makes APIs easy with file-based routes. Put a route ts file in app/api/posts directory, and it’s an endpoint! This code sets up our blogging app’s API. We use GET to fetch posts—filtered by tag if you add ?tag=coding. The POST adds a new post with an ID.
With Next, you need to export a particular command from the route ts file. To handle GET and POST requests, you need to export functions with that name.
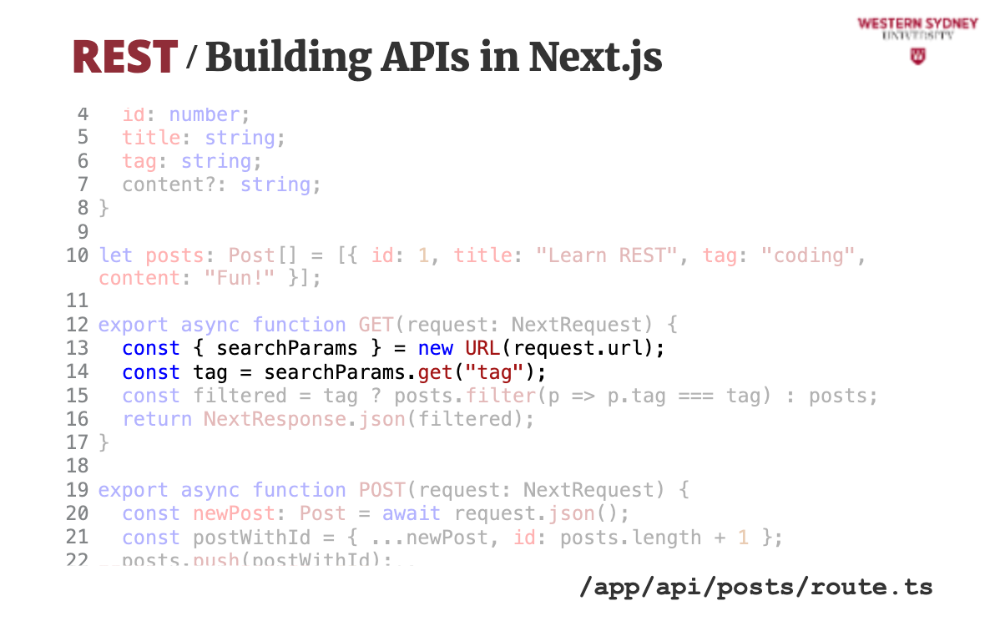
The GET request has no body, and you need to encode all the information in the URL. Think of GET as a simple route visit. Therefore, we parsew the URL of the request and extract the tag from the query string.
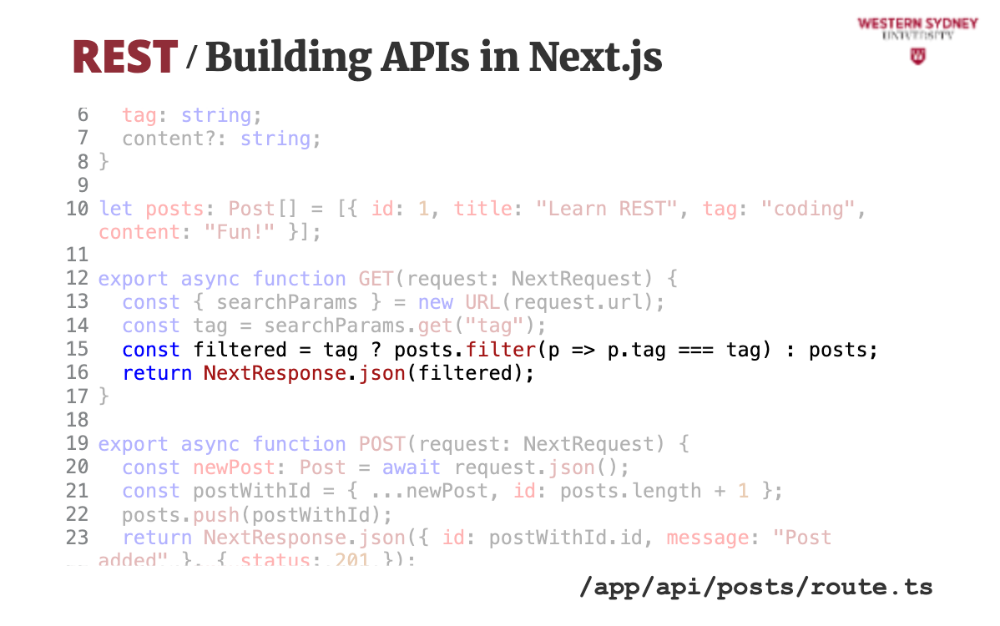
Next, we filter current tags based on the tag and return the json value. Using the NextResponse json function also correctly sets the response header type to application/json.
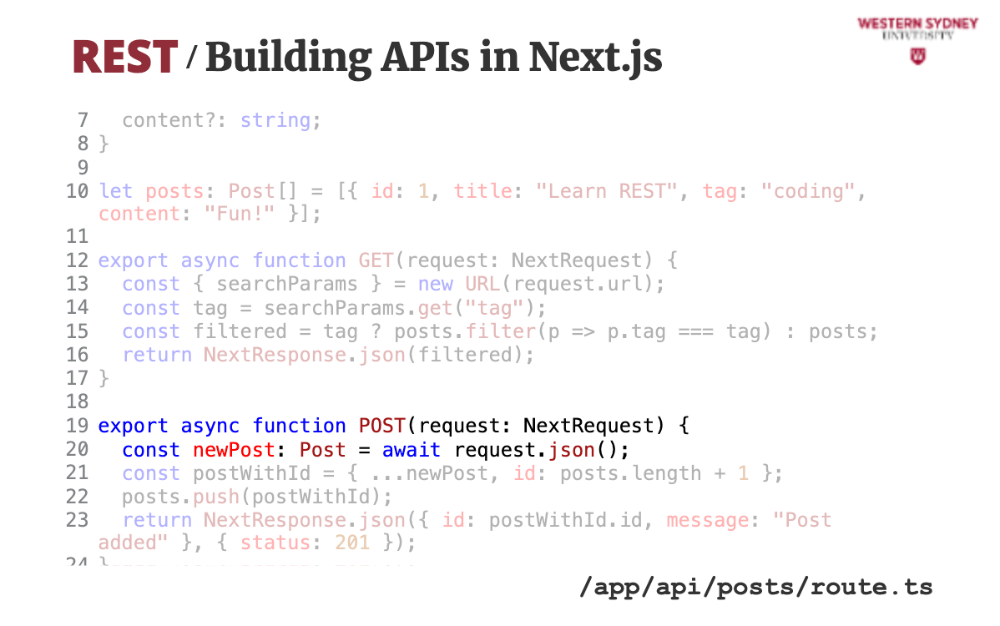
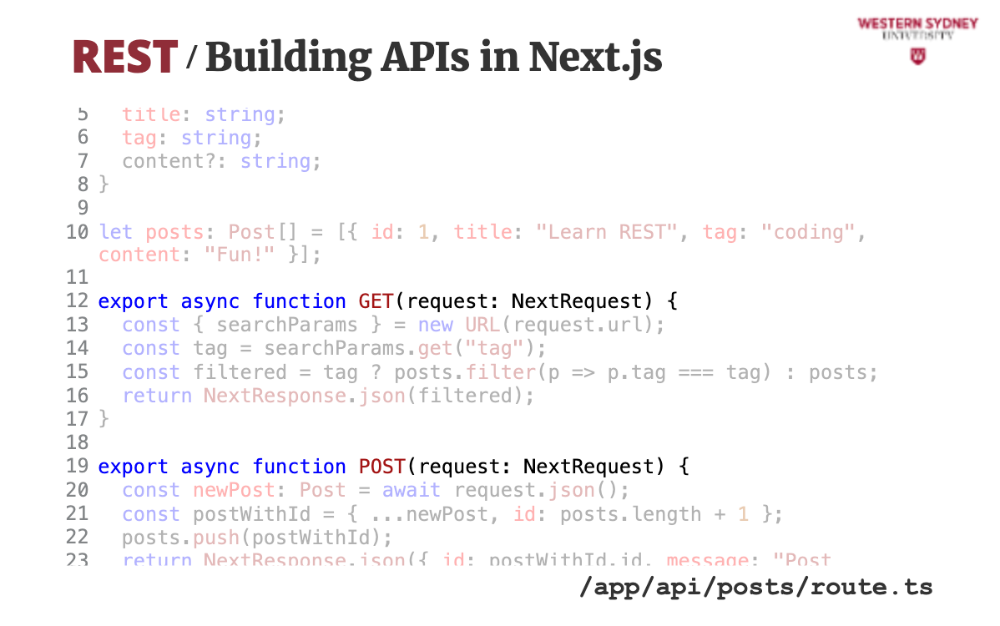
All other non-GET requests, such as POST, and DELETE, have a body. Again, Next comes with a handy helper that reads a json value from the request body, in this case extracting the post we would like to create.
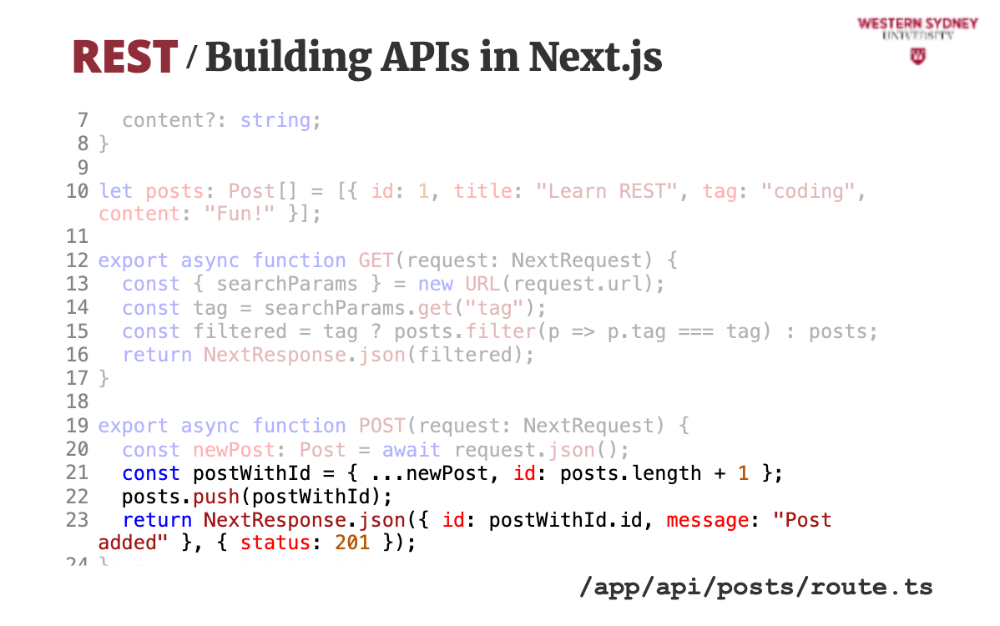
Last, we store the post from the body and return the ID on the new post in a JSON response.
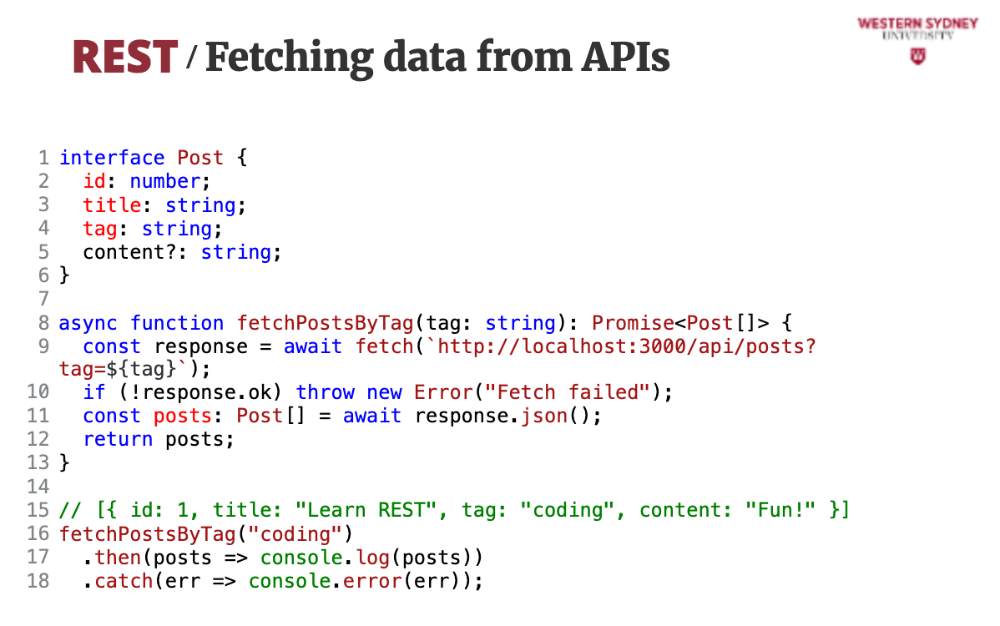
Now let’s use the fetch command to call our API from the client—like a user browsing posts. This example grabs posts tagged “coding” from our Next.js API.
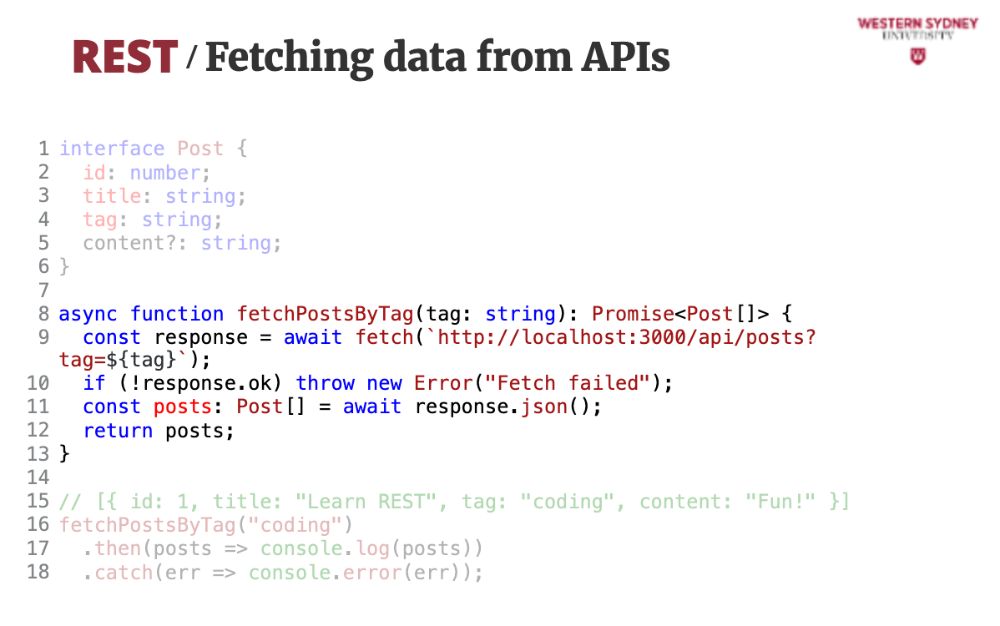
We create a helper function that fetches the data from api posts endpoint, providing the tag we would like to filter on.
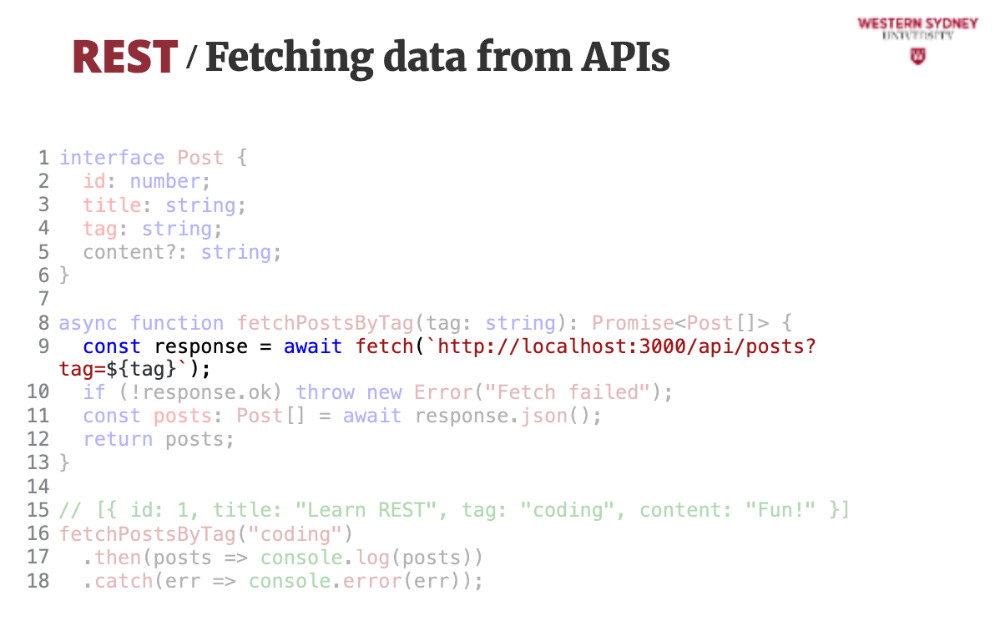
When using GET, all we need to provide is the url and potentially the headers we would like to include. In this case, we only specified the url and the tag in the query string.
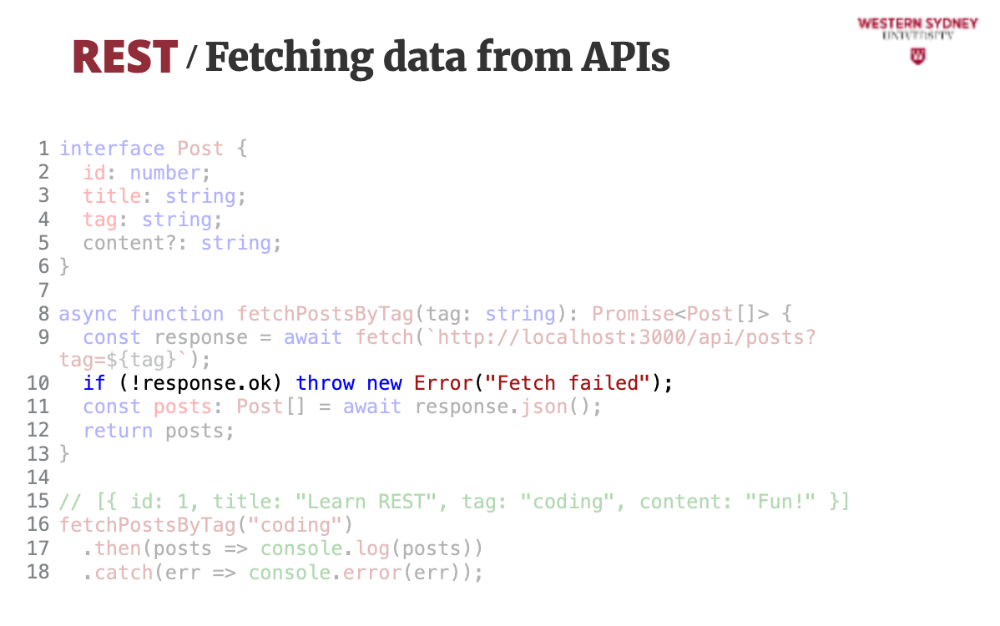
It is a good practice to check, whether the response is ok. The response is ok when the response code is in 200s, all other requests, such as 404 or 302 are deemed not ok.
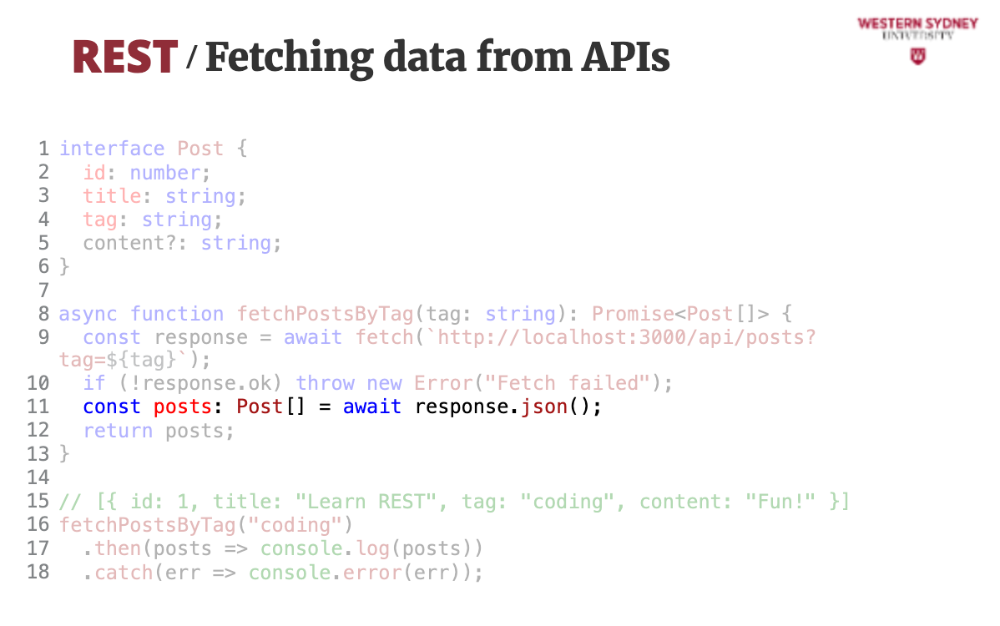
We can use the JSON function helper to parse the JSON response. This function is asynchronous.

Last, we return the returned posts.
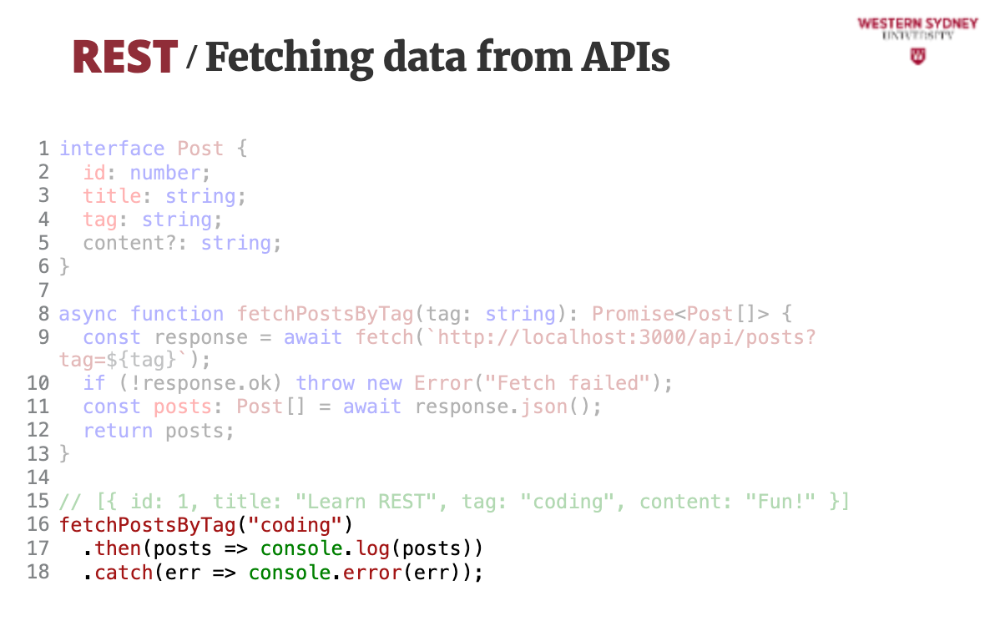
The helper function is asynchronous, so we need to use promises or async/await approach to read the filtered posts by tag.
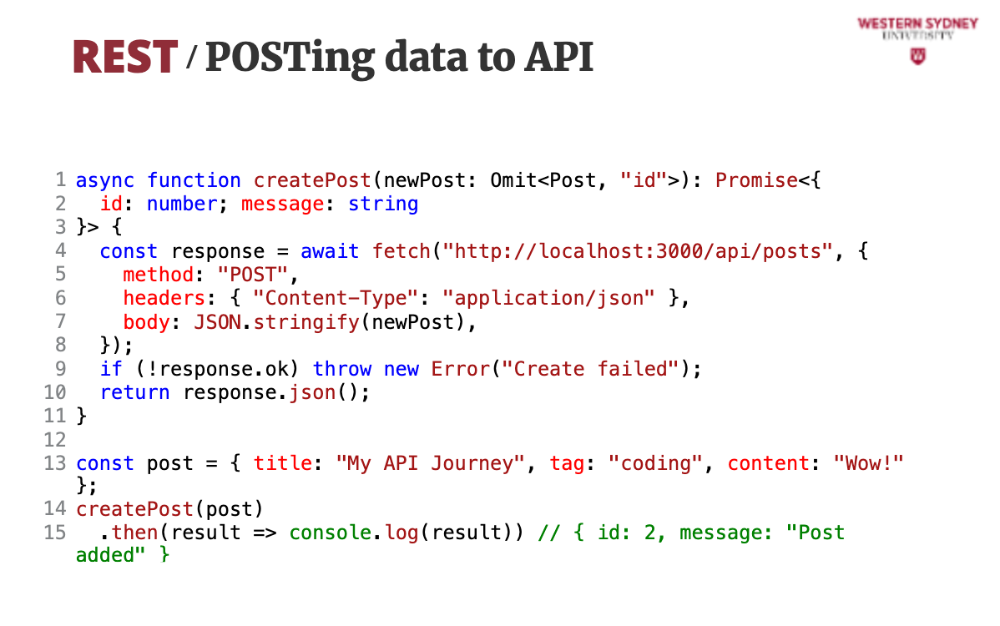
This example sends a new post to our API. The server adds an ID and confirms it.
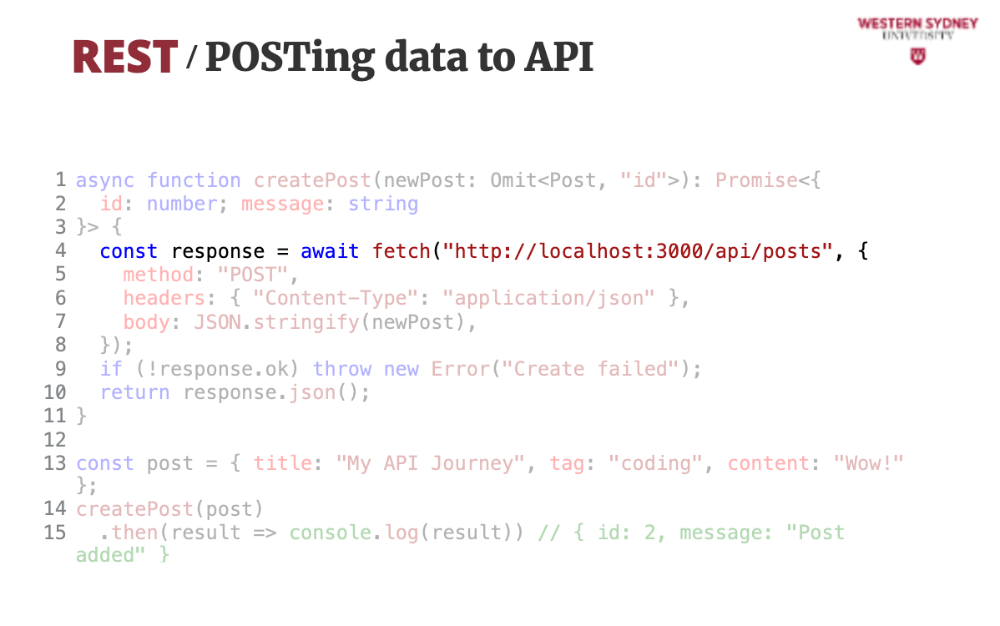
Just so you know, we are using the same API endpoint to save the new post as getting the list of posts.
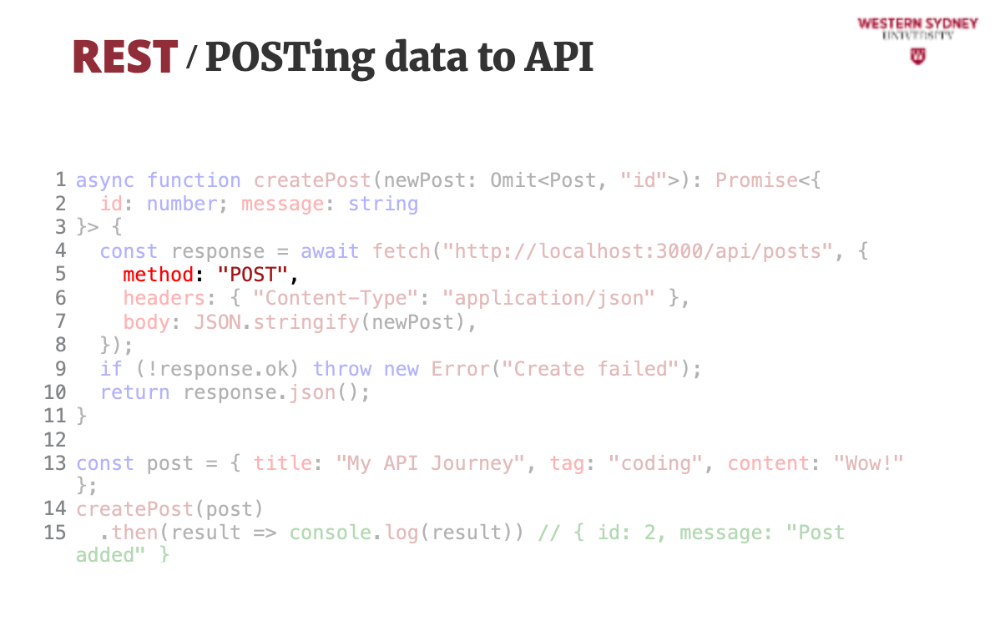
What changes, is that we specify the the method is POST. When method is not specified GET is assumed.
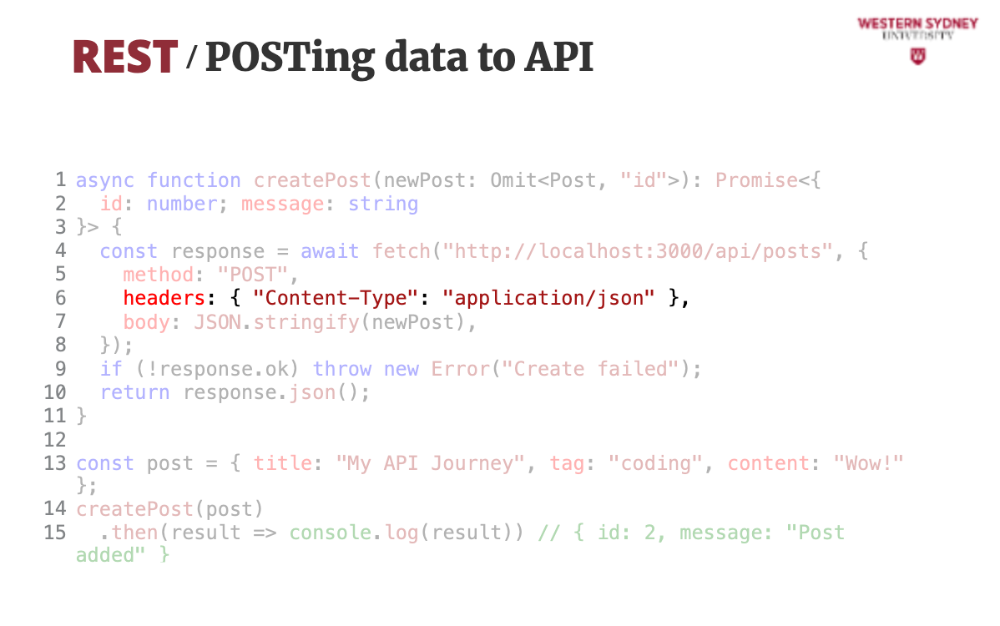
With POST requests, we need some basic headers, such as the type of content provided in the request's body. In our case, we will be sending JSON data,
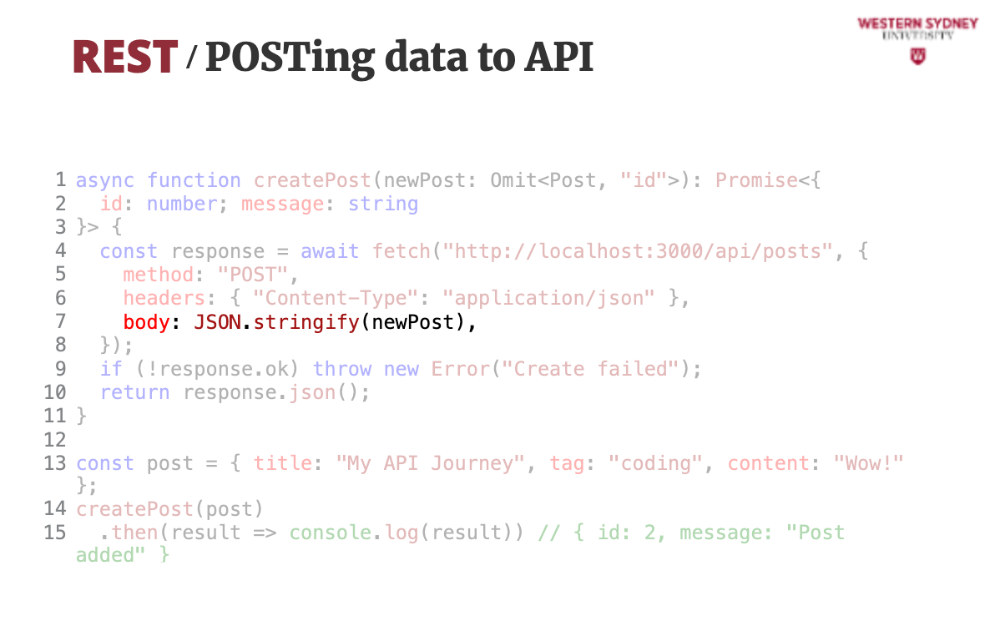
Once we set the correct type, we provide the request body, not that the body must always be serialised to string. No other format is accepted.
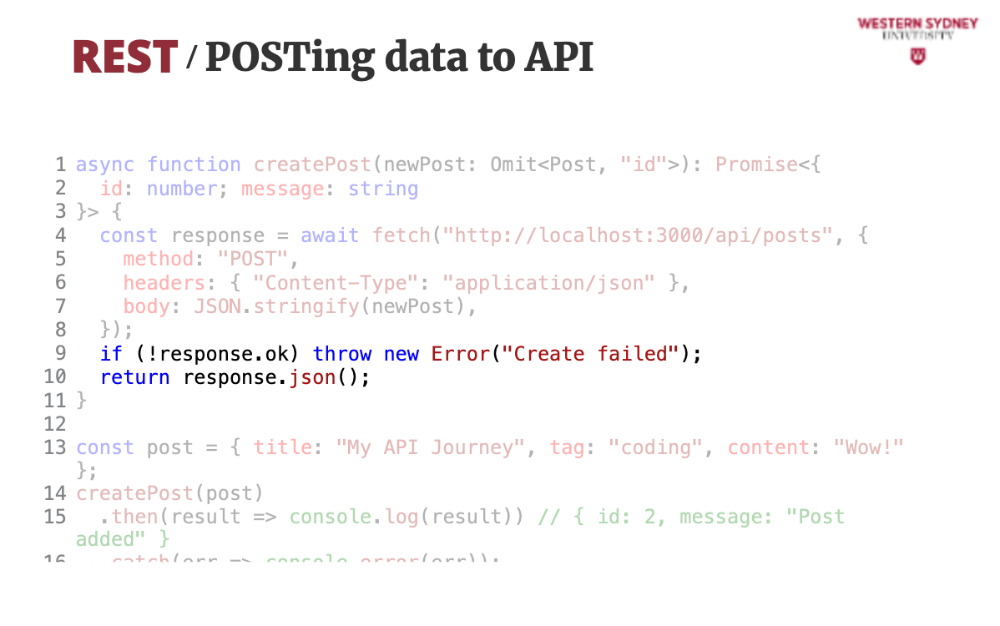
Once we receive the response, we read the JSON output and return it.
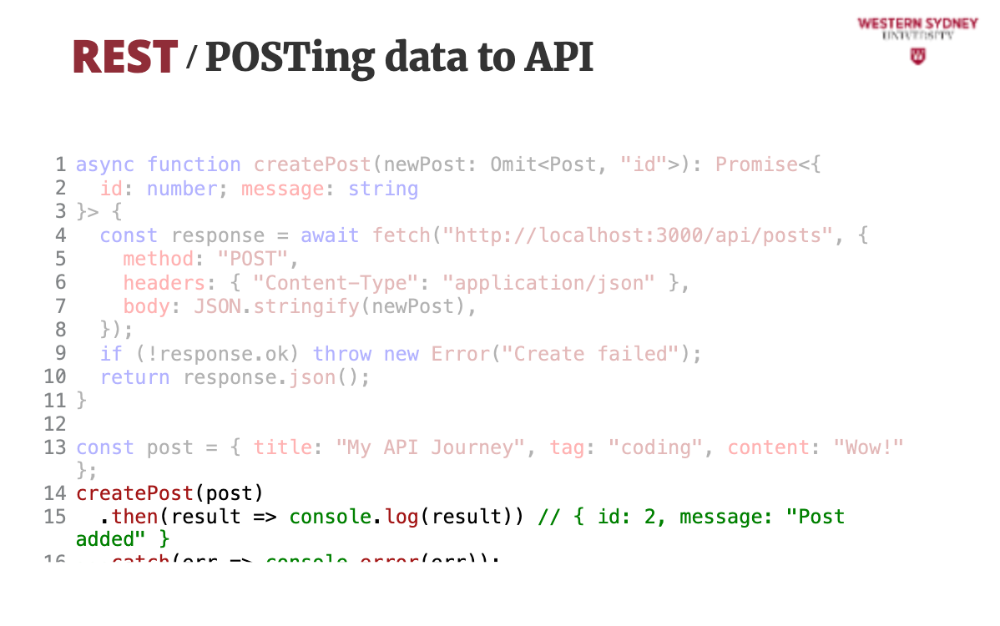
When we use this helper function, note how we expect that ID to be returned. Check out the previous slide to see where the value is coming from!

REST also lets us update (method PUT), patch (method PATCH), or delete (method DELETE) posts—here’s how.
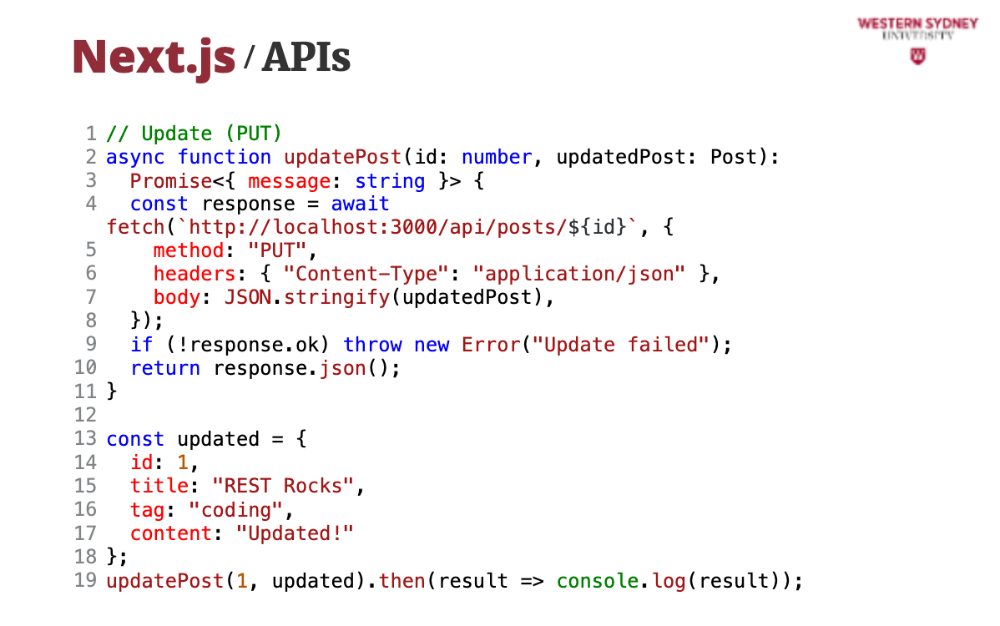
The UPDATE method updates the current post entirely. You should provide whole post to this method.
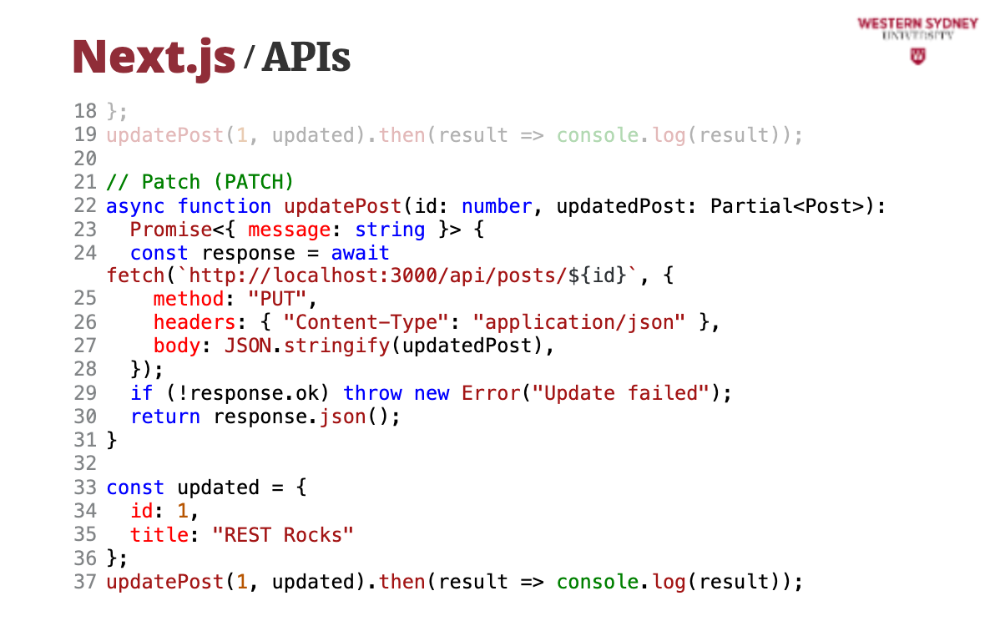
The PATCH method updates only portions of the current post, and you only need to provide the identifier of the post and the properties you would like to update
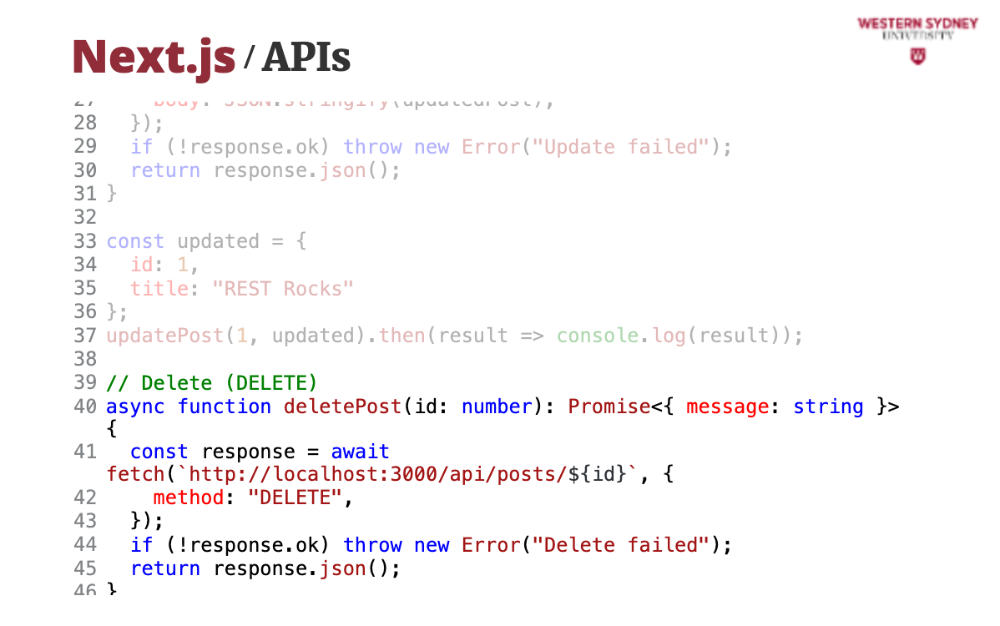
Last, the DELETE method deletes the current post.

Let's wrap up with some hints and best practices
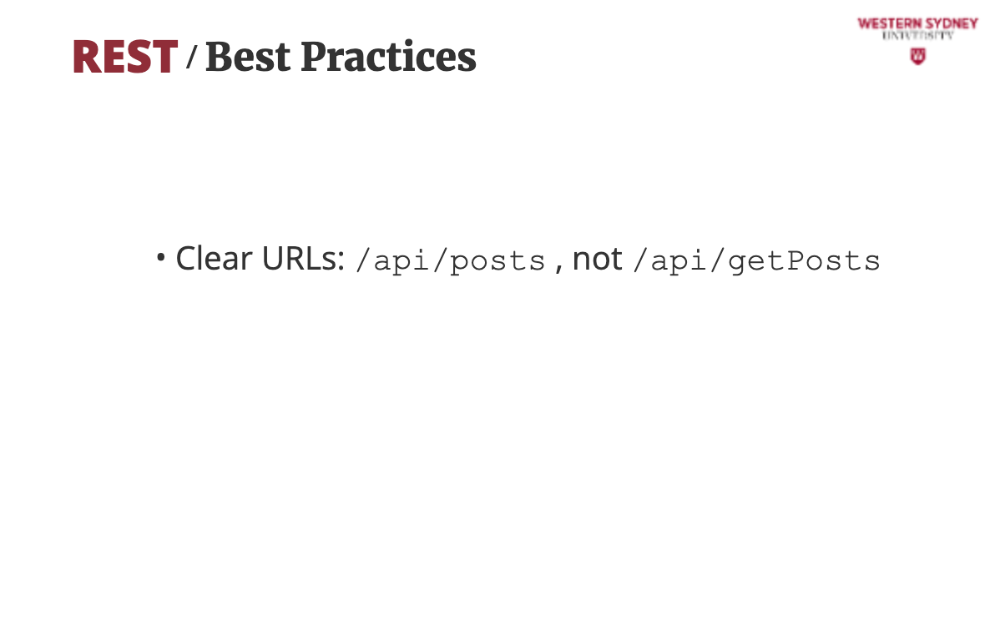
Keep your API resource-focused—REST loves simplicity. Do not name your API endpoints by what they do, but by what resources they provide!
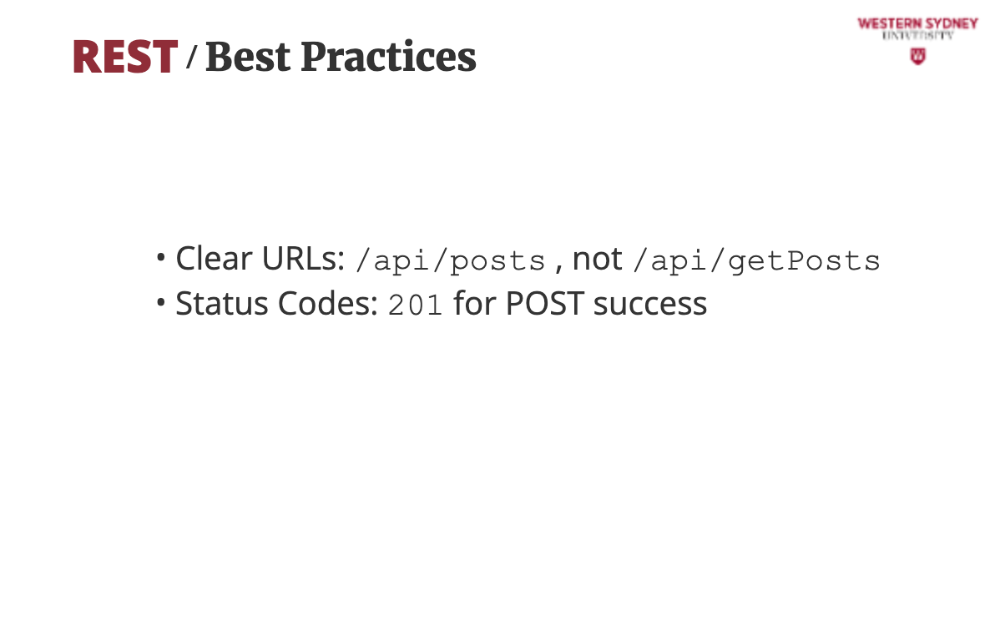
Make sure to return the correct codes! This tells fetch that your request worked—next. JS makes this easy.
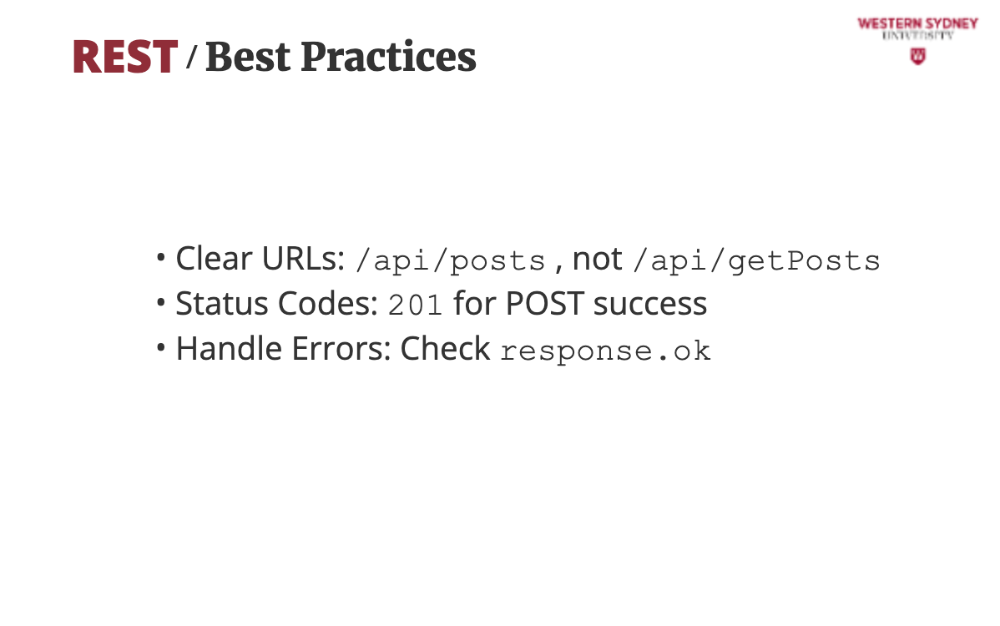
Always check if the response was ok on your client! It keeps your app from breaking when things go wrong.
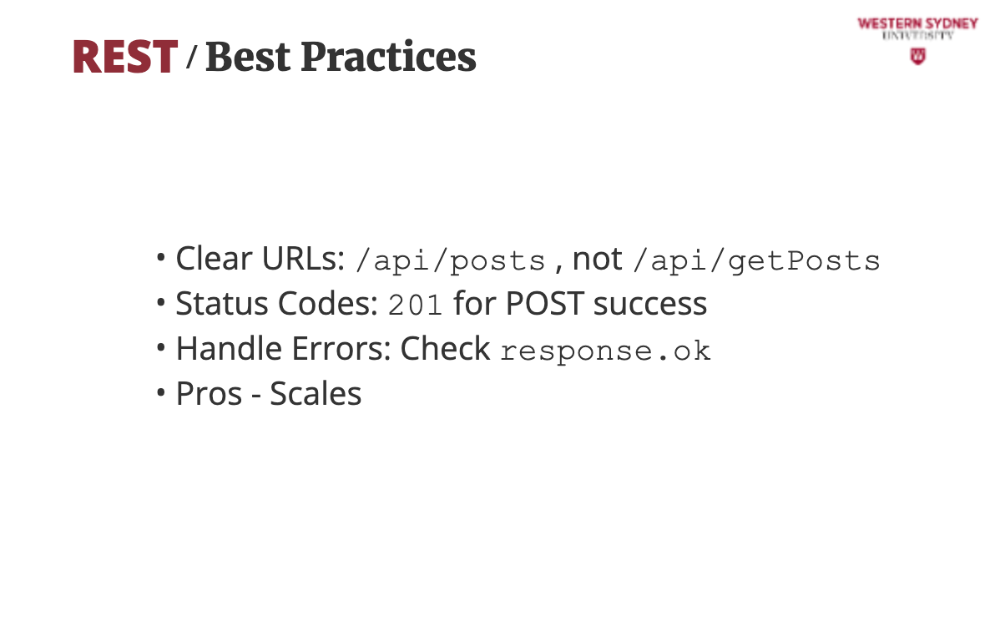
REST scales well, as it is stateless!
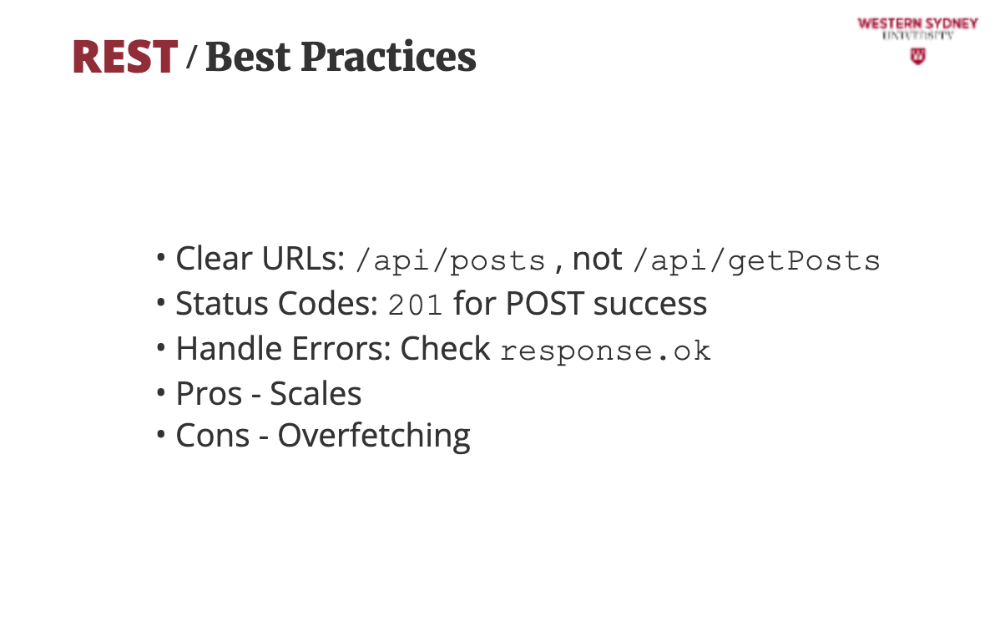
But watch for overfetching by always returning all the data, such as the whole post, even though you are only interested in post title. You can overfetching with query params like fields=title.