End to End testing with Playwright
End-to-End Testing with Playwright
In our blog application, users can read posts, filter them by tags or dates, and admins can create or edit posts. You’ve coded the frontend, backend, and everything works perfectly on your machine. But when you deploy it, users complain: posts don’t load, filters break, or the admin login fails. Frustrating, right? This is where End-to-End (E2E) testing with Playwright saves the day.
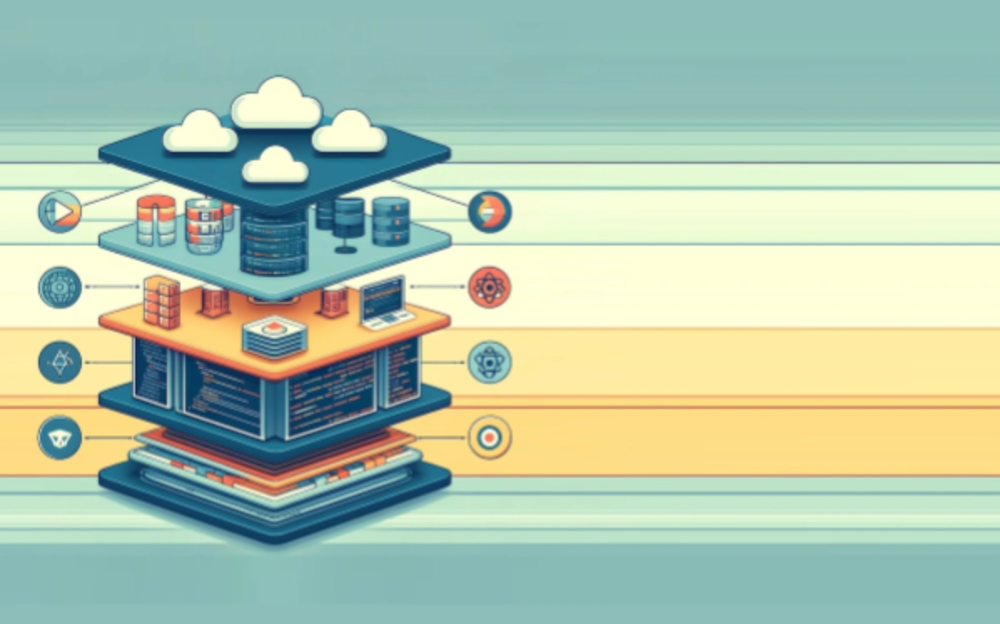
E2E testing mimics real user behaviour, checking that your entire app—frontend, backend, and database—works together seamlessly. Unlike unit tests (which test small pieces of code) or integration tests (which test connections between components), E2E tests ensure the user experience is flawless. For Blog app, E2E tests confirm that users can browse posts and admins can manage content without hiccups.
Why is this critical? Because users don’t care about your code—they care about a working app. A single bug, like a broken "Publish" button, could turn away readers or frustrate admins. Plus, manual testing (clicking through the app yourself) is slow and error-prone. Playwright automates this, catching issues before they reach production.
Common Misconception: Students often think, "I tested my app manually, so it’s fine." But manual testing misses edge cases—like what happens when a user clicks "Filter by Tag" 10 times rapidly or logs in with a slow network? Playwright tests these scenarios reliably. Another misconception: "Unit tests are enough." Nope! Unit tests won’t catch UI bugs or database connection failures. Let’s dive into Playwright to see how it transforms Blog app’s reliability.
Setting Up Playwright
Let’s get Playwright running for Blog app. Playwright is a testing tool by Microsoft that supports Chromium, Firefox, and WebKit browsers, letting you test your app across different environments.
- Install Playwright:
In your Blog app project (assuming a Node.js setup), run:
npm init playwright@latest- This installs Playwright and sets up a
playwright.config.tsfile. - Choose TypeScript for configuration (it’s stricter and helps catch errors).
- Configure Playwright:
Edit
playwright.config.tsto point to Blog app’s URL (e.g.,http://localhost:3000for development):import { defineConfig } from '@playwright/test'; export default defineConfig({ webServer: { command: 'npm run start', // Starts Blog app url: 'http://localhost:3000', }, use: { baseURL: 'http://localhost:3000', headless: true, // Runs tests without opening browser windows }, });
- Write Your First Test:
Create a file
tests/homepage.spec.ts:import { test, expect } from '@playwright/test'; test('Homepage loads posts', async ({ page }) => { await page.goto('/'); await expect(page.locator('h1')).toHaveText('Welcome to Blog app'); await expect(page.locator('.post-list')).toBeVisible(); });Run tests with:
npx playwright test
This test checks if Blog app’s homepage loads and displays posts. If the <h1> tag or post list is missing, the test fails—catching UI bugs early.
What Can You Test with Playwright?
Playwright’s strength is its flexibility. For Blog app, here are key scenarios to test:
- Simple Example: Page Navigation:
Test if users can navigate to the "Filter by Tag" page:
test('Navigate to tag filter', async ({ page }) => { await page.goto('/'); await page.click('a[href="/tags"]'); await expect(page).toHaveURL('/tags'); await expect(page.locator('.tag-list')).toBeVisible(); });- This ensures routing works and the tag filter UI loads.
- Advanced Example: Filtering Posts:
Test if filtering posts by a tag (e.g., "Tech") shows only relevant posts:
test('Filter posts by tag', async ({ page }) => { await page.goto('/tags'); await page.selectOption('select#tag-filter', 'Tech'); const posts = page.locator('.post-list .post'); await expect(posts).toHaveCount(2); // Assume 2 tech posts for (const post of await posts.all()) { await expect(post.locator('.tag')).toHaveText('Tech'); } });- This checks both the filter functionality and the correctness of displayed posts.
Playwright can also test:
- Form submissions (e.g., creating a post as an admin).
- API responses (e.g., does the backend return correct post data?).
- Visual regressions (e.g., does the UI look broken?).
- Accessibility (e.g., is Blog app usable with screen readers?).
Why It Matters: Testing these scenarios ensures Blog app works for all users—whether they’re casually browsing or managing content.
Using Playwright’s New Locators
When testing your app, you need to interact with elements like buttons or inputs. Playwright offers a generic locator method, but newer methods like getByText, getByLabel, getByTestId, getByRole, and getByPlaceholder are often better. Let’s explore why using BlogSphere’s admin page.
- Generic
<strong>locator</strong>:Uses CSS or XPath, e.g.:
await page.locator('button#publish').click();- Works but is brittle—CSS selectors break if the UI changes (e.g.,
#publishbecomes.publish-btn).
- New Locators:
<strong>getByText</strong>: Finds elements by visible text.await page.getByText('Publish Post').click();- Tests if the "Publish Post" button is clickable, mimicking how users find it.
<strong>getByLabel</strong>: Targets form fields by their label.await page.getByLabel('Post Title').fill('My First Post');- Ensures the title input is accessible and usable.
<strong>getByTestId</strong>: Uses customdata-testidattributes.await page.getByTestId('post-content').fill('Hello, world!');- Ideal for dynamic elements lacking consistent text or labels.
<strong>getByRole</strong>: Finds elements by ARIA role (e.g., button, link).await page.getByRole('button', { name: 'Publish' }).click();- Tests accessibility compliance, ensuring buttons are keyboard-navigable.
<strong>getByPlaceholder</strong>: Targets inputs by placeholder text.await page.getByPlaceholder('Enter post title').fill('My First Post');
- Why New Locators Are Better:
- User-Centric: They mimic how users interact (by text or role), not how developers code (CSS).
- Resilient: Less likely to break when the UI changes (e.g., text stays even if IDs change).
- Accessible:
getByRoleandgetByLabelensure BlogSphere works for screen readers. - Clearer: Code reads like a user story, e.g., “click the Publish button” vs. “click
#publish.”
- When to Use Them:
<strong>getByText</strong>: For buttons or links with stable text, like "Publish Post."<strong>getByLabel</strong>: For form fields tied to labels, ensuring accessibility.<strong>getByTestId</strong>: For dynamic or non-text elements, like a post editor (adddata-testidin your HTML).<strong>getByRole</strong>: For interactive elements (buttons, links) to test functionality and accessibility.<strong>getByPlaceholder</strong>: For inputs with clear placeholders.- Fallback to
<strong>locator</strong>: Only when no new locator fits (e.g., complex CSS or legacy code).
- BlogSphere Example:
Test creating a post:
test('Create a post', async ({ page }) => { await page.goto('/admin'); await page.getByLabel('Post Title').fill('My First Post'); await page.getByTestId('post-content').fill('Hello, world!'); await page.getByRole('button', { name: 'Publish' }).click(); await expect(page.getByText('Post published!')).toBeVisible(); });- This test is readable, robust, and checks accessibility.
Advantages: New locators make tests maintainable and align with user behavior. Disadvantages: getByTestId requires adding attributes to your code, and getByText can fail if text is dynamic (e.g., translations). Choose based on your app’s structure.
Handling Interactions
Blog app has dynamic features like clicking buttons, filling forms, and handling modals. Playwright makes testing these interactions straightforward.
- Clicking and Waiting:
When an admin clicks "Publish" on a new post, the app sends an API request and shows a success message. Test it:
test('Publish a post', async ({ page }) => { await page.goto('/admin'); await page.getByLabel('Title').fill('My First Post'); await page.getByLabel('Content').fill('Hello, world!'); await page.getByText('Publish').click(); await expect(page.getByText('Post published!')).toExist(); });- Playwright waits for elements to appear, avoiding flaky tests.
- Handling Modals:
If an admin tries to delete a post, a confirmation modal appears. Test it:
test('Delete a post', async ({ page }) => {
  await page.goto('/admin');
  await page.click('button.delete-post');
  const modal = page.locator('.modal');
  await expect(modal).toBeVisible();
  await modal.click('button#confirm-delete');
  await expect(page.locator('.post-list')).toHaveCount(0); // Post gone
});
- Complex Interactions:
Test dragging and dropping tags to reorder them in the admin dashboard:
test('Reorder tags', async ({ page }) => {
  await page.goto('/admin/tags');
  const tag1 = page.locator('.tag').nth(0);
  const tag2 = page.locator('.tag').nth(1);
  await tag1.dragTo(tag2);
  await expect(tag1).toHaveAttribute('data-order', '2');
  await expect(tag2).toHaveAttribute('data-order', '1');
});
Advantages: Playwright’s interaction APIs are intuitive and mimic real user actions. Disadvantages: Overusing complex interactions can slow tests. Focus on critical user flows.
Handling Authentication (Cookie-Based)
Blog app’s admin features require login. Testing authenticated flows manually is tedious, so let’s automate it with Playwright using cookies.
- Set Up Authentication:
Log in once and save cookies:
test('Save admin login state', async ({ page }) => {
  await page.goto('/login');
  await page.fill('input#username', 'admin');
  await page.fill('input#password', 'secret123');
  await page.click('button#login');
  await expect(page).toHaveURL('/admin');
  await page.context().storageState({ path: 'admin-auth.json' });
});
- Reuse Cookies:
Use the saved state in other tests:
test.use({ storageState: 'admin-auth.json' });

test('Access admin dashboard', async ({ page }) => {
  await page.goto('/admin');
  await expect(page.locator('h1')).toHaveText('Admin Dashboard');
});
- Why Cookies?:
- Cookies are faster than logging in for every test.
- They mimic how real users stay logged in.
- Pitfall: Cookies expire. Refresh the
admin-auth.jsonfile periodically.
Alternative: For APIs with tokens (e.g., JWT), set headers in Playwright:
await page.setExtraHTTPHeaders({ Authorization: `Bearer ${token}` });Playwright UI
Playwright’s Test Runner UI is a game-changer for debugging Blog app tests:
- Run
npx playwright test --uito open a browser-based interface. - Features:
- Test Explorer: See all tests and filter by name.
- Live Debugging: Watch tests run in real-time with browser playback.
- Error Details: View screenshots, videos, and stack traces for failures.
- Example: If the "Publish a post" test fails, the UI shows a screenshot of the missing success message, helping you spot UI bugs.
Advantage: Makes debugging visual and interactive. Disadvantage: Can be overkill for small projects. Use it when tests get complex.
Playwright with CI/CD
To ensure Blog app is production-ready, integrate Playwright into your CI/CD pipeline (e.g., GitHub Actions).
GitHub Actions Example:
name: Run Playwright Tests on: [push] jobs: test: runs-on: ubuntu-latest steps: - uses: actions/checkout@v3 - uses: actions/setup-node@v3 with: { node-version: '18' } - run: npm install - run: npx playwright install --with-deps - run: npx playwright test- What It Does:
- Runs tests on every code push.
- Installs browsers (Chromium, etc.) for Playwright.
- Fails the pipeline if tests fail, preventing buggy deployments.
- Tips:
- Use
--headlessin CI for speed. Store test reports as artifacts:
- uses: actions/upload-artifact@v3
  with:
    name: test-results
    path: playwright-report/
- Use
Advantages: Catches bugs before they hit production. Disadvantages: CI setup takes time, and flaky tests can block deployments.
Playwright Extension for VS Code
The Playwright VS Code extension supercharges your testing workflow:
- Features:
- Run tests directly from the editor.
Generate test code with the "Codegen" tool:
npx playwright codegen http://localhost:3000- Click through Blog app, and Playwright writes test code for you.
- Debug tests with breakpoints and inspect browser states.
- Example: Use Codegen to create a test for filtering posts, then tweak it manually.
Why Use It?: Saves time writing boilerplate and makes testing feel like coding.
Bonus: Parallel Testing and Sharding
Blog app might have dozens of tests, slowing down your suite. Playwright supports:
- Parallel Testing:
Run tests concurrently by default. Configure in
playwright.config.ts:export default defineConfig({ workers: 4, // Run 4 tests at once });
- Sharding:
Split tests across CI machines:
npx playwright test --shard=1/3 # Run 1st of 3 shards- Ideal for large suites.
Advantage: Speeds up feedback. Disadvantage: Parallel tests can conflict if they share resources (e.g., a test database). Use separate environments.
Conclusion
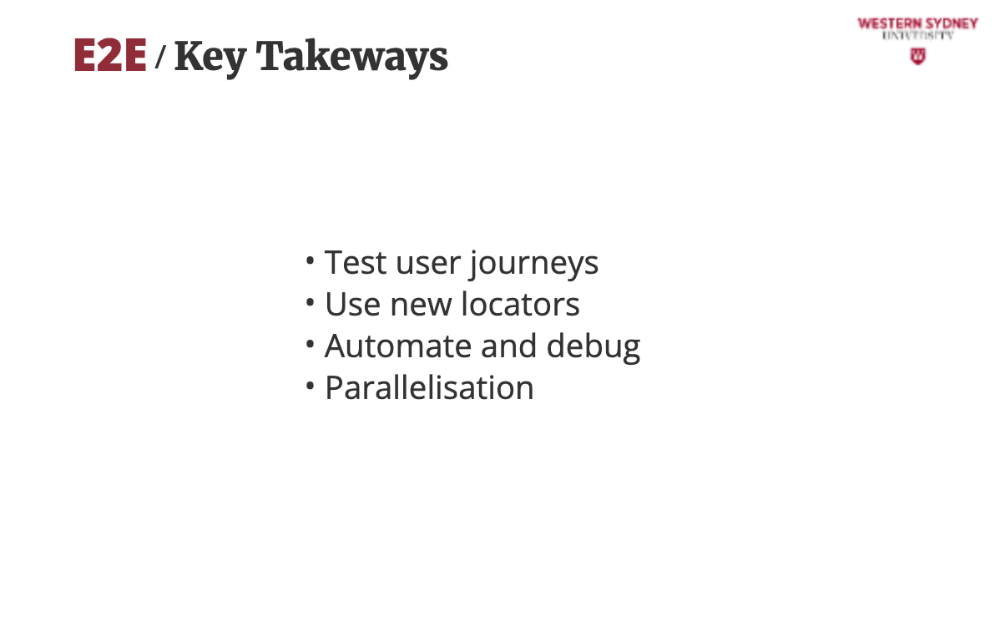
Key Takeaways:
- E2E testing with Playwright ensures Blog app works for users and admins.
- Set up Playwright with TypeScript for robust tests.
- Test critical flows: navigation, forms, authentication, and interactions.
- Use cookies for fast authentication testing.
- Leverage Playwright’s UI, CI/CD integration, and VS Code extension for efficiency.
- Parallelize tests to scale your suite.
Best Practices:
- Write clear, focused tests for key user journeys.
- Use
expectassertions to verify outcomes. - Save authentication states to avoid repetitive logins.
- Debug with the UI or VS Code extension before fixing failures.
Common Pitfalls:
- Don’t test everything—focus on what users do most.
- Avoid flaky tests by waiting for elements explicitly (e.g.,
await page.waitForSelector()). - Refresh cookie states if tests fail due to expired sessions.
By mastering Playwright, you’ll build a bulletproof Blog app that users love. Now, go write some tests and catch those bugs before they catch you!
Slides
Picture launching your blogging app, only to find broken filters or a faulty admin login. Frustrating, right? End-to-End testing with Playwright saves the day, ensuring every click works perfectly. Let’s dive in and learn how to make your app flawless for users and admins alike!
E2E testing catches bugs by simulating real user actions in a real browser environment across the whole app. They differ to unit and integration tests. Unit tests check only small code pieces, like a function. E2E tests verify the whole app—UI, backend, database—works together, ensuring user experience is seamless.
There are quite a few options when it comes to choosing your End-to-end testing framework, such as Cypress or Pupeteer. In this course we will consider Playwright as we love its speed, clean API and ease of use.
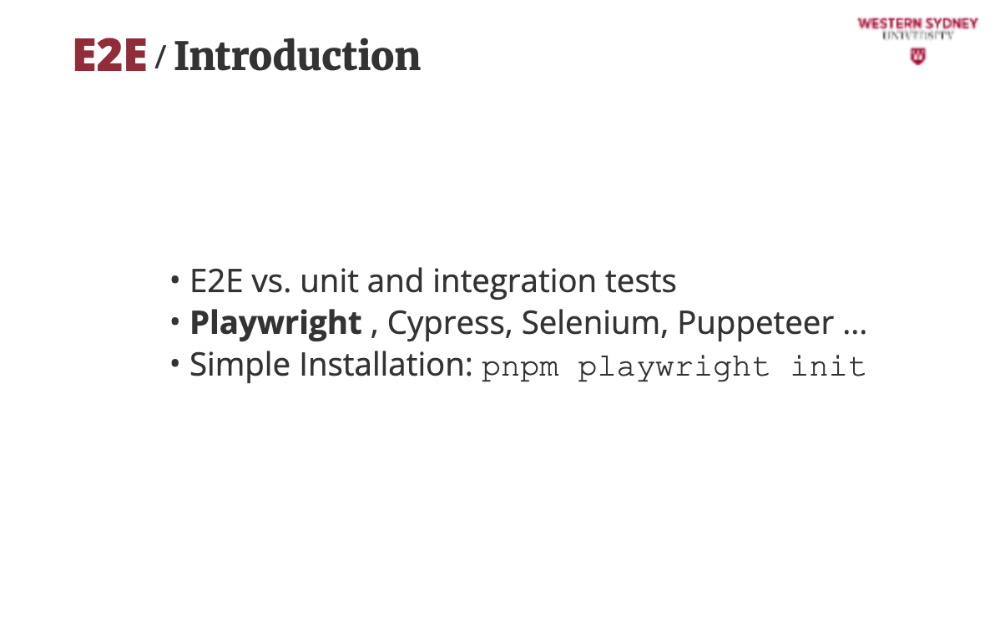
The lecture description walks you through installing Playwright for your app. You should also check out Playwrights officical documentation for all options. But, it’s a quick pnpm command to get started with TypeScript for robust tests.
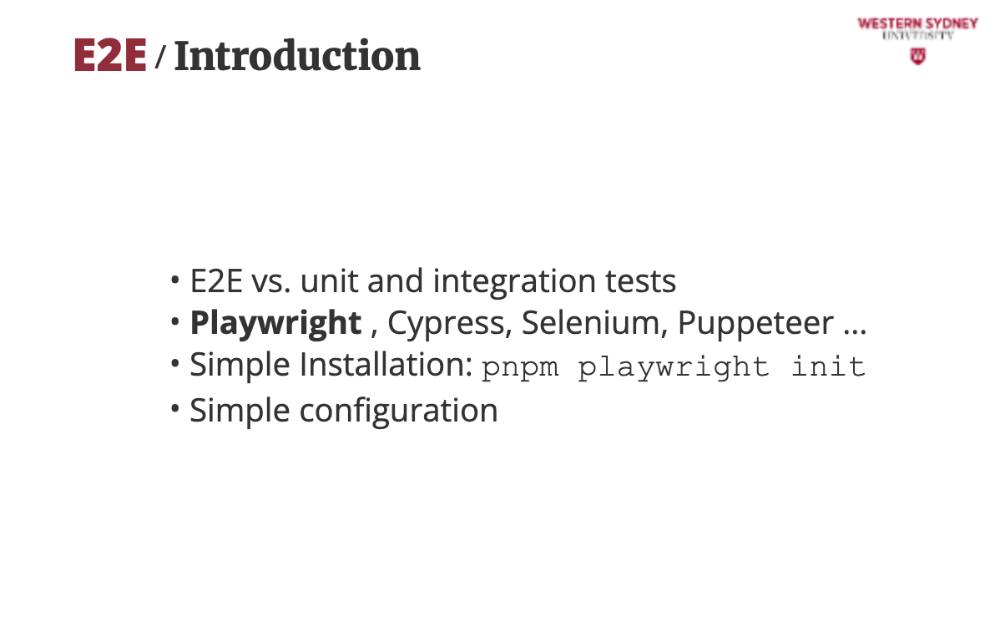
In the lecture, we configure Playwright to point at the app's main URL, like localhost:3000, and run tests in Chrome and Firefox.
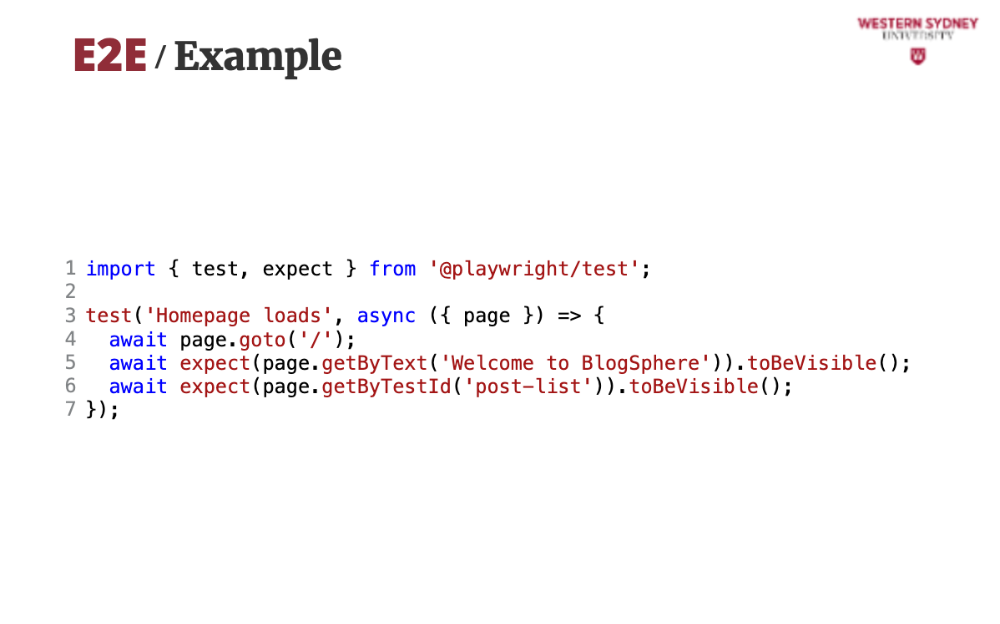
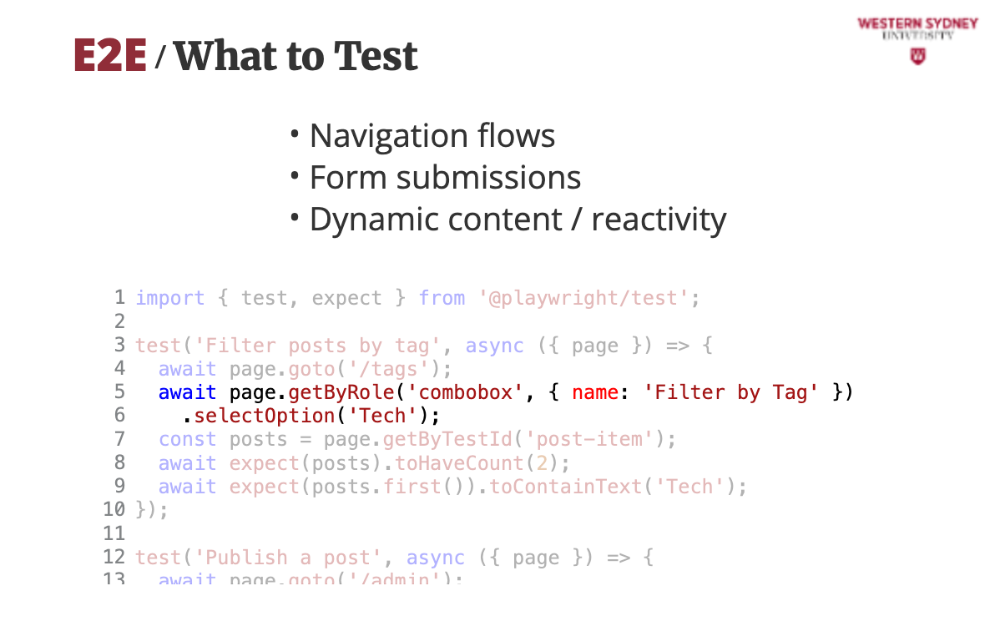
Let’s test if app's homepage loads correctly, ensuring users see the welcome message and a list of posts.
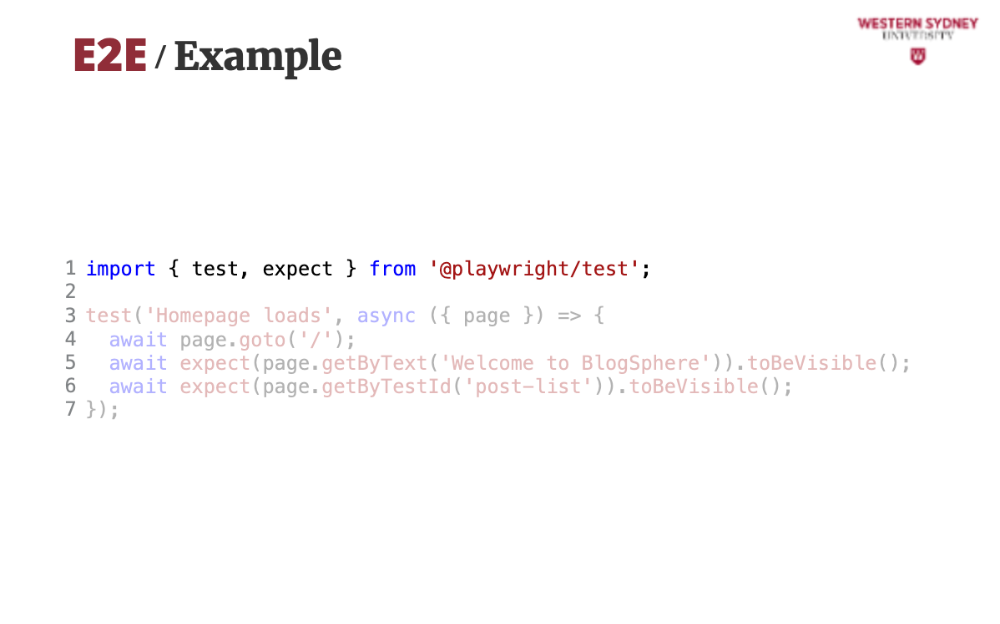
First, we import the necessary test functions and assertion library.
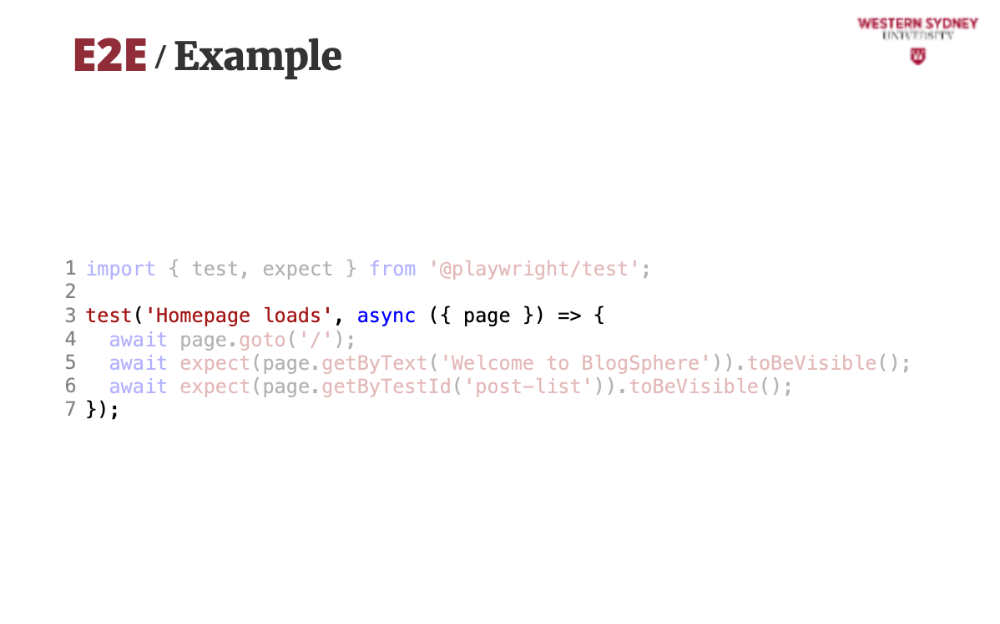
The structure slightly differs from integration tests, which organise the test cases using "describe" and "it."
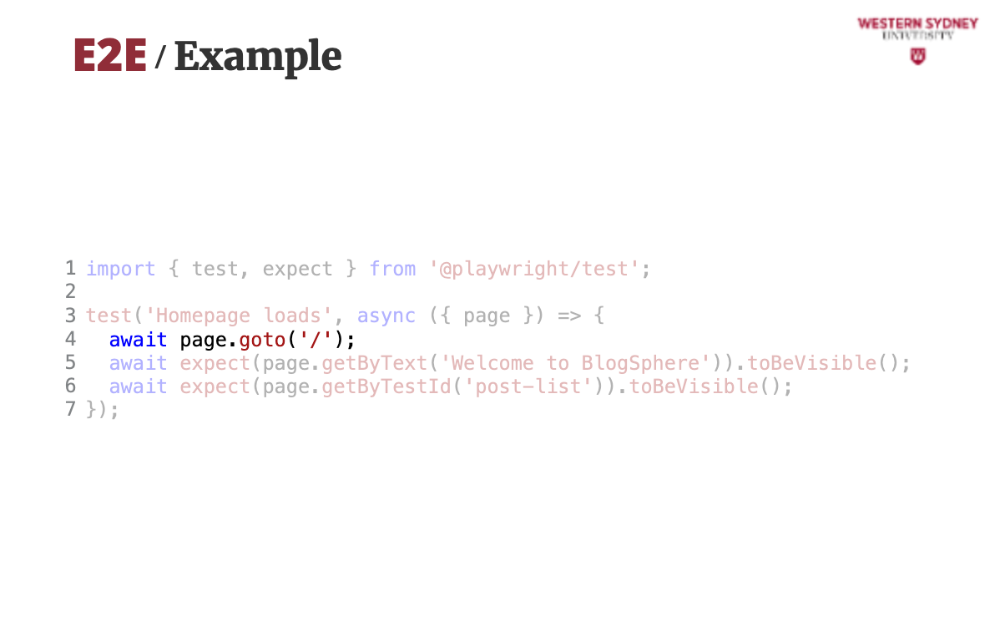
In the test, we will visit the application root and wait for the page to finish loading. You can notice that all calls in Playwright are asynchronous, which makes sense as all user functions are asynchronous as well.
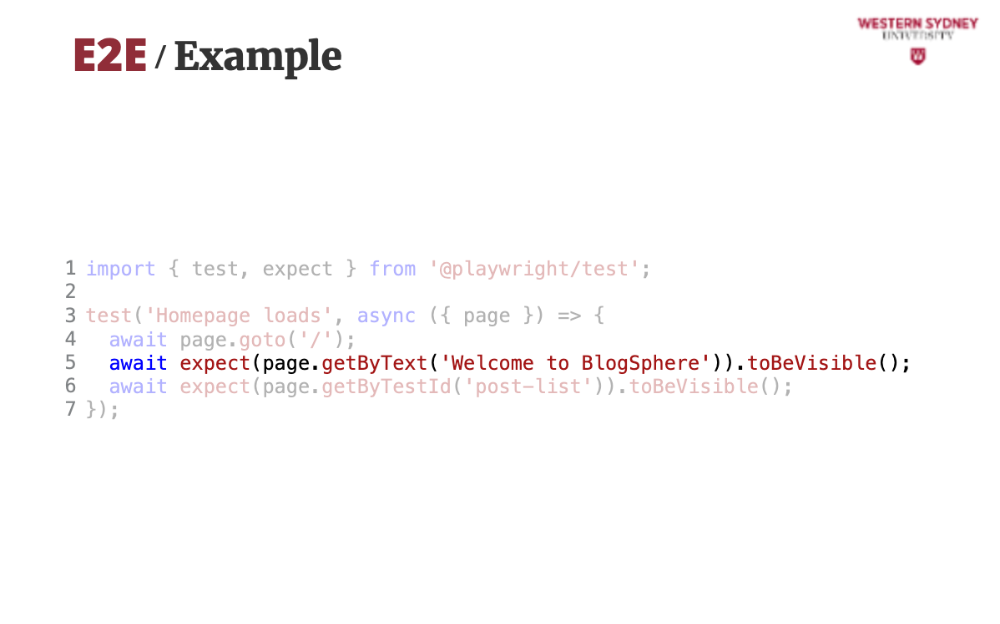
Then, we will use the getPageByText locator to see whether the given text appears on the page.
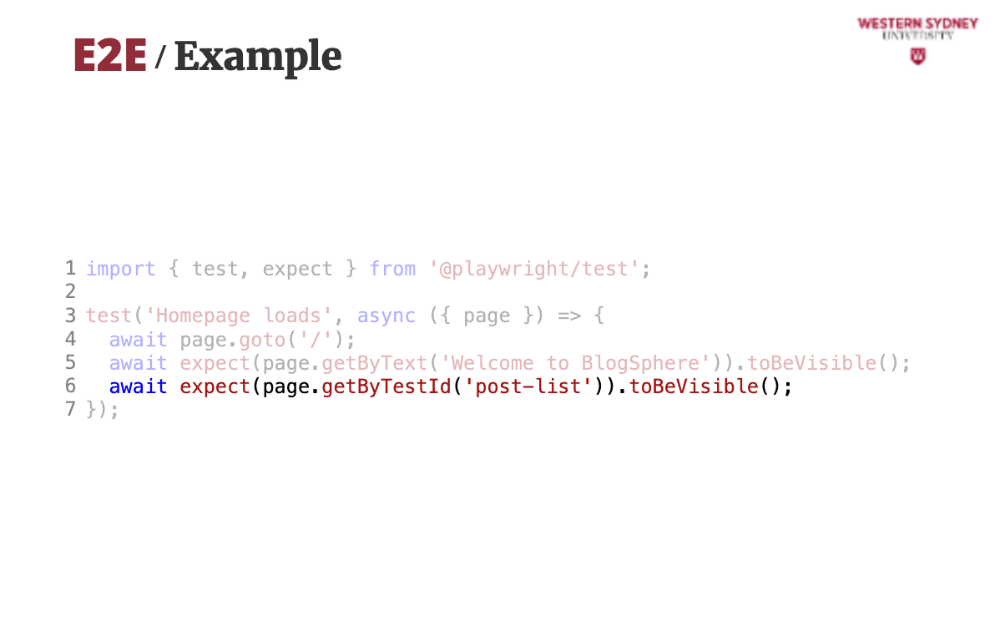
Also, we will use the getByTestId locator to see whether the page renders a list of posts market with special data-test-id property and value "post-list". It is pretty simple and straightforward!

So, what should you test with end to end test?

Test if users can move from app's homepage to the tags page by clicking on given elements, ensuring smooth routing.

Verify admins can create posts, checking the UI and backend work together.
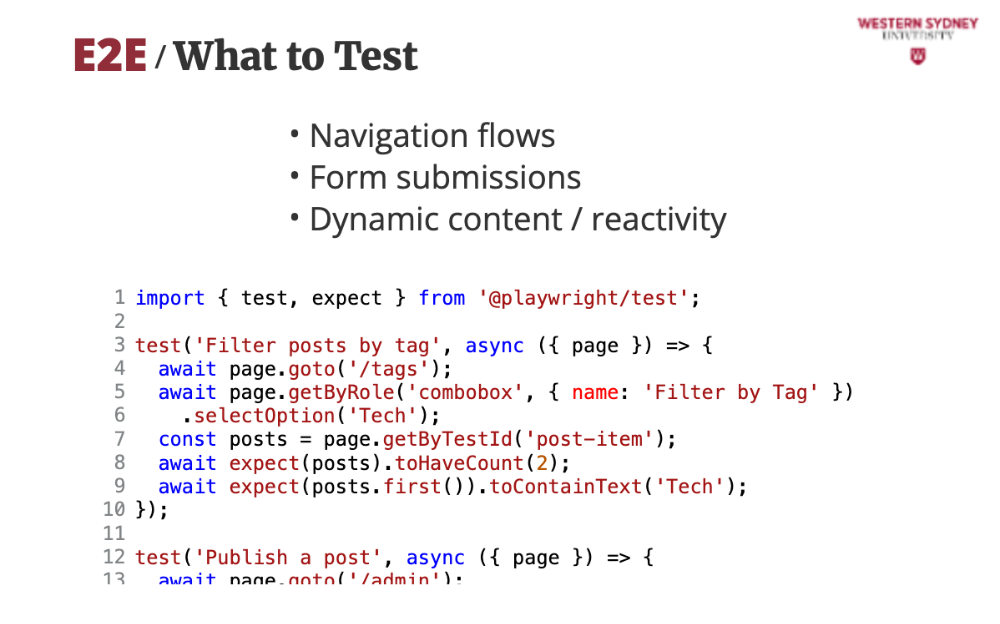
Test filtering posts by tags, ensuring only relevant posts show up. Test if your reactive content behaves as expected!
Playwright can seamlessly manipulate your form elements, such as textboxes, textareas, selects or checkboxes.
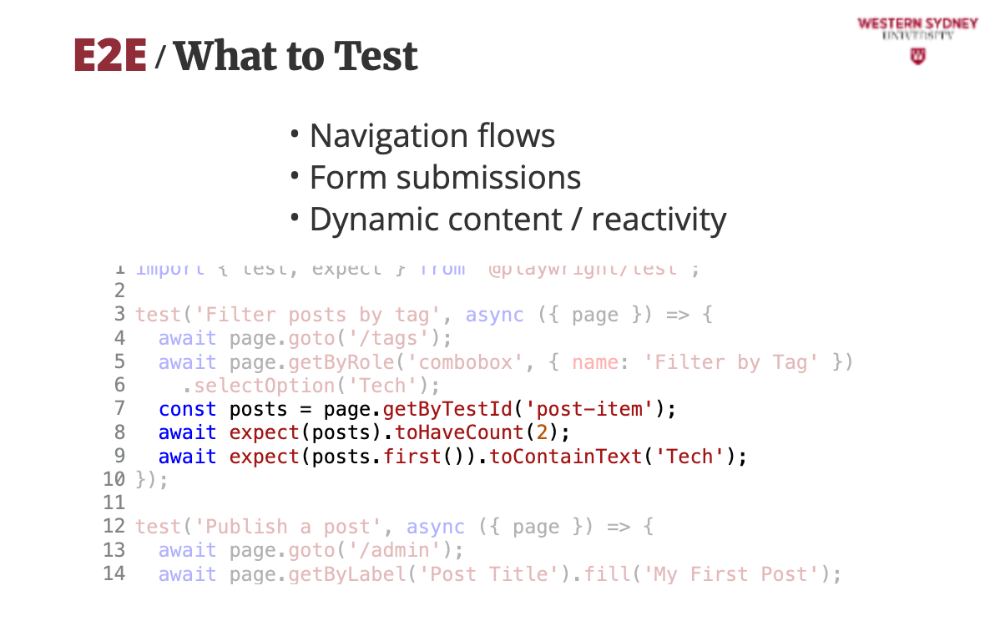
Using the powerful assertion library called expect it can check for presence of text, elements or their properties.
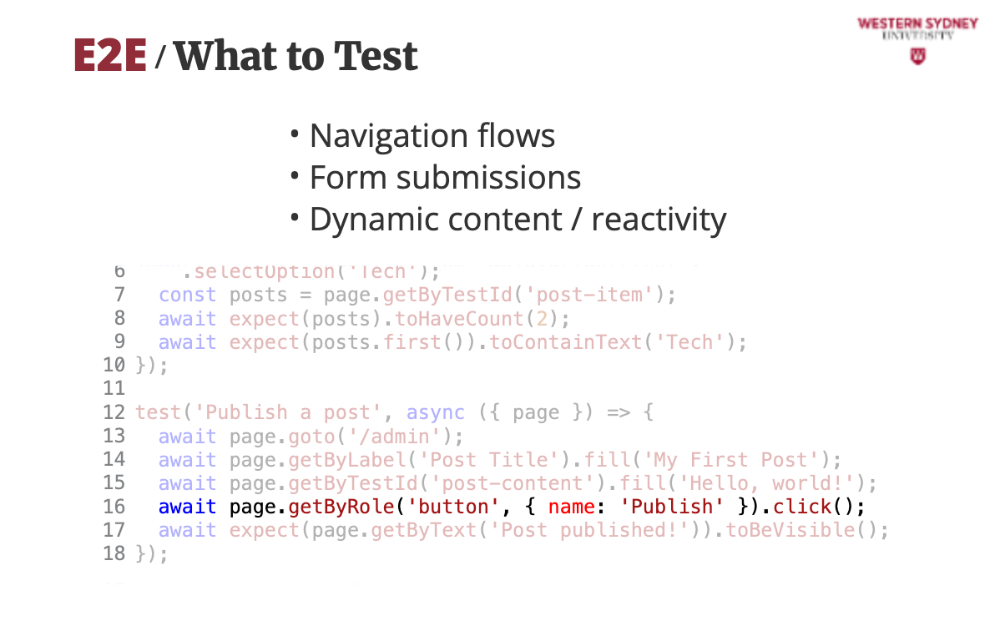
You can also interact with elements by clicking on them, dragging dropping and others.
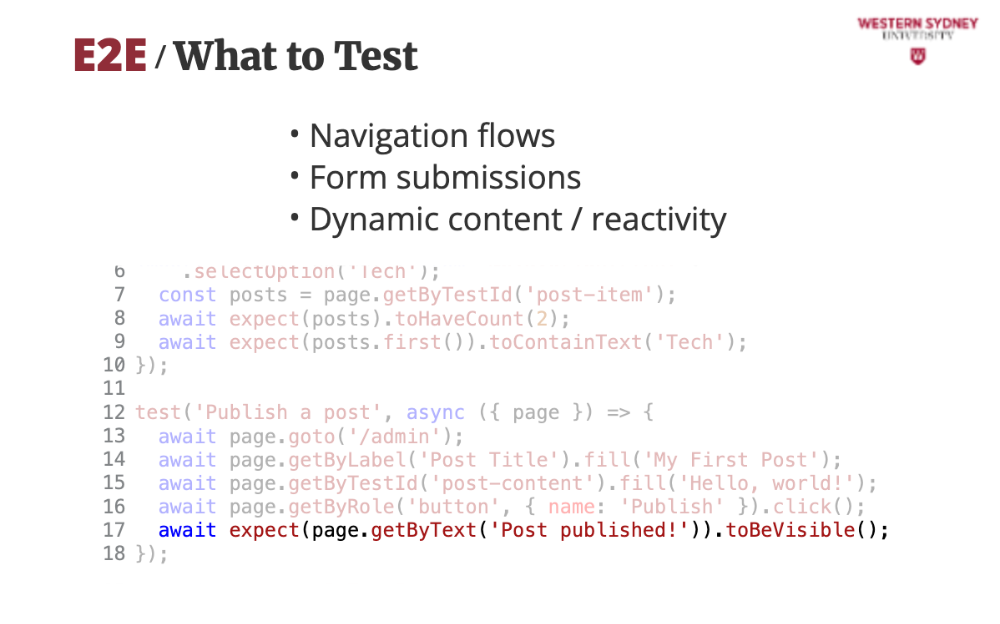
Once the interaction finishes we can observe the changes, such as this reactive notification.
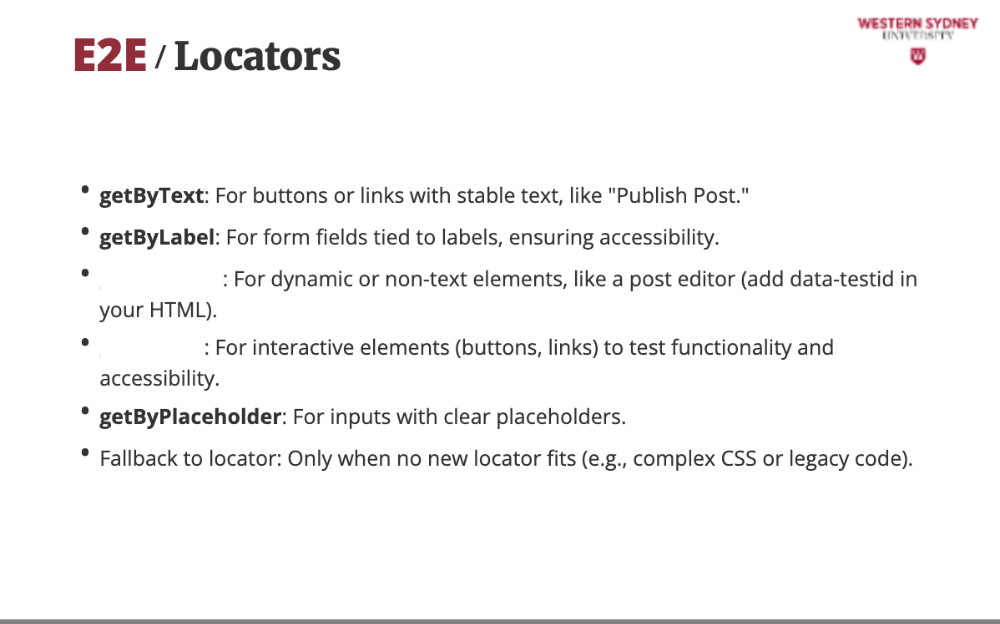
The legacy approach using the "locator" function has been recently complemented by playwright’s getByText, getByLabel, getByTestId, getByRole to mimic user behaviour, unlike fragile CSS selectors. Use getByText for buttons, getByLabel for forms, getByTestId for dynamic elements. getByRole ensures app is usable by all, like screen reader users.
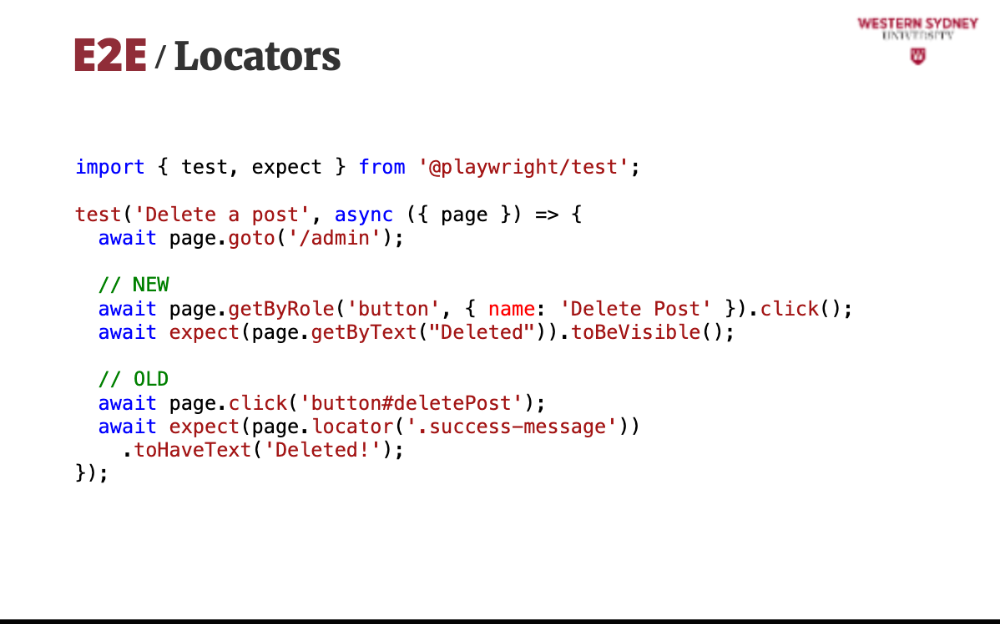
You can compare both approaches in this example. In our opinion, the new approach better reflects what is happening from the user perspective and is more readable. We leave it up to you to decide.

End-to-end tests often have to test authenticated applications, simulating access for different users and roles. Whether you are using cookies or tokens, playwright make it easy.
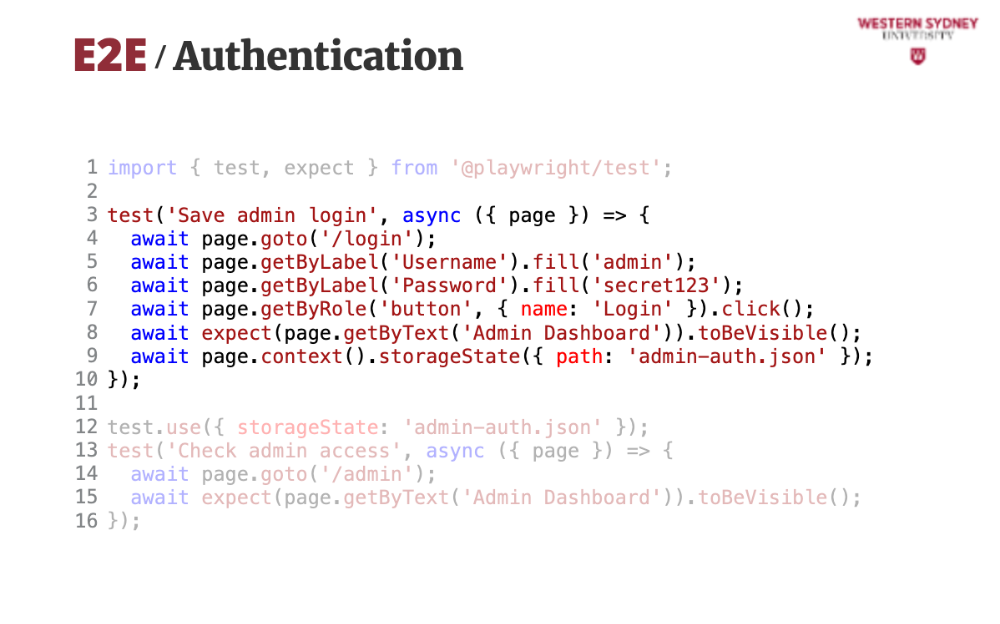
First, you create a test case where you authenticate a particular user filling out their username and password.
After authentication you save current context containing cookies, session and storage state to a json file.
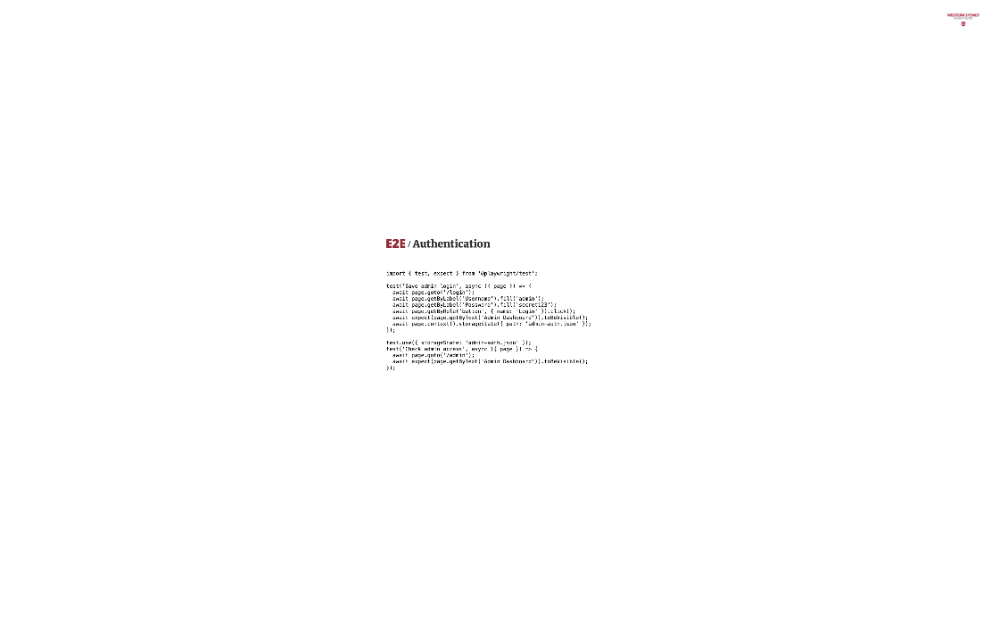
Then , all you need to do is to tell your tests to use the context saved in that json file.
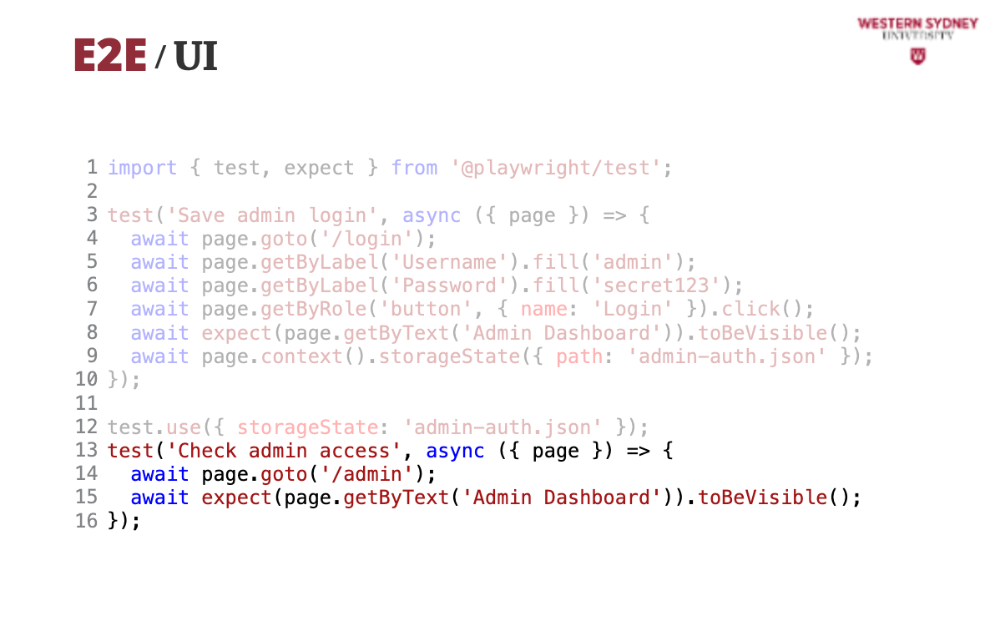
Your tests will have access to authenticated parts of your app. It's easy! Please check out the Playwright documentation for more options.

Playwright also comes with a visual preview of your tests, showing you the state of your application with every command. Run npx playwright test --ui to watch tests live, with screenshots for failures.
Playwright also has an extension for Visual Studio Code that allows you to execute and debug your tests in the editor. It also allows you to automatically generate your tests by mimicking your interactions in the browser.
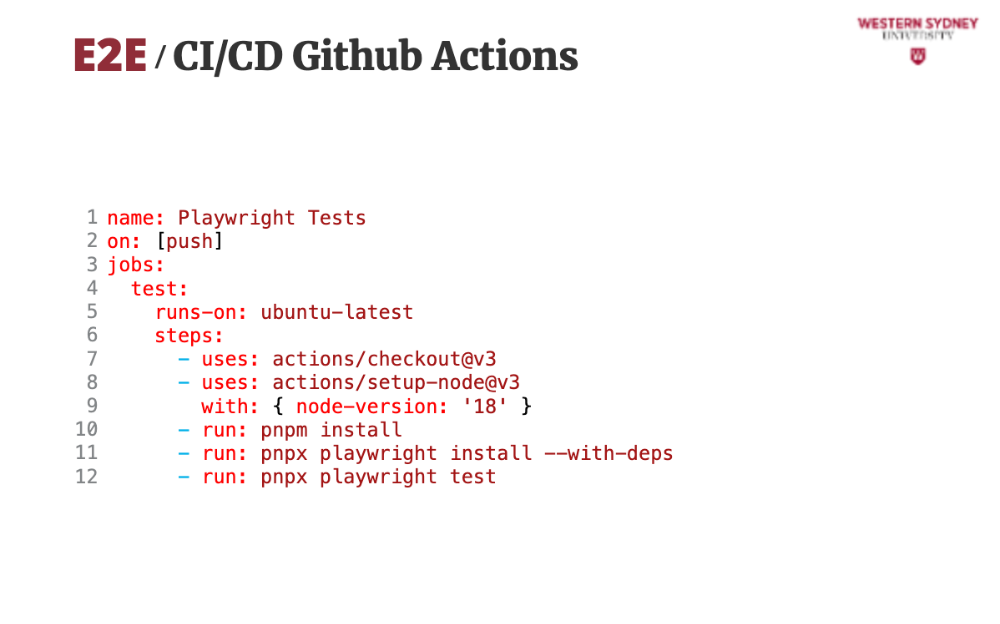
Playwright can also automatically generate your Github Action to execute your end-to-end tests. This minimal example installs the necessary browsers and executes your tests.
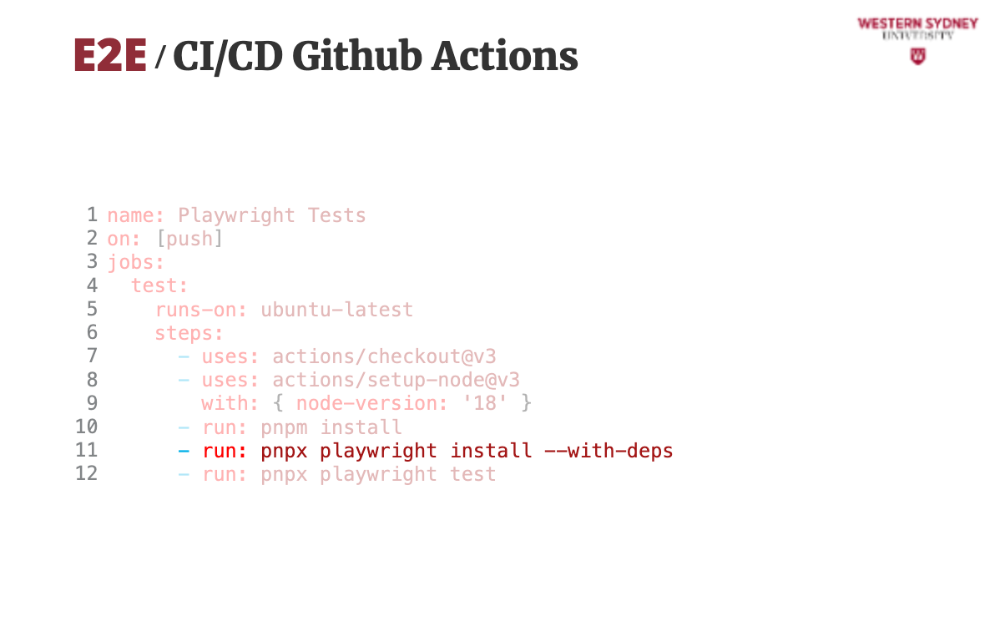
This is the important command that installs all the necessary browsers and their dependencies.
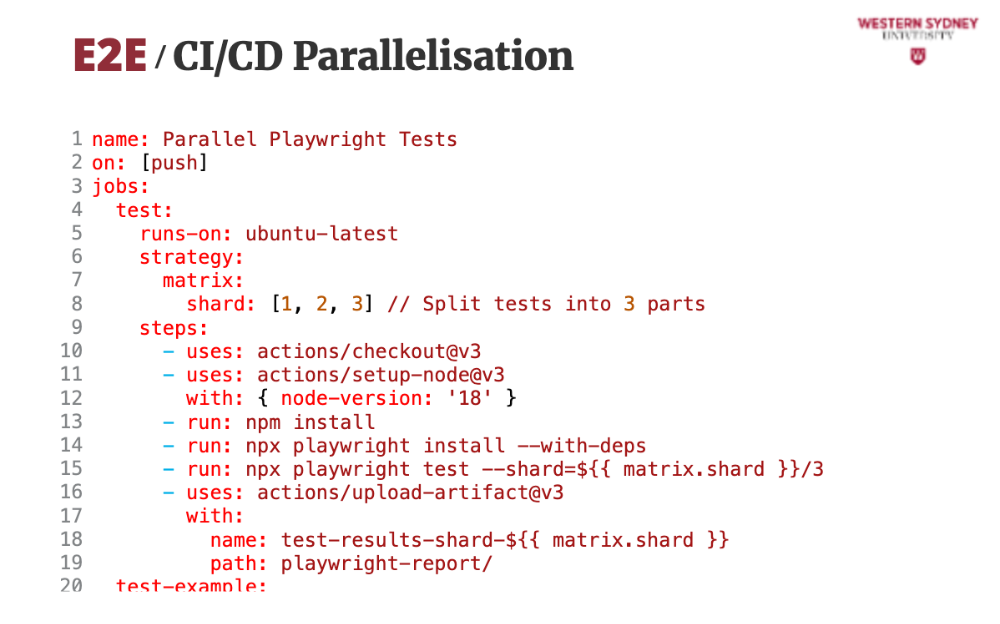
End-to-end tests are slow. Like really slow. It is normal for E2E tests to run for hours to test bigger applications. The fastest way to speed them up is to split their execution among more computers and test them in parallel. This action shows how easy it is to set it up in Github actions.
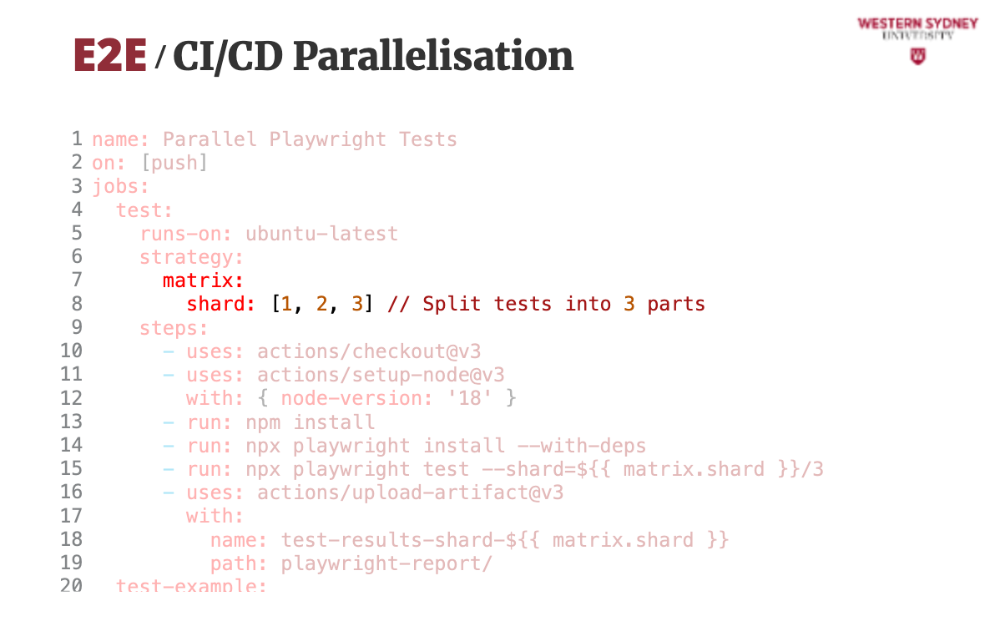
In the matrix / shard property, you define how many instances you want to run in parallel. Shard is like an identifier of the instance.
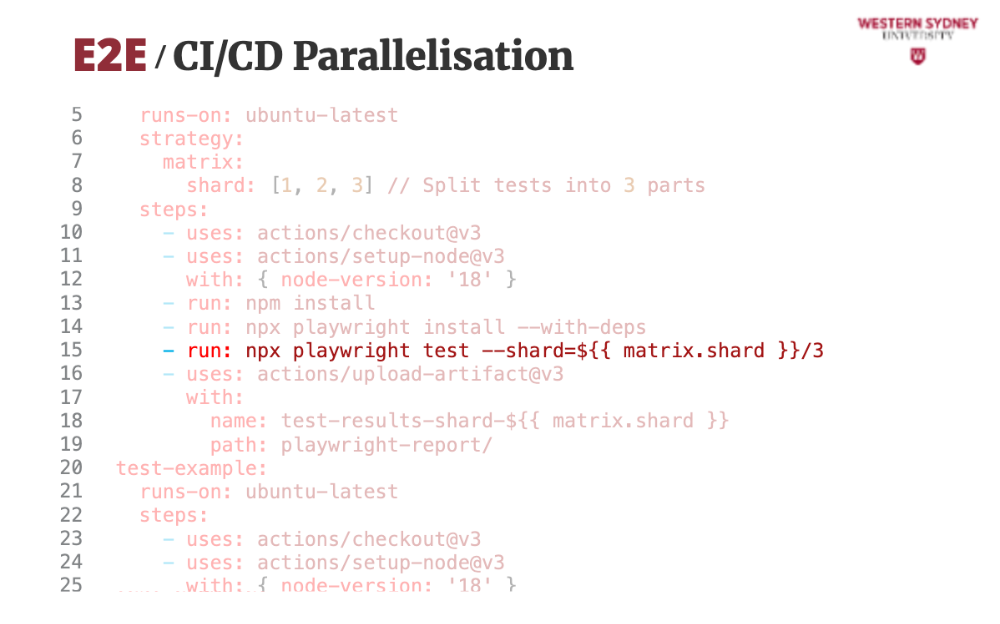
Then, you execute your tests by providing the current shard index and the total number of shards. Playwright will automatically decide how to split tests based on this information.

Once the tests are completed, this command will upload the generated screenshots to the action information page so that you can download and explore them if things go wrong.
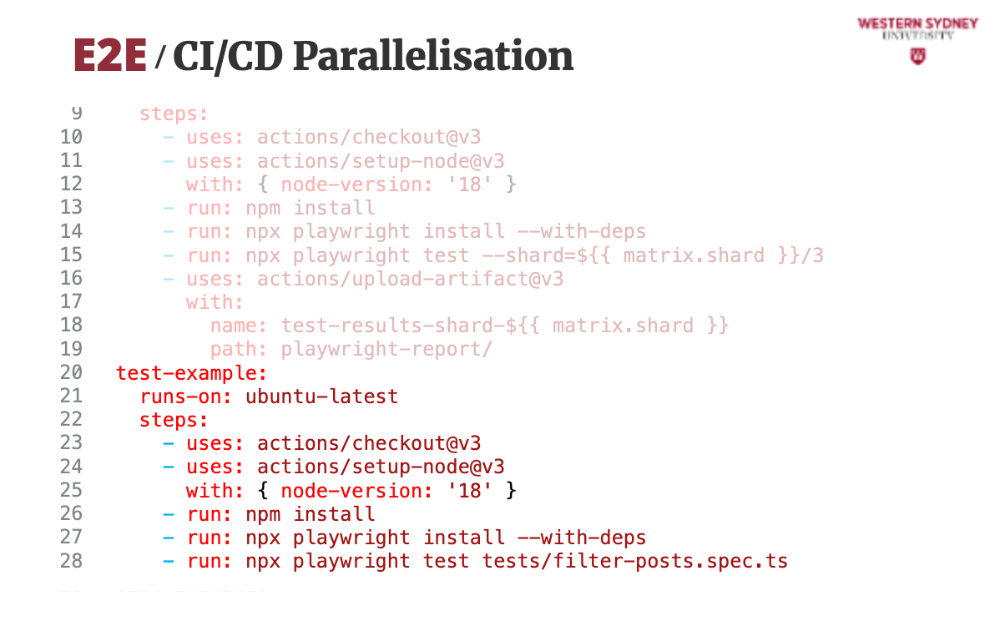
The rest is business as usual, same as in our last example.
Let's wrap up
With end-to-end testing, focus on what users do in your app, like filtering or publishing, for reliable tests.
getByText, getByRole, and others make tests robust, user-focused, more resilient and readable.
CI/CD and Playwright’s UI catch bugs early, saving time when your application stops behaving as it should
Use parallelisation and sharding to speed up your tests by splitting their execution among multiple containers.
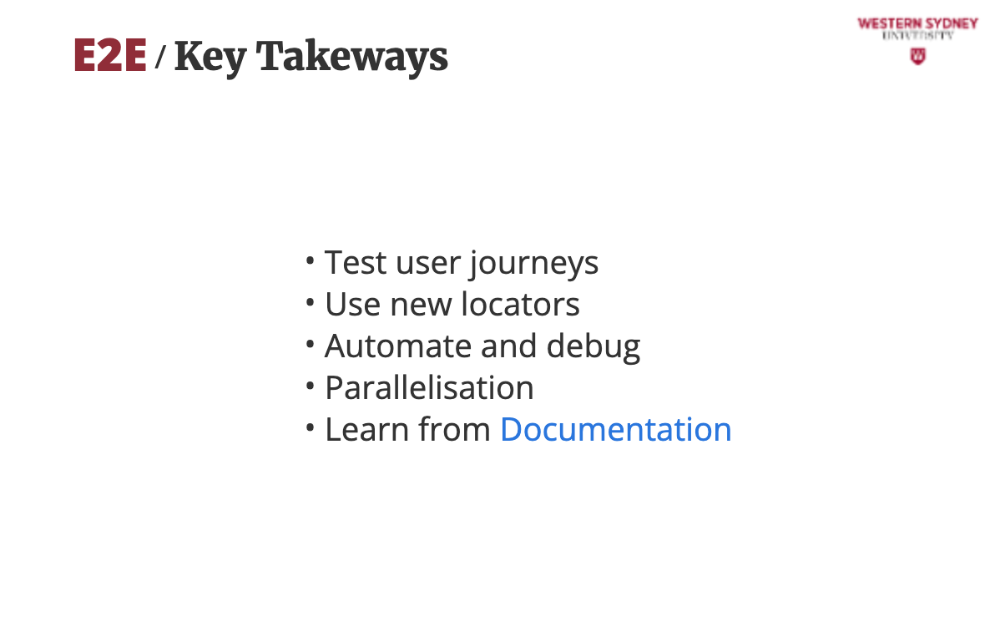
Explore the rich documentation of Playwright to learn about all the possibilities of this amazing technology.