Validations and Error Handling
Why Validation and Error Handling Matter
In our blogging app, users can read posts, and admins can create or edit them. What happens if an admin tries to submit a post without a title? Or enter a date in the wrong format? Without proper checks, your app could crash, save bad data, or confuse users with cryptic error messages. That’s where data validation and error handling come in—they’re like the gatekeepers of your app, ensuring everything runs smoothly and users get helpful feedback.
This topic is crucial because it protects your app’s reliability and user experience. Today, we’ll solve a real-world problem: how to validate data in Next.js APIs and server actions, handle errors gracefully, and display them to users. We’ll use a blogging app example to see it in action. But first, let’s bust some myths—many think validation is just about “checking a box,” or that throwing errors everywhere is fine. Spoiler: it’s not! Poor error handling can frustrate users, and sloppy validation can let bad data sneak through.
Section 1: Understanding Data Validation with Zod
Let’s start with validation. A common misconception is that you can trust user input—like assuming every admin will enter a perfect post title. Nope! Users make mistakes, and some might even try to break your app. That’s why we use a library like Zod to enforce rules.
Zod lets us define a schema—a blueprint of what our data should look like. For our blogging app, let’s say an admin submits a post with a title, content, and tags. Here’s a simple example:
import { z } from "zod";

const postSchema = z.object({
  title: z.string().min(1, "Title is required"),
  content: z.string().min(10, "Content must be at least 10 characters"),
  tags: z.array(z.string()).min(1, "At least one tag is required"),
});
- How it works: Zod checks if the data matches this schema. If the title is empty, it fails with a custom message.
- Why it’s cool: It’s type-safe (great with TypeScript) and gives us clear error messages.
Now, let’s try a more complex case. What if we add an optional publish date that must be a valid date if provided?
const advancedPostSchema = z.object({
  title: z.string().min(1, "Title is required"),
  content: z.string().min(10, "Content must be at least 10 characters"),
  tags: z.array(z.string()).min(1, "At least one tag is required"),
  publishDate: z.string().datetime().optional(), // ISO date string or undefined
});
- How it works:
publishDatecan be empty, but if it’s there, it must be a valid ISO date (e.g., "2025-03-20T12:00:00Z"). - Advantages: Strict rules prevent junk data. If the date’s wrong, Zod tells us exactly why.
- Disadvantages: Takes a bit more setup, but it’s worth it for safety.
In our blogging app, an admin submits a form. We’ll validate it in a server action or API route next.
Section 2: Validation in Next.js Server Actions and APIs
Next.js gives us two ways to handle backend logic: API routes and server actions. Let’s use our schema in both, expanding our blogging example.
Server Action Example
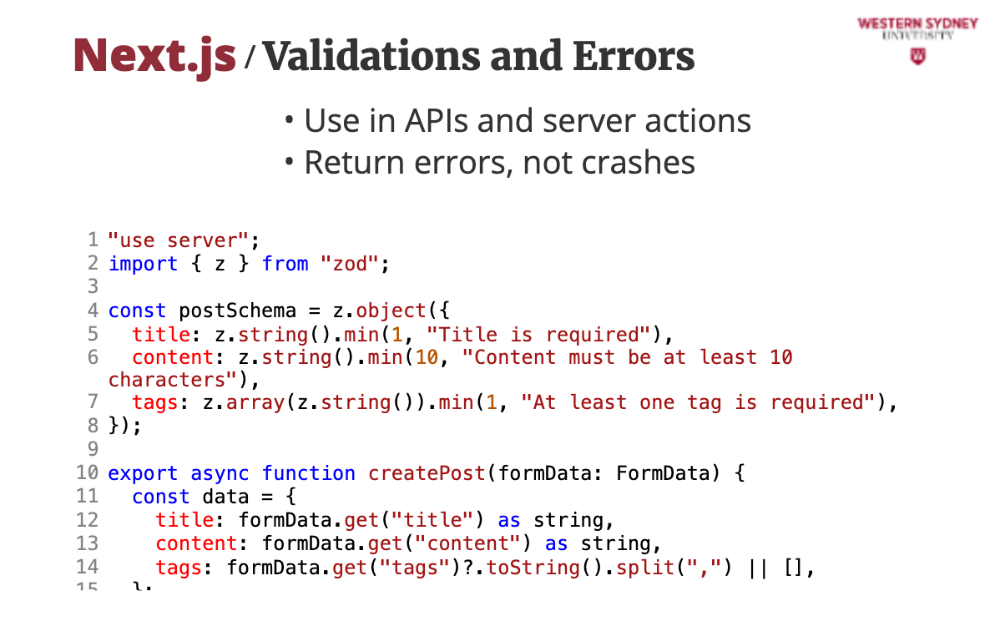
Server actions run on the server when a form is submitted. Here’s how we validate a new post:
"use server";
import { z } from "zod";
const postSchema = z.object({
title: z.string().min(1, "Title is required"),
content: z.string().min(10, "Content must be at least 10 characters"),
tags: z.array(z.string()).min(1, "At least one tag is required"),
});
export async function createPost(formData: FormData) {
const data = {
title: formData.get("title"),
content: formData.get("content"),
tags: formData.get("tags")?.toString().split(",") || [],
};
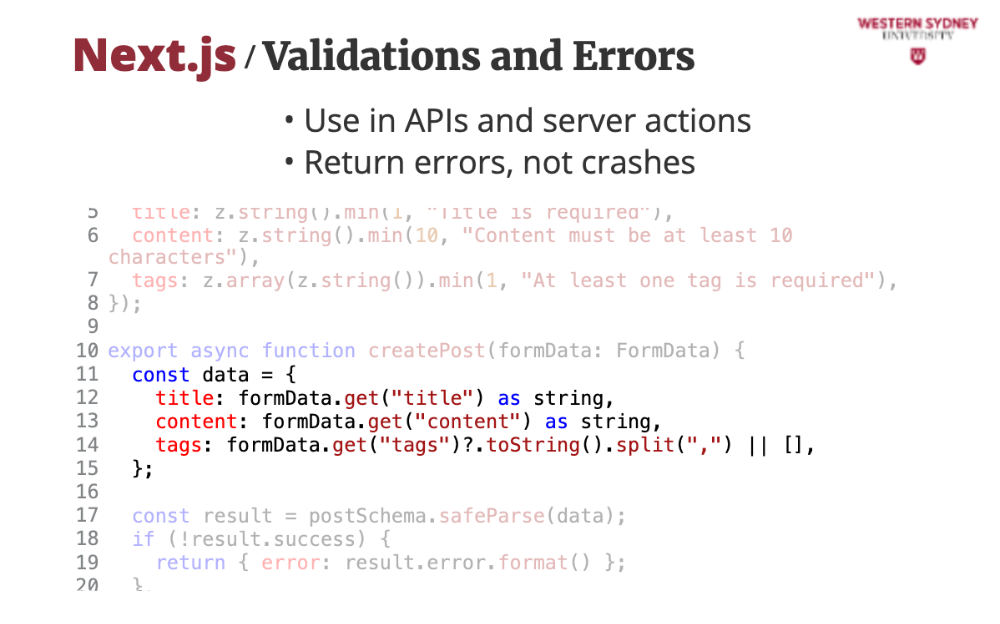
const result = postSchema.safeParse(data);
if (!result.success) {
return { error: result.error.format() }; // Structured error object
}
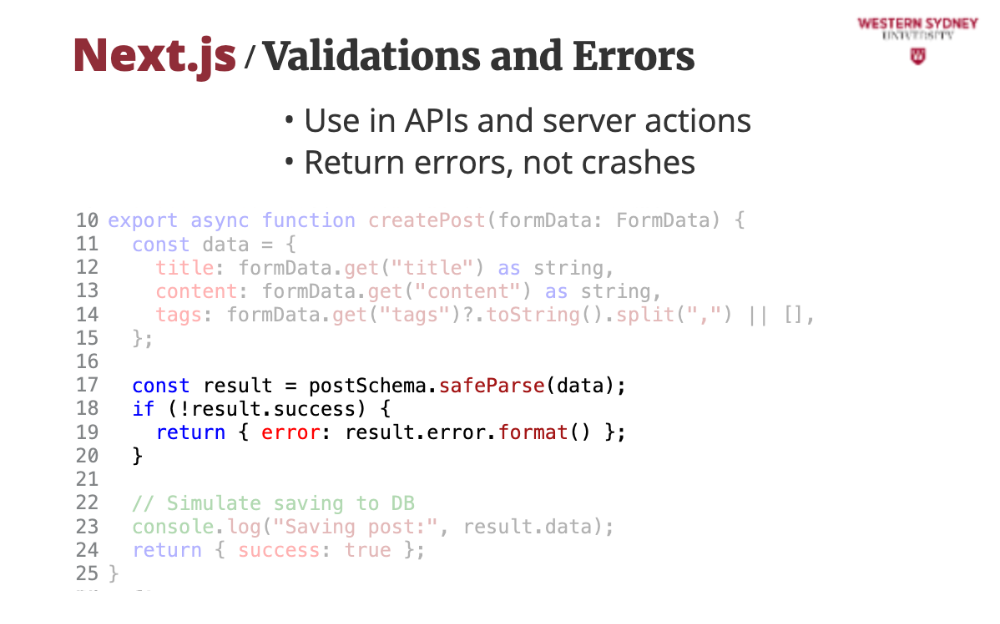
// Save to database (pretend we have a DB function)
await savePost(result.data);
return { success: true };
}
- Step-by-step:
- Grab form data.
- Parse it with Zod’s
safeParse(won’t throw errors, just returns success/failure). - If it fails, return errors. If it passes, save the post.
- Why it works: Users get specific feedback (e.g., “Title is required”) without crashing the app.
API Route Example
For an API route (e.g., /api/posts), it’s similar:
import { NextRequest } from "next/server";
import { z } from "zod";

const postSchema = z.object({
  title: z.string().min(1, "Title is required"),
  content: z.string().min(10, "Content must be at least 10 characters"),
  tags: z.array(z.string()).min(1, "At least one tag is required"),
});

export async function POST(req: NextRequest) {
  const data = await req.json();
  const result = postSchema.safeParse(data);

  if (!result.success) {
    return Response.json({ error: result.error.format() }, { status: 400 });
  }

  await savePost(result.data);
  return Response.json({ success: true });
}
- How it differs: APIs are more RESTful, often used by clients like TanStack Query (we’ll get there).
Section 3: Errors vs. Exceptions—What’s the Difference?
Here’s where people get tripped up. An error is something you expect—like a missing title. An exception is unexpected—like the database crashing. Let’s handle both in our blogging app.
- Errors: Use Zod’s output to tell the user what’s wrong. In the server action, we returned
{ error: result.error.format() }. The client can display “Title is required” directly. - Exceptions: If
savePostfails (e.g., DB is down), catch it:
export async function createPost(formData: FormData) {
  try {
    const data = { /* ... */ };
    const result = postSchema.safeParse(data);
    if (!result.success) {
      return { error: result.error.format() };
    }
    await savePost(result.data);
    return { success: true };
  } catch (e) {
    return { error: "Something went wrong on our end. Try again later." };
  }
}
- Why separate them?: Users don’t need techy exception details (“Database connection lost”). Give them a friendly message instead.
- Advantage: Keeps the app stable. Disadvantage: You might hide bugs if you’re not logging exceptions (so log them!).
Section 4: Communicating with the Client Using TanStack Query
Now, let’s connect this to the frontend with TanStack Query (formerly React Query). It’s perfect for fetching and mutating data in our blogging app. Here’s how an admin adds a post via the API:
import { useMutation } from "@tanstack/react-query";
import { advancedPostSchema } from "./schemas";

type PostData = z.infer<typeof advancedPostSchema>;

async function createPost(data: PostData) {
  const res = await fetch("/api/posts", {
    method: "POST",
    body: JSON.stringify(data),
    headers: { "Content-Type": "application/json" },
  });
  if (!res.ok) {
    const errorData = await res.json();
    throw new Error(JSON.stringify(errorData.error));
  }
  return res.json();
}

export function PostForm() {
  const mutation = useMutation({
    mutationFn: createPost,
    onSuccess: () => alert("Post created!"),
    onError: (error) => {
      const errorDetails = JSON.parse(error.message);
      alert("Errors: " + JSON.stringify(errorDetails));
    },
  });

  const handleSubmit = (e: React.FormEvent) => {
    e.preventDefault();
    const formData = new FormData(e.target as HTMLFormElement);
    const data = {
      title: formData.get("title") as string,
      content: formData.get("content") as string,
      tags: formData.get("tags")?.toString().split(",") || [],
      publishDate: formData.get("publishDate") as string | undefined,
    };
    mutation.mutate(data);
  };

  return (
    <form onSubmit={handleSubmit}>
      <input name="title" placeholder="Title" />
      <textarea name="content" placeholder="Content" />
      <input name="tags" placeholder="Tags (comma-separated)" />
      <input name="publishDate" placeholder="Publish Date (optional)" />
      <button type="submit">Submit</button>
    </form>
  );
}
- How it works:
useMutationsends the data to the API.- If Zod fails, the API returns a 400 with error details, and
onErrorshows them. - If it’s an exception (e.g., 500), we catch that too.
- Why TanStack Query?: It handles loading states, retries, and caching automatically.
- Expanding the example: Add a “fetch posts” query to filter by tags or date—same validation applies on the server.
Conclusion: Key Takeaways
Let’s wrap up! Today, we built a blogging app with solid data validation and error handling:
- Validation with Zod: Define schemas to catch bad data early.
- Server Actions & APIs: Use
safeParseto validate, return errors cleanly. - Errors vs. Exceptions: Handle expected issues with messages, catch unexpected ones gracefully.
- TanStack Query: Connect it all to the frontend with smooth user feedback.
Best practices: Always validate on the server (client validation isn’t enough), use specific error messages, and log exceptions. Pitfalls to avoid: Don’t skip validation, don’t show users raw exception details, and don’t overcomplicate schemas early on. With this, your app will be robust and user-friendly—happy coding!
Slides

Let's talk about how you can safely receive and handle user data, and notify them when things go wrong!
>Imagine users submitting junk data—like an empty blog post title. Without validation, your app could crash or store nonsense. Validation acts like a filter, catching mistakes before they cause trouble.
Users hate cryptic errors like “500 Internal Server Error.” Good error handling gives them clear, helpful messages instead, like “Please add a title.” Picture an admin submitting a post with no content or a broken date. Today, we’ll fix that with validation and smart error handling in a blogging app.
Zod is a library that lets us set up a schema—a blueprint of what our data should look like. It’s simple but powerful, especially with TypeScript.
Instead of trusting users to send perfect data, Zod checks it upfront. If something’s wrong, it tells us exactly what and why.
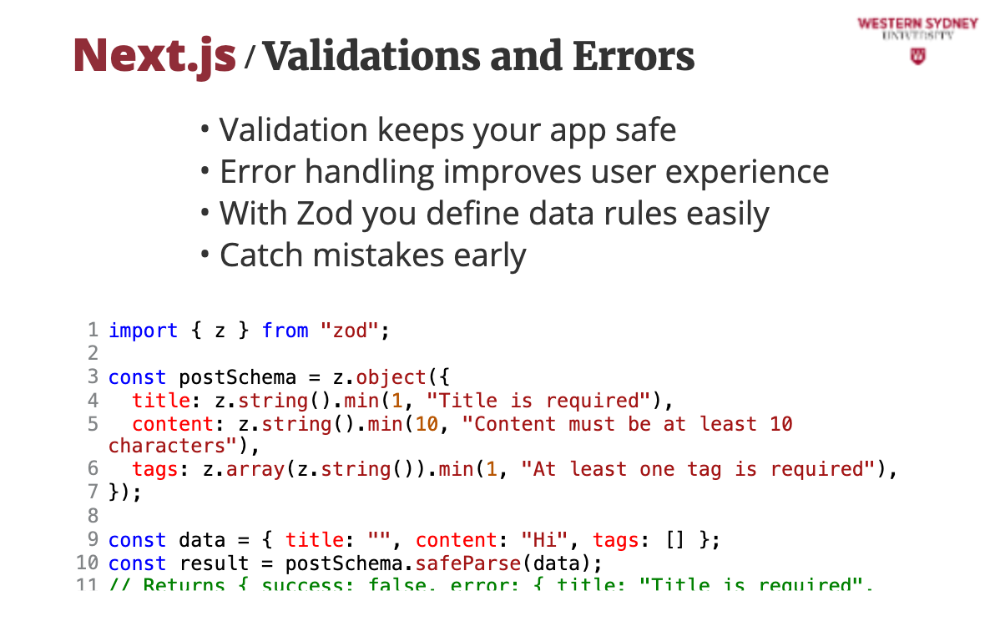
Let’s say our blogging app needs a title, content, and tags for each post. Zod ensures they’re all there and valid. This code defines a schema for a blog post. When we test it with bad data—like an empty title—it fails and gives us clear error messages we can show users.
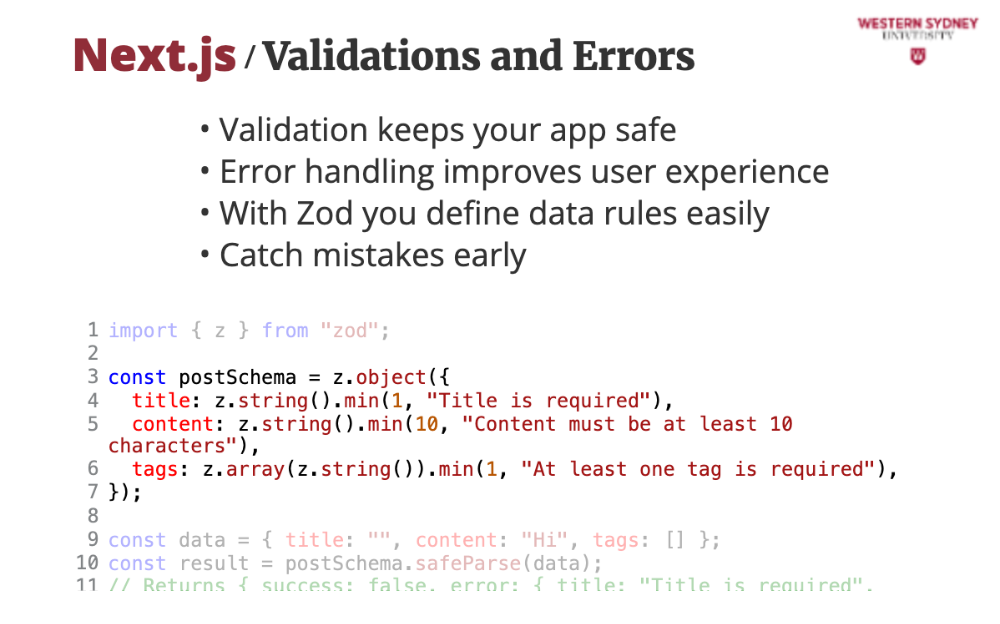
Here we set the rules: title must be a string with at least 1 character, content needs 10, and tags must have at least one entry. This protects our app from bad input.
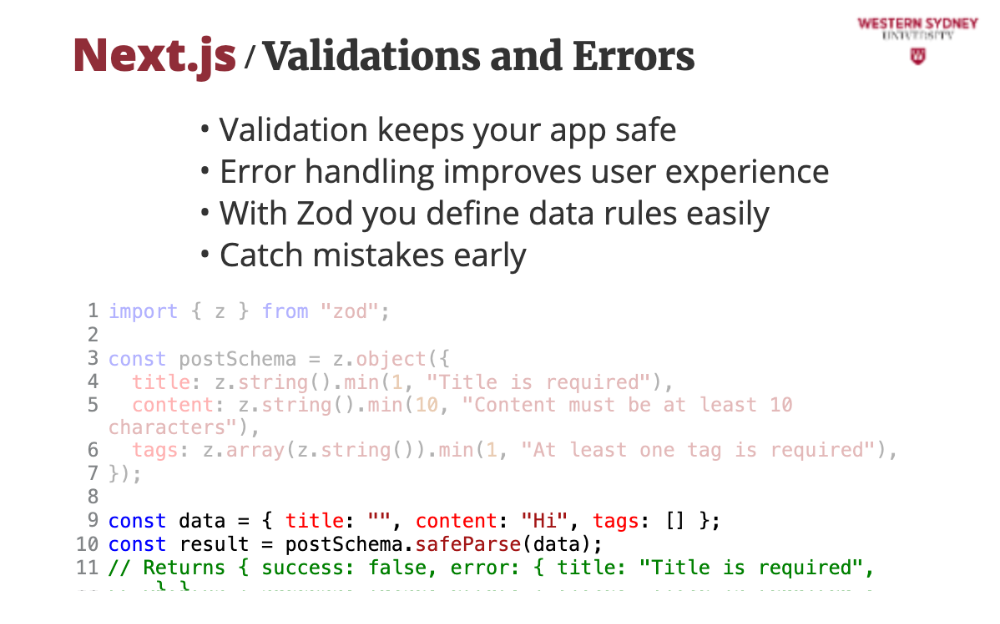
safeParse checks the data without crashing—it’s perfect for server-side validation.

Next.js lets us validate in API routes or server actions. Both run on the server, so we can trust the checks even if the client messes up.
If validation fails, we send back a structured error—like “Title is required”—instead of letting the app break. Do not trust the client, always validate on server as well!
This server action validates a new blog post from a form. It’s a full example you can test—just hook it to a form and try submitting bad data!

First, we define the ZOD schema.
We grab the form data and shape it into an object. This step mimics what an admin might send when creating a post.
If validation fails, we return the errors in a neat format. This lets the frontend display them nicely to the user.
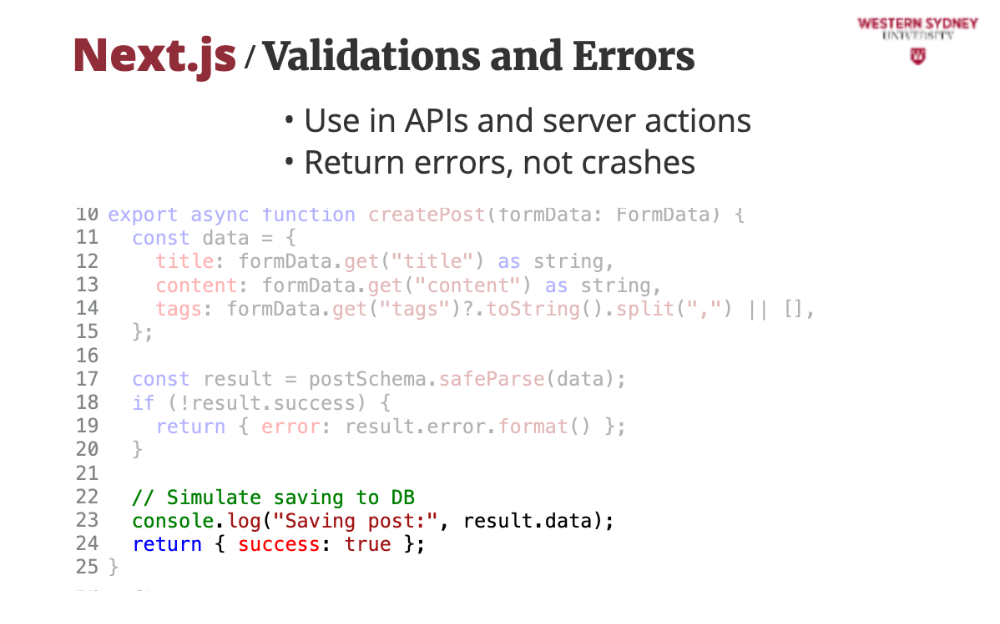
Otherwise, we return a message that all went well.
Let's talk about how you can gracefully handle any issues that happen server side. There are either expected errors, or unexpected exceptions.
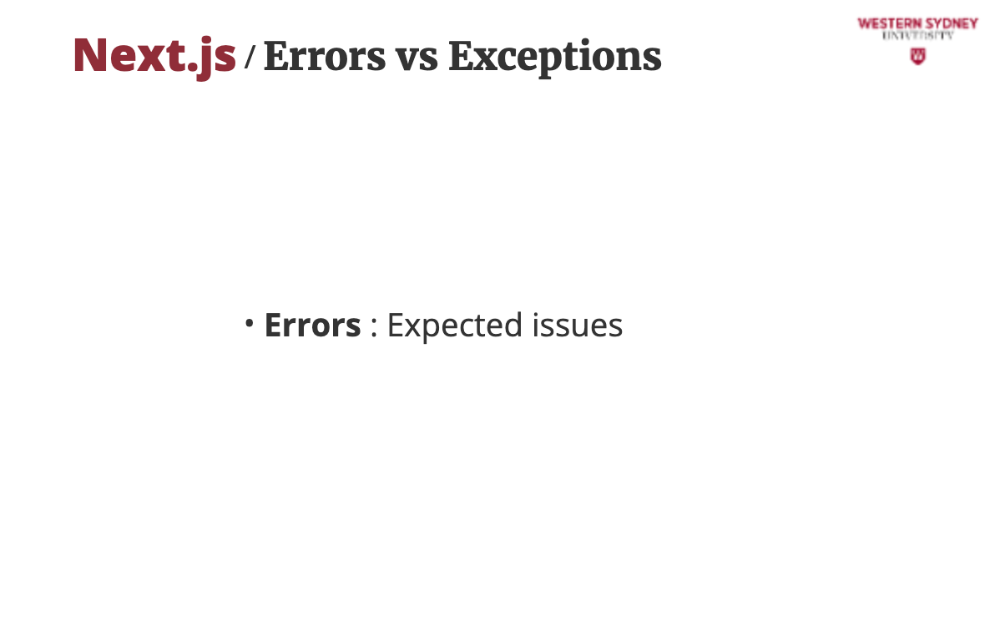
Errors are things we can predict, like a missing title. We handle them with validation and send users friendly messages.
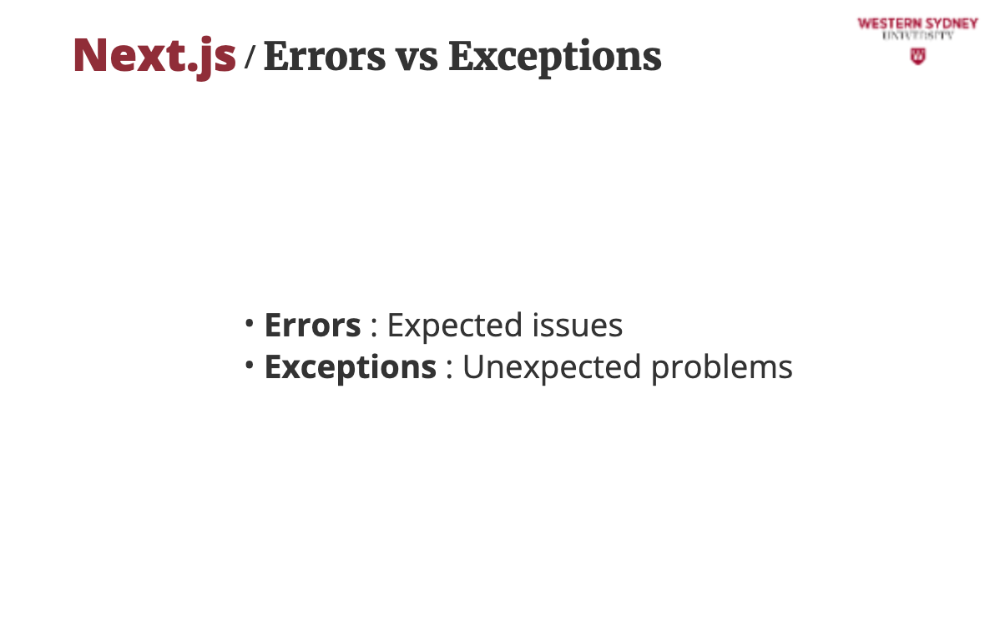
Exceptions are surprises—like the database failing. We catch them to keep the app running and hide the techy details.
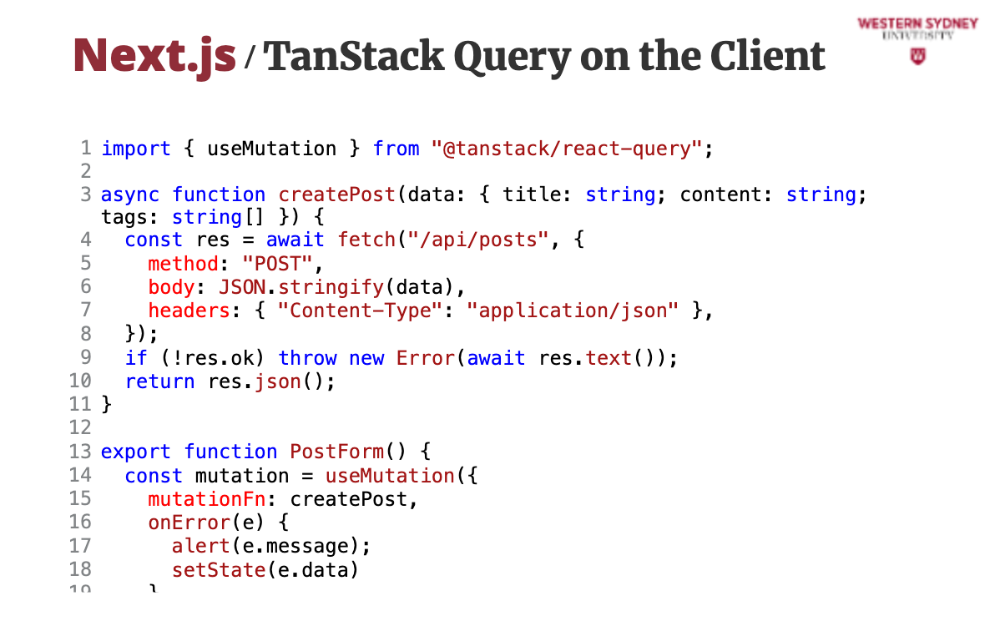
With tanstack it is beneficial to handle queries and mutations with helper functions, where you can read the outcome of the query and mutation.
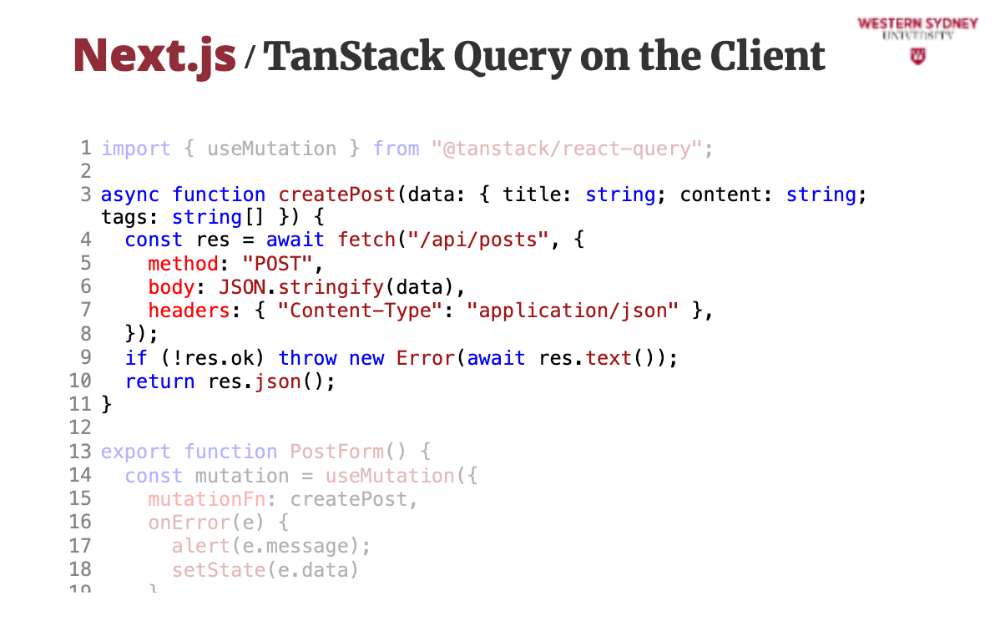
In this case, the createPost function reads the outcome ouf the API fetch, and if it not ok, for example the return status is bigger than 200, it throws a client-side error.

The mutation then can handle the incoming error in the onError handler.
Let's wrap up!
Do not trust your users, always check data on the server with a schema—it’s your first line of defense.
Tell users what they did wrong with errors, but catch exceptions quietly and log them.
Use TanStack Query for smooth UX, it ties everything together on the frontend, making validation and error handling feel seamless.