Server Actions
Server Actions and Mutations
Hey everyone! Today, we’re diving into something super cool and powerful in web development: Server Actions and Mutations. If you’ve ever wondered how websites update information—like adding a blog post or liking a comment—without needing to refresh the page, this is the magic behind it. In this lecture, we’ll explore how Server Actions work in Next.js, a popular framework, and why they’re a game-changer for building interactive apps.
Why does this matter? Imagine you’re running a blogging app—let’s call it "BlogSphere." Users read posts, filter them by tags like "tech" or "travel," and admins add or edit posts. Without Server Actions, every time an admin adds a post, the page might need to reload, or you’d need complicated code to talk to the server. Server Actions make this smooth and simple, letting you update data directly from your components. By the end of this lecture, you’ll see how to use them to build BlogSphere and handle real-world tasks like creating posts or updating drafts.
Let’s hook you in with a question: Have you ever thought adding a blog post should require a bunch of separate server requests? A common misconception is that you need tons of API calls to update a site. Surprise—Server Actions let you do it in one go! Or maybe you think client-side code alone can handle everything? Nope, that’s not always secure or efficient. Let’s break these ideas apart and see the truth.
Section 1: What Are Server Actions?
So, what exactly are Server Actions? They’re special functions in Next.js that run on the server, not the browser. You can call them from your app—whether it’s a button click or a form submission—and they handle tasks like saving data (we call this "mutating" data). They’re asynchronous, meaning they don’t freeze your app while they work.
Let’s start with BlogSphere. Imagine a user wants to see all posts tagged "tech." On the admin side, you want to add a new post titled "Why AI is Awesome." Without Server Actions, you might write a separate API endpoint, send a request, wait for a response, and then update the page. With Server Actions, you define a function, mark it with 'use server', and call it directly. It’s like giving your app a superpower to talk to the server instantly.
Here’s a simple example for BlogSphere:
async function addPost(formData: FormData) {
  'use server';
  const title = formData.get('title');
  const content = formData.get('content');
  // Save to database (pretend we have one!)
  console.log(`New post: ${title} - ${content}`);
}
You’d use this in a form, and boom—the post is added without extra hassle. Later, we’ll make this more complex, but this is the foundation.
Why is this surprising? Many think server stuff has to be separate from the UI. Server Actions blur that line, letting you write server code right next to your components. It’s efficient and keeps things tidy.
Section 2: Building BlogSphere with Server Actions
Let’s build BlogSphere step-by-step. We’ll start with the admin adding a post, then make it fancier.
Simple Example: Adding a Post
Picture an admin dashboard with a form: fields for "Title," "Content," and "Tag." When the admin submits it, we want the post saved and the page updated without a reload. Here’s how it works:
// app/actions.ts
'use server';
export async function addPost(formData: FormData) {
  const title = formData.get('title') as string;
  const content = formData.get('content') as string;
  const tag = formData.get('tag') as string;
  // Imagine this saves to a database
  const newPost = { id: Date.now(), title, content, tag, date: new Date() };
  console.log('Post added:', newPost);
  return newPost;
}

// app/admin/add-post/page.tsx
export default function AddPostPage() {
  async function handleAddPost(formData: FormData) {
    'use server';
    await addPost(formData); // Reuse the action
  }

  return (
    <form action={handleAddPost}>
      <input name="title" placeholder="Post Title" />
      <textarea name="content" placeholder="Write your post..." />
      <input name="tag" placeholder="Tag (e.g., tech)" />
      <button type="submit">Add Post</button>
    </form>
  );
}
What’s happening? The form calls handleAddPost, which runs on the server and uses addPost to save the data. No page refresh needed—Next.js handles the update behind the scenes.
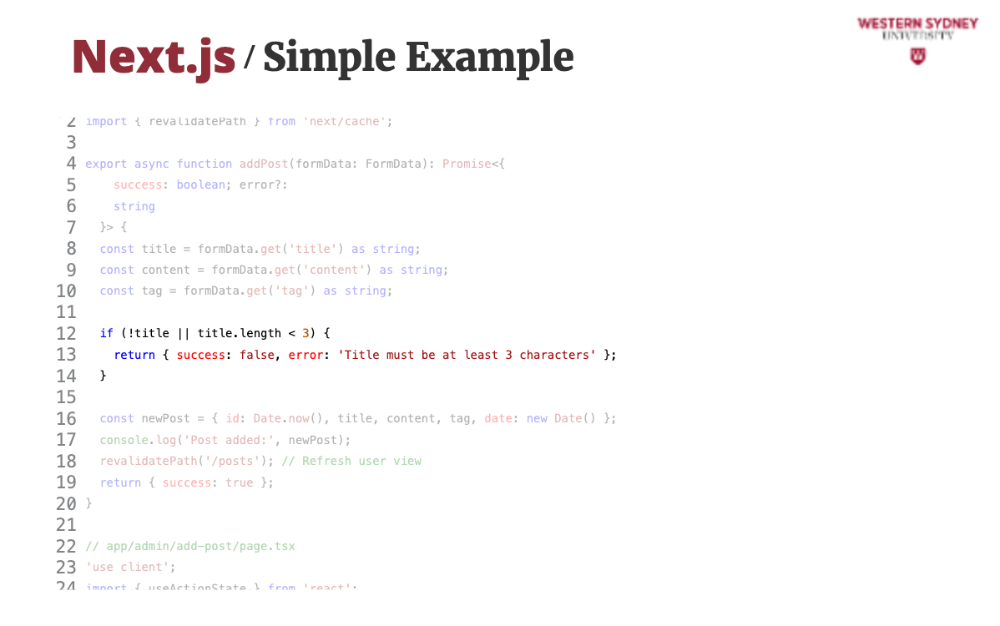
Advanced Example: Validation and Feedback
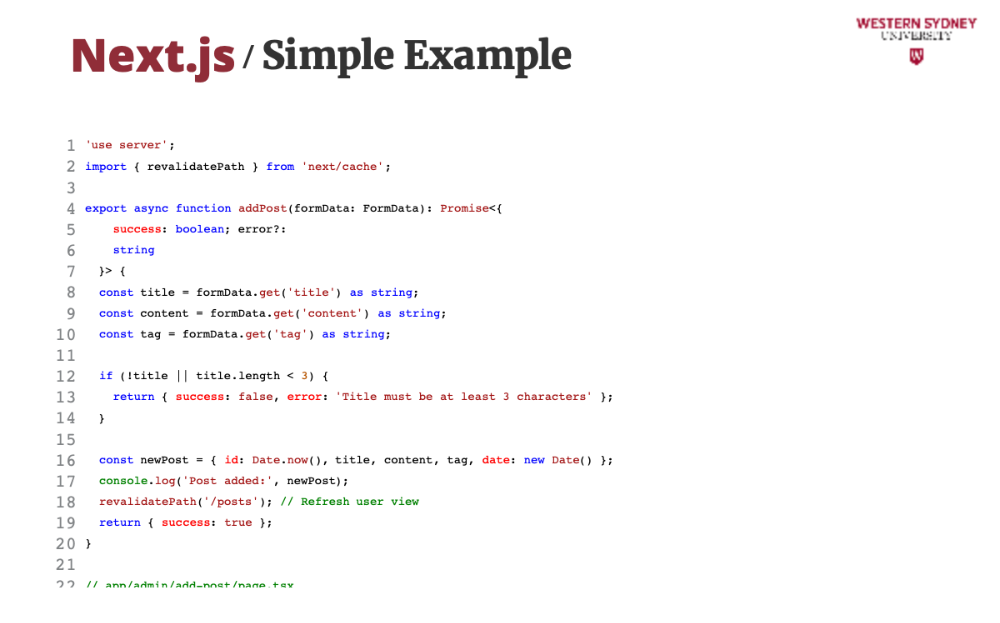
Now, let’s level up. What if the admin forgets the title? We’ll add server-side validation and give feedback. Plus, we’ll revalidate the cache so users see the new post instantly.
// app/actions.ts
'use server';
import { revalidatePath } from 'next/cache';

export async function addPost(prevState: any, formData: FormData) {
  const title = formData.get('title') as string;
  const content = formData.get('content') as string;
  const tag = formData.get('tag') as string;

  // Validation
  if (!title || title.length < 3) {
    return { error: 'Title must be at least 3 characters long' };
  }

  const newPost = { id: Date.now(), title, content, tag, date: new Date() };
  console.log('Post added:', newPost);
  revalidatePath('/posts'); // Refresh the posts page
  return { success: true, post: newPost };
}

// app/admin/add-post/page.tsx
'use client';
import { useActionState } from 'react';
import { addPost } from '@/app/actions';

export default function AddPostPage() {
  const [state, formAction] = useActionState(addPost, { error: null, success: false });

  return (
    <form action={formAction}>
      <input name="title" placeholder="Post Title" />
      <textarea name="content" placeholder="Write your post..." />
      <input name="tag" placeholder="Tag (e.g., tech)" />
      {state.error && <p style={{ color: 'red' }}>{state.error}</p>}
      {state.success && <p style={{ color: 'green' }}>Post added successfully!</p>}
      <button type="submit">Add Post</button>
    </form>
  );
}
Here, we use useActionState to show errors or success messages. If the title’s too short, the server sends back an error. If it works, the cache updates, and users see the new post on /posts. Cool, right?
How It Works
Server Actions run on the server, so they’re secure—no sensitive logic leaks to the browser. They integrate with Next.js caching, meaning one call can update data and the UI. They’re also reusable—call addPost from a form, a button, or even a keyboard shortcut.
Advantages:
- Fast: One server trip does it all.
- Secure: Runs server-side, away from prying eyes.
- Simple: No need for separate APIs.
Disadvantages:
- Serialization: Arguments must be simple (no complex objects).
- Learning curve: Mixing server and client code can confuse beginners.
Section 3: Expanding BlogSphere
Let’s push BlogSphere further. Users want to filter posts by tag, and admins want to save drafts.
Filtering Posts
On the user side, we’ll display posts and let them filter by tag. Server Actions can help fetch filtered data:
// app/actions.ts
'use server';
export async function getPostsByTag(tag: string) {
  const allPosts = [
    { id: 1, title: 'AI Basics', tag: 'tech', date: new Date() },
    { id: 2, title: 'Travel Tips', tag: 'travel', date: new Date() },
  ]; // Pretend database
  return allPosts.filter(post => post.tag === tag);
}

// app/posts/[tag]/page.tsx
export default async function PostsByTag({ params }: { params: { tag: string } }) {
  const posts = await getPostsByTag(params.tag);
  return (
    <ul>
      {posts.map(post => (
        <li key={post.id}>{post.title} - {post.tag}</li>
      ))}
    </ul>
  );
}
Here, getPostsByTag runs on the server, fetching posts for a tag like "tech." The page renders them directly.
Saving Drafts
Admins might want to save a draft without publishing. Let’s add an event handler:
// app/actions.ts
'use server';
export async function saveDraft(content: string) {
  console.log('Draft saved:', content);
  return { success: true };
}

// app/admin/edit-post/page.tsx
'use client';
import { saveDraft } from '@/app/actions';

export default function EditPost() {
  return (
    <form>
      <textarea
        name="content"
        onChange={async (e) => {
          await saveDraft(e.target.value);
        }}
      />
      <button type="submit">Publish</button>
    </form>
  );
}
Every keystroke saves the draft on the server. We could debounce this (wait a bit between saves) to avoid overloading, but this shows the flexibility—Server Actions work beyond forms!
Section 4: Optimistic Updates in BlogSphere
Now, let’s make BlogSphere feel really fast with optimistic updates. Normally, when an admin adds a post, they wait for the server to confirm it’s saved before seeing it on the screen. What if we show it instantly and update it behind the scenes? That’s optimistic updating—assuming success and fixing it later if something goes wrong.
Imagine the admin adds "Why AI is Awesome" on the /posts page, where users also see the latest posts. We’ll use the useOptimistic hook to show the post immediately:
// app/actions.ts
'use server';
import { revalidatePath } from 'next/cache';

export async function addPostOptimistic(formData: FormData) {
  const title = formData.get('title') as string;
  const content = formData.get('content') as string;
  const tag = formData.get('tag') as string;

  if (!title || title.length < 3) {
    throw new Error('Title must be at least 3 characters long');
  }

  const newPost = { id: Date.now(), title, content, tag, date: new Date() };
  console.log('Post added:', newPost);
  revalidatePath('/posts');
  return newPost;
}

// app/posts/page.tsx
'use client';
import { useOptimistic } from 'react';
import { addPostOptimistic } from '@/app/actions';

type Post = { id: number; title: string; content: string; tag: string; date: Date };

export default function PostsPage({ initialPosts }: { initialPosts: Post[] }) {
  const [optimisticPosts, addOptimisticPost] = useOptimistic<Post[], Post>(
    initialPosts,
    (state, newPost) => [...state, newPost]
  );

  async function handleAddPost(formData: FormData) {
    const newPost = {
      id: Date.now(),
      title: formData.get('title') as string,
      content: formData.get('content') as string,
      tag: formData.get('tag') as string,
      date: new Date(),
    };
    addOptimisticPost(newPost); // Show instantly
    await addPostOptimistic(formData); // Confirm with server
  }

  return (
    <div>
      <ul>
        {optimisticPosts.map(post => (
          <li key={post.id}>{post.title} - {post.tag}</li>
        ))}
      </ul>
      <form action={handleAddPost}>
        <input name="title" placeholder="Post Title" />
        <textarea name="content" placeholder="Write your post..." />
        <input name="tag" placeholder="Tag (e.g., tech)" />
        <button type="submit">Add Post</button>
      </form>
    </div>
  );
}
How It Works
The useOptimistic hook takes the current posts and a function to update them. When the admin submits the form, we:
- Instantly add the post to
optimisticPosts—it appears on the screen. - Call
addPostOptimisticto save it on the server. - If the server fails (e.g., validation error), we could roll back, but here we assume success for simplicity.
Advantages and Challenges
- Advantage: Feels instant—users love speed! Great for likes, comments, or posts.
- Advantage: Works with Server Actions’ server-side power.
- Challenge: If the server fails, you need a plan to undo the update (we’ll save that for later).
- Challenge: Requires client-side code, so it’s not purely server-driven.
In BlogSphere, optimistic updates make adding posts snappy, keeping users engaged. It’s like saying, “Trust me, it’s saved,” while the server catches up.
Conclusion
Let’s wrap up! Server Actions in Next.js let you mutate data—like adding posts or saving drafts—right from your components. They’re fast, secure, and tie into caching for instant updates. With optimistic updates, they feel even faster. In BlogSphere, we added posts, validated them, filtered by tags, saved drafts, and made updates feel instant—all with a few functions.
Key takeaways:
- Use
'use server'to define Server Actions. - They handle form submissions, event handlers, and more.
- Validate data server-side for safety.
- Revalidate caches to keep the UI fresh.
- Optimistic updates boost perceived speed.
Common pitfalls to avoid:
- Don’t skip validation—users might send bad data.
- Watch out for serialization limits—keep arguments simple.
- Test client-server boundaries; mixing them takes practice.
- Plan for server failures with optimistic updates.
Next time you’re building an app, think: Can Server Actions simplify this? Can optimistic updates make it feel faster? For BlogSphere, they turned a messy process into a smooth, snappy one. You’ve got the tools—go experiment and build something awesome!
Slides

Let's talk about how you can update your data using React's server actions.
In this course we are building a blogging app where users read posts filtered by tags like 'tech' or 'travel,' and admins add or edit posts. Server Actions in Next.js make this smooth by letting us update data directly from components—no page reloads, no messy API calls.
Without Server Actions, adding a post might mean sending a request, waiting, and refreshing the page. That’s slow and clunky—users hate waiting. Server Actions fix this by running on the server with one call.

Server Actions are async functions that run server-side. Call them from a form or button, and they update data instantly. It’s like giving Blog superpowers—fast, secure, and simple!
You might think client-side code can do it all. Nope! That’s not secure for sensitive tasks like saving posts. Server Actions keep the heavy lifting on the server.
Server Actions are special functions in Next.js marked with 'use server'. They run on the server, not the browser, and handle data mutations—like adding a post to BlogSphere.
Let’s say an admin adds a post titled 'Why AI is Awesome'. With Server Actions, we define one function, call it from a form, and it saves the post—no extra steps!
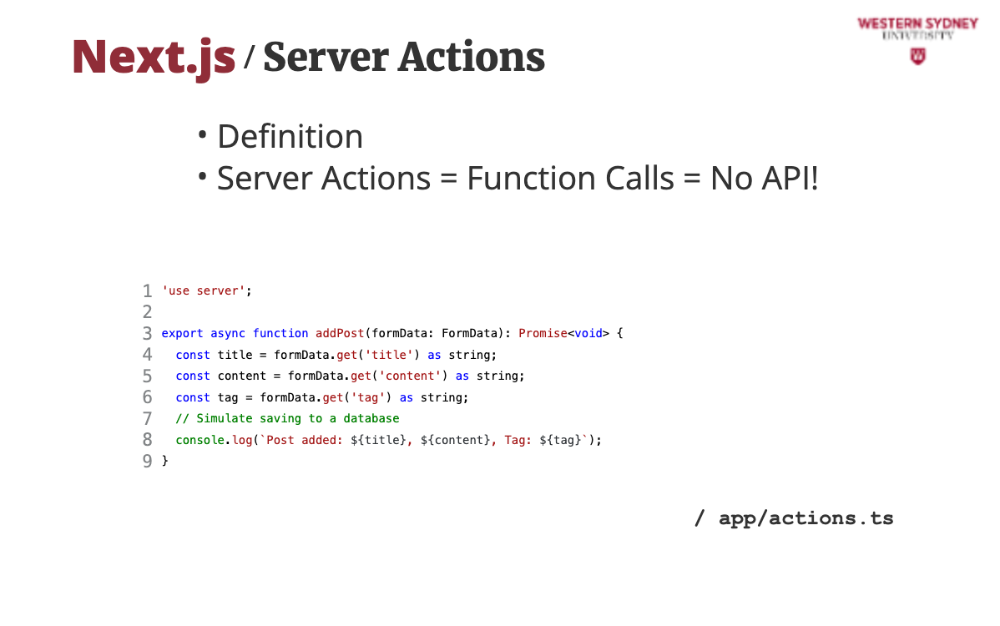
Here’s our first Server Action for Blog. It’s basic but shows the core idea. This Server Action takes form data, extracts the title, content, and tag, and logs them—pretending it’s a database save. You’d call this from a form in Blog's admin page. It’s server-side, so it’s secure and fast.

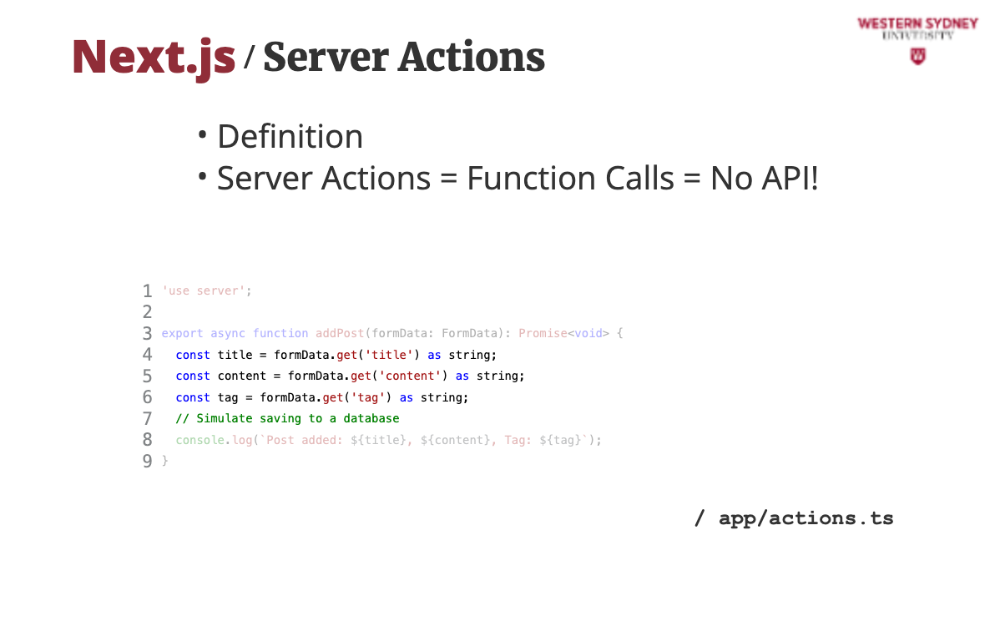
Server actions must have the "use server" keyword as a first experssion in the file.
These lines grab the form data—title, content, and tag. In BlogSphere, this is how we collect what the admin types, solving the problem of getting user input to the server.
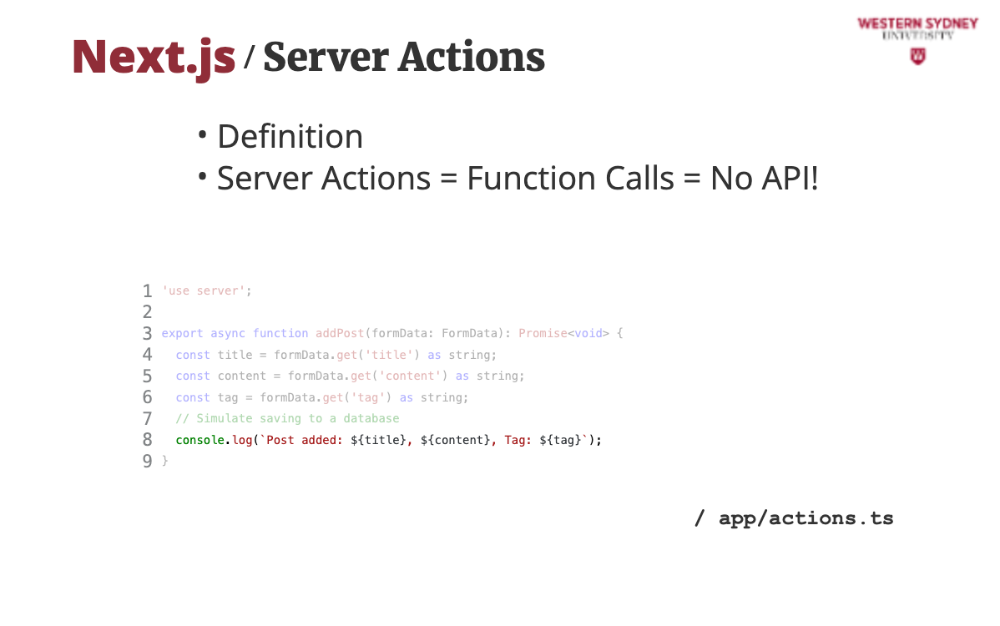
This logs the post, simulating a save. It’s our first step to mutating data, showing how Server Actions handle the core task of updating Blog
Let’s build the admin side of Blog. This form lets admins add posts with a title, content, and tag. The Server Action ties it all together. The form calls addPost, which validates the title and logs the post. useActionState shows feedback—errors or success—without a reload. Let's break it down!
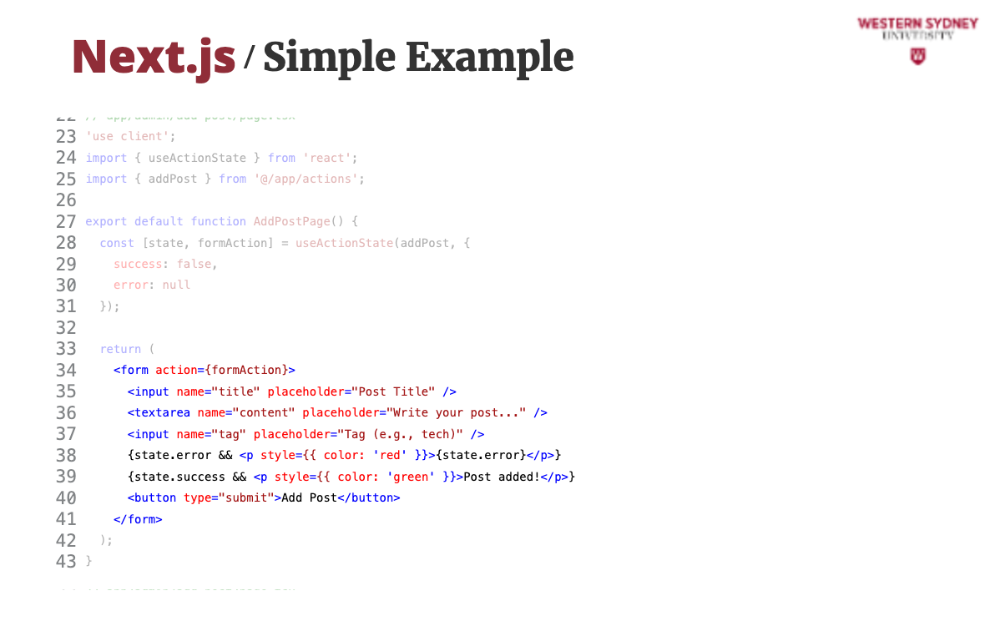
This is the form where we collect user data. It is an uncontrolled form.
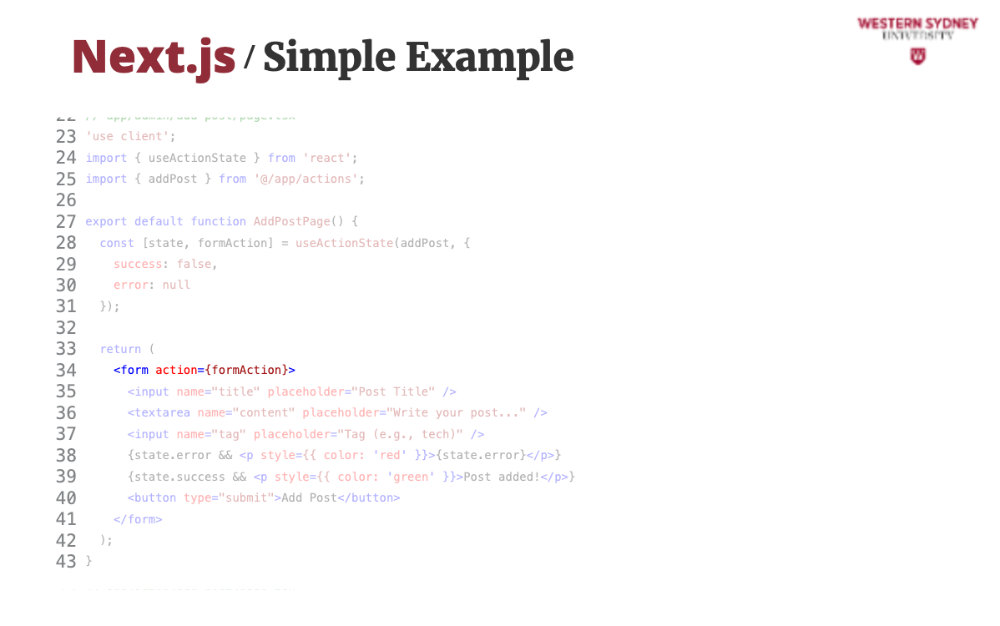
Notice that instead of URL we provide function formAction to the action prop. This already is magic!
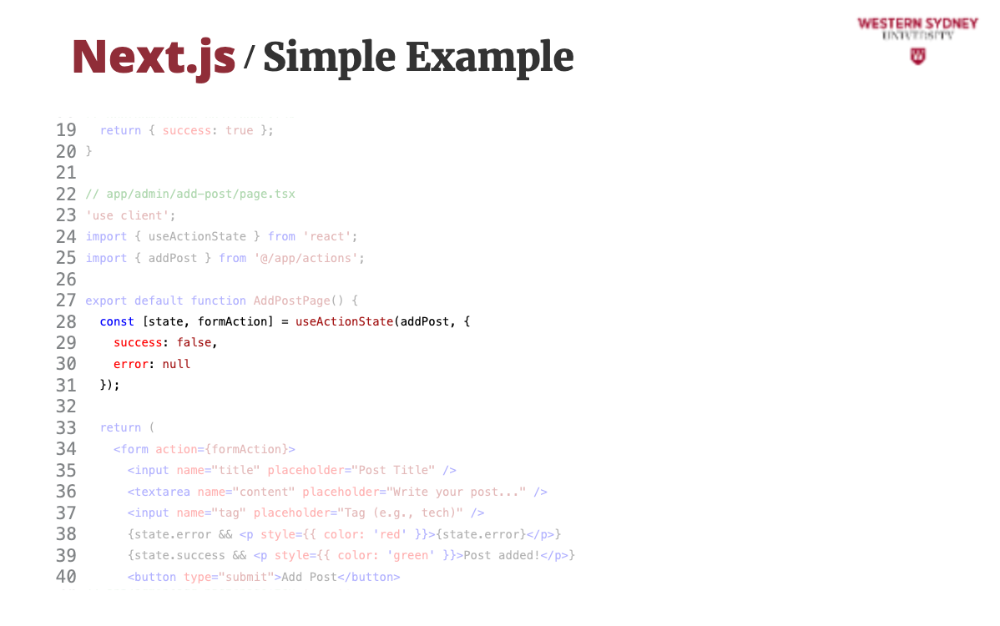
The formAction is created using the new useActionState hook, which takes a server action addPost as its parameter and allows us to track its asynchronous execution.
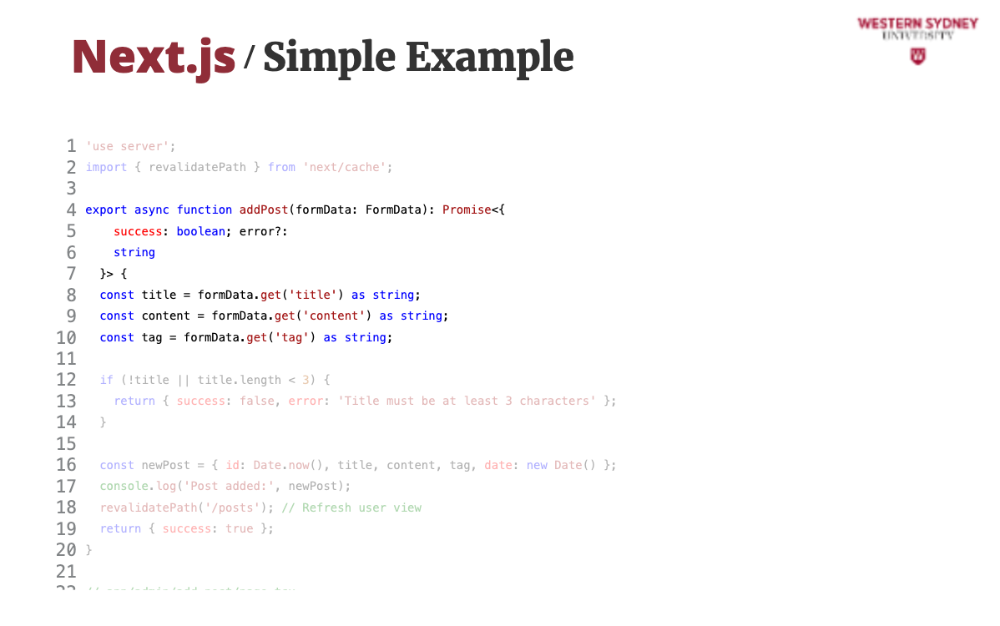
The server action addPost reads the form data and parses them to variables
We then validate the data. This is using arbitrary validation, but there are sophisticated validation libraries, such as Zod, that you can use. Please note that we return JSON with success set to false and the error message. This is how we communicate results to the client.
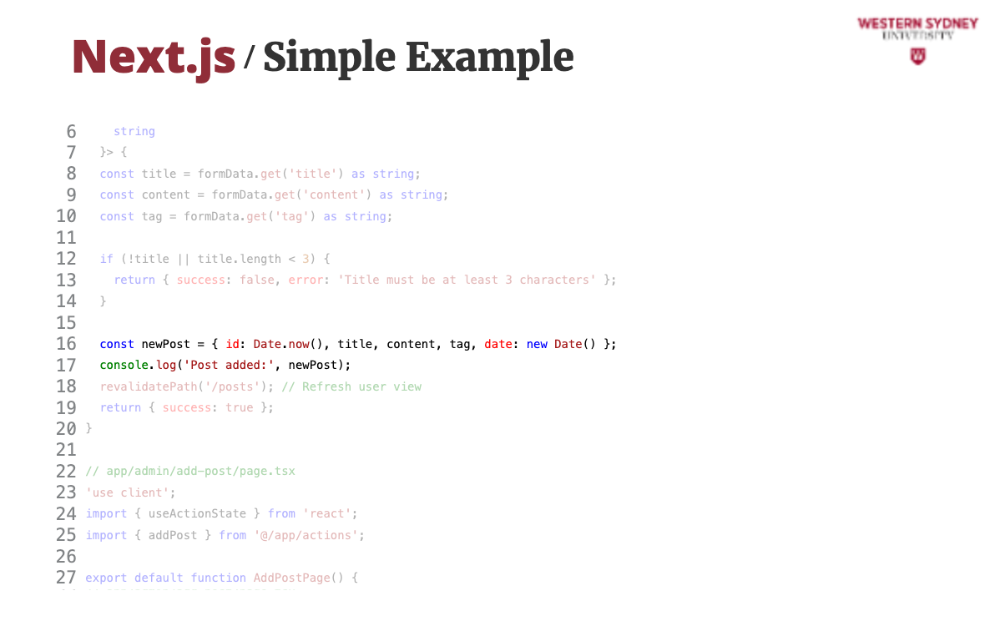
We create and log the new post. Here you would store it in the database.

Last, we tell Next.js to invalidate the route /posts, as adding the new posts should vacate the cached data and load a new list.

We return a JSON that the action executed correctly
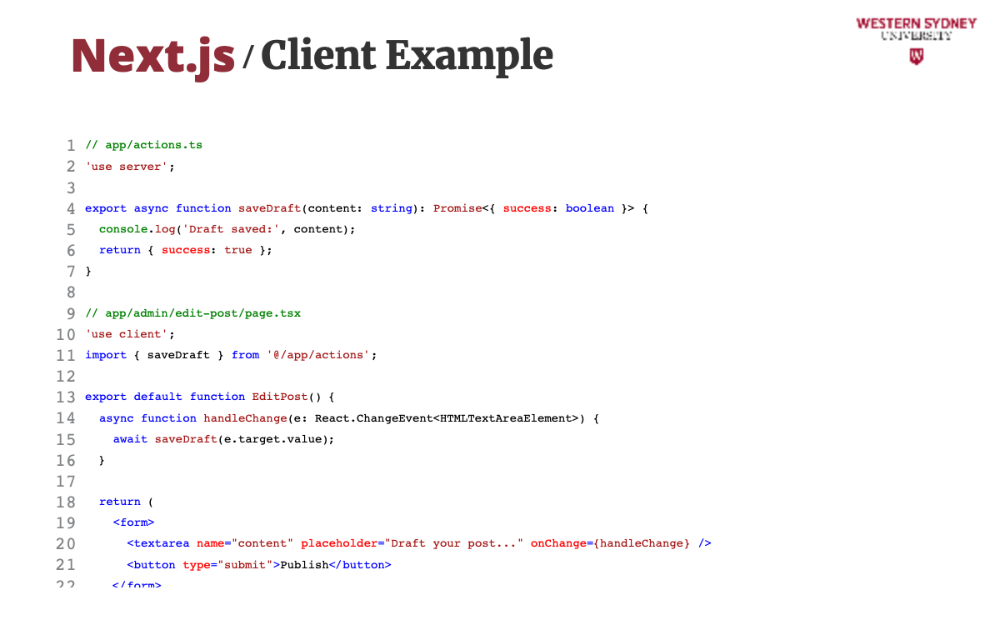
But, as an absolute magic trick, you can call server function from the client!
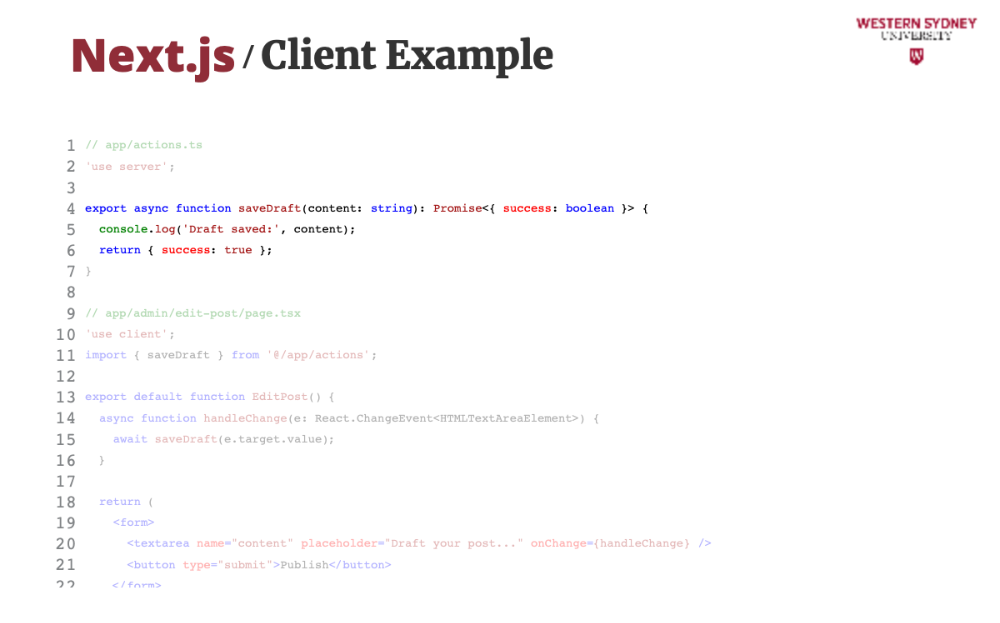
Consider this simple function that save a draft of the text you are working on.
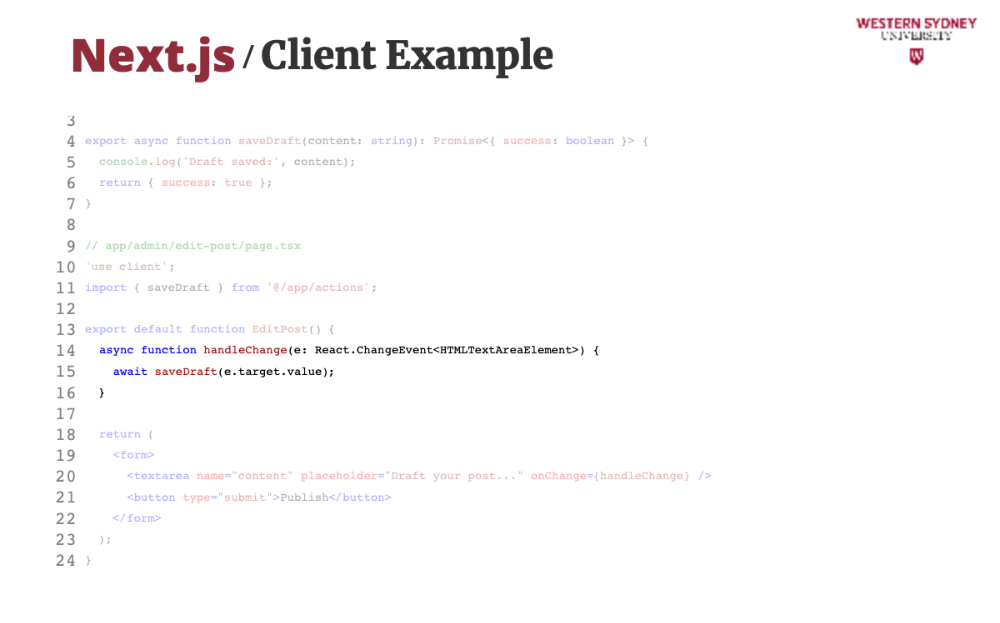
On client, we add an asynchronous function that calls this server action ... yes, you heard it well ... we can call function on the server from the client!
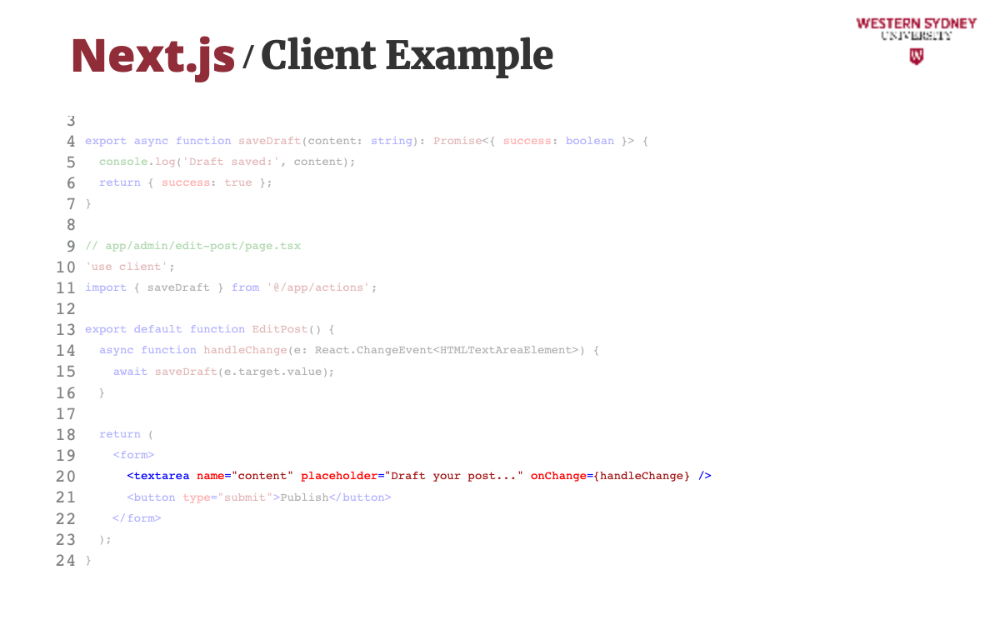
We then hook this asynchronous handler to the onChange listener, so when user changes the value in the textarea it is automatically updated on the server.
Server actions allow type safe calls, reducing need for complicated REST structures.
On the other hand, it disables access to external users who might want to use this endpoint as well. Thus, it is not useful when creating public facing APIs.

Sometimes, server actions take too long, but you can anticipate their result. Therefore, you can use optimistic updates that update the client prior to action returning a value. This form optimistically adds a post—users see it immediately, and the server confirms it.
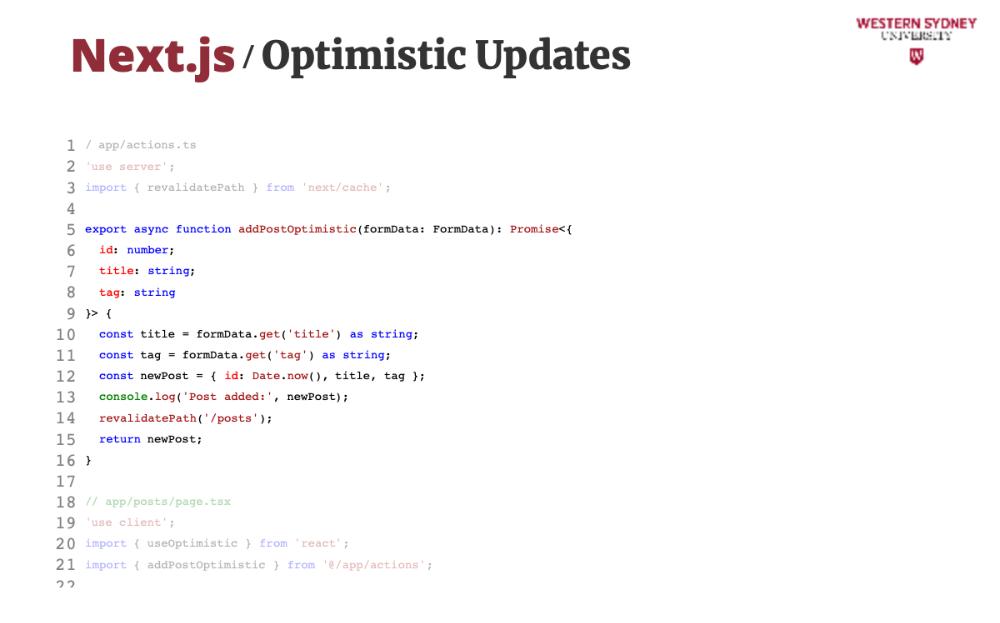
This is our server action, that creates the new post.
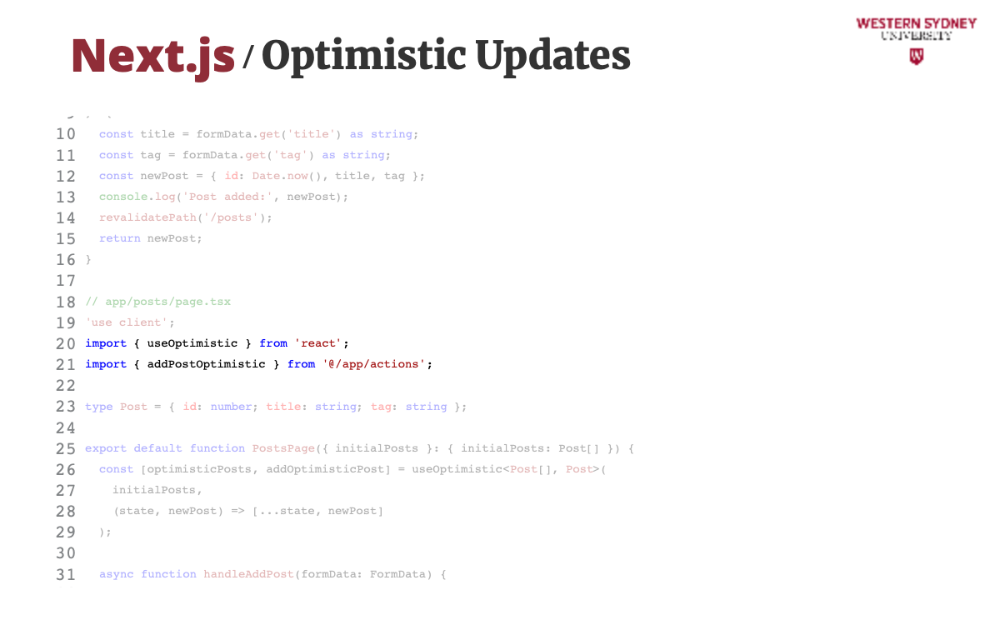
useOptimistic sets up instant updates. It takes initial posts and a function to add new ones, solving the problem of slow UI updates in Blog
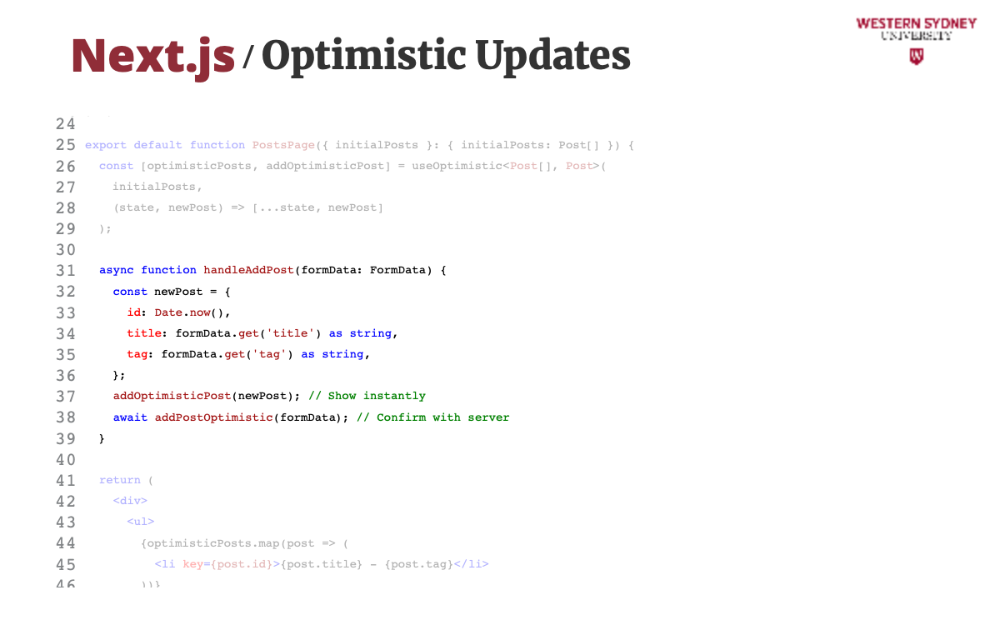
We create a post and add it optimistically before the server call. This makes Blog feel snappy, tackling user wait time.
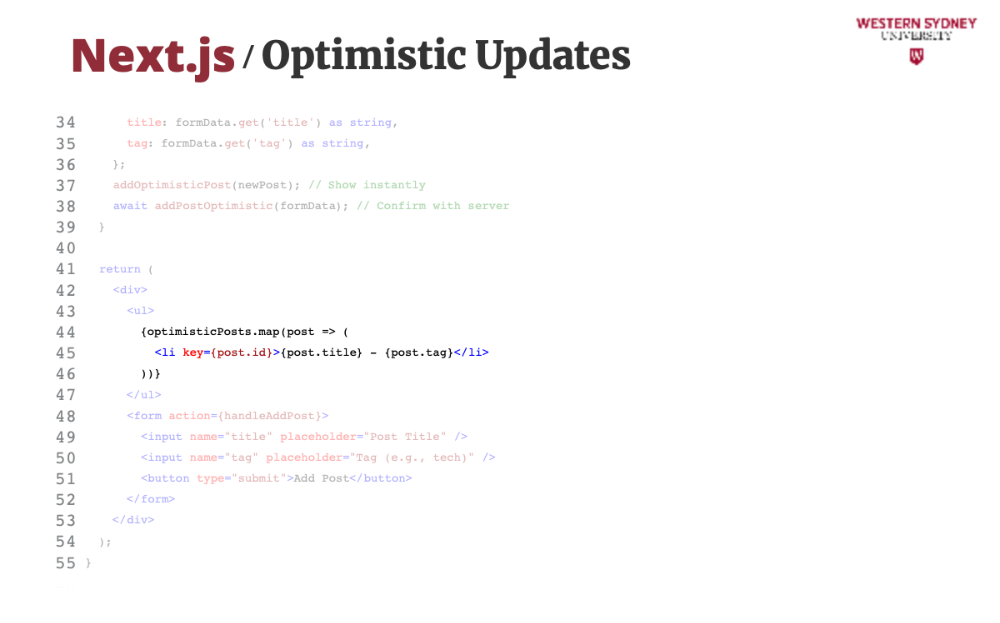
We use the optimistic value to render the list, not the original value.

Server Actions let you mutate data—like adding posts—right from components. They’re secure, fast, and tie into Next.js caching.
Always validate data server-side, use revalidatePath for fresh UI, and test optimistic rollbacks if the server fails.
Don’t skip validation—bad data crashes apps. Keep arguments simple for serialization. Practice mixing client and server code—it’s tricky but worth it!