Security
Securing Full-Stack Applications
In your Blog, users are reading posts, filtering them by tags or dates, and your admin panel lets you create and edit content seamlessly. Everything’s perfect—until a hacker slips malicious code into a blog post, stealing user data or crashing your site. Security isn’t just a buzzword; it’s the foundation that keeps your app trustworthy and functional. Today, we’ll dive into common security issues in Next.js apps, explore how Next.js helps you tackle them, and learn how to protect our blogging app from real-world threats like XSS, CSRF, and more.
Why is this relevant? In full-stack development, users trust you with their data—names, emails, even passwords. A single vulnerability can ruin that trust. We’ll use our blogging app as a running example to make this practical and relatable. Let’s start by busting a common misconception: many beginners think Next.js’s built-in features make apps secure by default. Spoiler alert: they help, but you still need to take deliberate steps to lock things down. Another misconception? “My app is small, so hackers won’t bother.” Wrong—automated bots target everyone, big or small. Ready to secure your app? Let’s go!
Section 1: Understanding Common Security Threats
First, let’s identify the enemies we’re fighting. Web apps, including those built with Next.js, face several common threats. Here’s a rundown, using our blogging app to ground each one:
- Cross-Site Scripting (XSS): A hacker injects malicious JavaScript into your blog post’s comments section. When users view the post, the script runs, stealing their session cookies or redirecting them to a phishing site. Beginners often think sanitizing inputs is enough, but XSS can sneak through unescaped outputs too.
- Cross-Site Request Forgery (CSRF): A user logged into your admin panel visits a malicious site, which tricks their browser into sending a request to delete a blog post. Many assume CSRF only affects old-school apps, but modern APIs need protection too.
- SQL Injection (for database-driven apps): If your blogging app uses a database to store posts, poorly sanitized queries can let attackers steal or delete data. Next.js doesn’t handle this directly, but your backend does.
- Insecure Authentication/Authorization: Weak passwords or exposed API keys in your admin panel can let hackers take control. A common mistake is assuming client-side checks are secure—always verify on the server!
- Insecure Dependencies: Using outdated Next.js libraries or npm packages can introduce vulnerabilities. Think you’re safe because “everyone uses this package”? Even popular ones get exploited.
Let’s focus on our blogging app. Picture a user submitting a comment like <script>alert('Hacked!');</script>. If we display it raw, every visitor’s browser runs that script. Scary, right? Our goal is to prevent these issues step-by-step.
Section 2: XSS Prevention in Next.js
What is XSS and Why It’s Dangerous
Cross-Site Scripting (XSS) happens when untrusted input—like user comments or post content—gets displayed without proper sanitisation. In our blogging app, XSS could let attackers steal user sessions, deface posts, or worse. Next.js helps by escaping JSX by default, but you need to be proactive.
How to Prevent XSS
- Sanitise Inputs and Outputs:
- Use libraries like
sanitize-htmlorDOMPurifyto clean user inputs before saving them. - Example: A user submits a comment with
<script>stealData()</script>. Sanitize it to plain text before storing it in your database. - For outputs, ensure your frontend escapes dynamic content. Next.js’s JSX does this automatically for
{variable}, but be cautious withdangerouslySetInnerHTML.
- Use libraries like
- Content Security Policy (CSP):
- A CSP restricts which scripts can run. Add it via a
<meta>tag or server headers in Next.js’snext.config.js. - Example: Allow only scripts from your domain to block external malicious scripts.
- A CSP restricts which scripts can run. Add it via a
- Use Safe Components:
- Avoid
dangerouslySetInnerHTMLunless absolutely necessary. Instead, parse markdown safely with libraries likemarkedfor blog post content.
- Avoid
Example: Securing Blog Comments
Let’s secure the comments section of our blogging app. Here’s how a vulnerable version might look:
// pages/posts/[id].jsx
import { useState } from 'react';

export default function Post({ post }) {
  const [comments, setComments] = useState(post.comments);

  return (
    <div>
      <h1>{post.title}</h1>
      <div>
        {comments.map((comment) => (
          <div key={comment.id} dangerouslySetInnerHTML={{ __html: comment.text }} />
        ))}
      </div>
    </div>
  );
}
This code is a disaster waiting to happen—dangerouslySetInnerHTML renders raw HTML, including scripts. Here’s a safer version:
// pages/posts/[id].jsx
import { useState } from 'react';
import sanitizeHtml from 'sanitize-html';

export default function Post({ post }) {
  const [comments, setComments] = useState(post.comments);

  return (
    <div>
      <h1>{post.title}</h1>
      <div>
        {comments.map((comment) => (
          <div key={comment.id}>{sanitizeHtml(comment.text, {
            allowedTags: ['b', 'i', 'em', 'strong'],
            allowedAttributes: {}
          })}</div>
        ))}
      </div>
    </div>
  );
}
Now, sanitize-html strips harmful tags like <script>, allowing only safe formatting. If a user submits <script>alert('Hacked!');</script>, it’s rendered as plain text, harmless to visitors.
Advantages and Disadvantages
- Advantages: Sanitization is fast, effective, and preserves user experience by allowing some formatting (e.g., bold text).
- Disadvantages: Overly strict sanitization might frustrate users who want richer formatting. You’ll need to balance security and usability.
Section 3: CSRF Protection in Next.js
What is CSRF?
CSRF tricks authenticated users into performing unwanted actions. In our blogging app, an admin might unknowingly delete a post via a malicious link. Next.js APIs need explicit protection since HTTP requests can be forged.
How to Prevent CSRF
- CSRF Tokens:
- Generate a unique token per session and include it in forms or API requests.
- Verify the token server-side before processing sensitive actions like deleting posts.
- SameSite Cookies:
- Set cookies with
SameSite=StrictorSameSite=Laxto prevent cross-origin requests from using them. - Next.js middleware can enforce this.
- Set cookies with
- Double-Submit Cookies:
- Send the CSRF token both in a cookie and a header. The server checks they match.
Example: Securing Admin Actions
Here’s how to protect an admin endpoint to delete posts:
// pages/api/posts/delete.js
import { getSession } from 'next-auth/react';
import { csrfToken } from 'next-csrf';

const csrf = csrfToken({ secret: process.env.CSRF_SECRET });

export default csrf(async function handler(req, res) {
  const session = await getSession({ req });
  if (!session || !session.user.isAdmin) {
    return res.status(403).json({ error: 'Unauthorized' });
  }

  if (req.method === 'DELETE') {
    // Delete post logic
    return res.status(200).json({ message: 'Post deleted' });
  }

  return res.status(405).json({ error: 'Method not allowed' });
});
On the client, include the CSRF token in requests:
// components/AdminPanel.jsx
import { useSession } from 'next-auth/react';
import { getCsrfToken } from 'next-auth/react';

export default function AdminPanel({ postId }) {
  const { data: session } = useSession();

  const deletePost = async () => {
    const csrfToken = await getCsrfToken();
    await fetch('/api/posts/delete', {
      method: 'DELETE',
      headers: { 'CSRF-Token': csrfToken },
      body: JSON.stringify({ postId }),
    });
  };

  if (session?.user.isAdmin) {
    return <button onClick={deletePost}>Delete Post</button>;
  }
  return null;
}
This ensures only authenticated admins with valid CSRF tokens can delete posts.
Advantages and Disadvantages
- Advantages: CSRF tokens are robust and widely supported.
- Disadvantages: Adds complexity to your API and requires careful session management.
Section 4: Other Security Holes and Next.js Features
SQL Injection
If our blogging app uses a database (e.g., via Prisma), use parameterized queries or an ORM to prevent injection. Example:
// Vulnerable
const query = `SELECT * FROM posts WHERE id = ${userInput}`;

// Safe
const posts = await prisma.post.findMany({ where: { id: parseInt(userInput) } });
Authentication
Use Next.js’s next-auth for secure authentication. Store passwords with bcrypt, not plain text. Verify roles server-side for admin routes.
Secure Headers
Add security headers in next.config.js:
module.exports = {
  async headers() {
    return [
      {
        source: '/:path*',
        headers: [
          { key: 'X-Frame-Options', value: 'DENY' },
          { key: 'X-Content-Type-Options', value: 'nosniff' },
          { key: 'Content-Security-Policy', value: "default-src 'self'" },
        ],
      },
    ];
  },
};
This prevents clickjacking and MIME-type attacks.
Dependency Management
Run npm audit regularly and update packages. Pin versions in package.json to avoid surprises.
Section 5: Penetration Testing Your Next.js App
Penetration testing (pen-testing) simulates attacks to find weaknesses. For our blogging app, here’s how to do it:
- Manual Testing:
- Try injecting
<script>tags in comments or post inputs. Check if they’re sanitized. - Test admin routes without authentication—ensure 403/401 errors.
- Try injecting
- Automated Tools:
- Use OWASP ZAP or Burp Suite to scan for XSS, CSRF, or injection vulnerabilities.
- Example: ZAP can crawl your app and flag unescaped outputs.
- Fuzzing:
- Send random inputs to API endpoints (e.g.,
/api/posts) to test error handling.
- Send random inputs to API endpoints (e.g.,
- Checklist:
- Verify CSP headers with tools like
securityheaders.com. - Test for exposed API keys in client-side code (use environment variables!).
- Verify CSP headers with tools like
Example: Testing XSS
Manually submit a comment like <img src="x" onerror="alert('Hacked!')">. If an alert pops up, your sanitization failed. Use ZAP to automate this across all inputs.
Advantages and Disadvantages
- Advantages: Pen-testing catches issues before hackers do.
- Disadvantages: Time-consuming and may require expertise or paid tools.
Conclusion
Securing a Next.js app like our blogging platform is about layering defenses. We’ve covered:
- XSS: Sanitize inputs/outputs and use CSP.
- CSRF: Implement tokens and SameSite cookies.
- Other Threats: Use ORMs, secure headers, and update dependencies.
- Pen-Testing: Regularly test manually and with tools like ZAP.
Key Takeaways:
- Never trust user input—always sanitize and validate.
- Leverage Next.js features like
next-authand headers, but don’t rely on them alone. - Test early and often to catch vulnerabilities.
Pitfalls to Avoid:
- Skipping server-side validation, assuming client-side is enough.
- Ignoring npm audit warnings or outdated packages.
- Using
dangerouslySetInnerHTMLwithout sanitization.
By applying these practices, your blogging app will be a fortress, keeping users safe and your reputation intact. Next time, we’ll explore performance optimization—because a secure app should also be fast!
Slides

Imagine your blogging app thriving—until a hacker slips in, stealing data via XSS or CSRF. Don’t panic! We’ll lock it down with NextJS tools, squash threats, and test like pros. Let’s make your app a fortress, keeping users safe and trust intact! Ready? Let’s dive in!
Why security matters? Security ensures your blogging app remains trustworthy. A single vulnerability can expose user data or crash your site, ruining your reputation.
Many think NextJS’s features like JSX escaping make apps bulletproof. Wrong—you need deliberate steps to secure it. In this lecture we’ll secure our blogging app where users read posts and admins manage content, facing threats like XSS and CSRF.
With XSS or Cross-Site Scripting), hackers inject scripts into comments, stealing user data and sessions. Our app’s comment section is a prime target.
CSRF or Cross-Site Request Forgery happens when malicious sites trick other sites thinking that requests are coming from the original site, for example tricking admins into deleting posts. APIs in NextJS need protection agains CSRF.
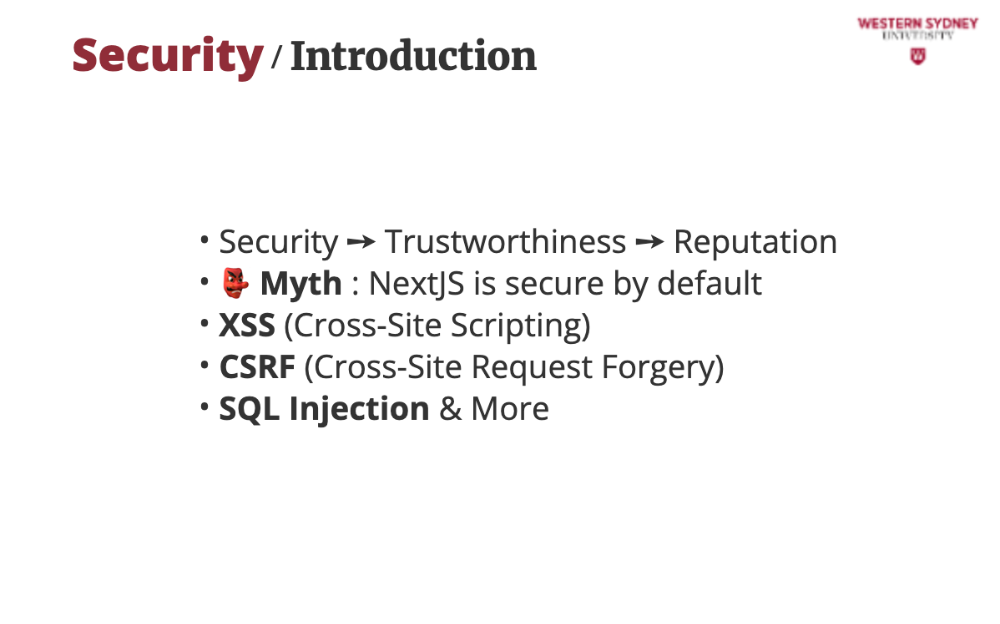
With SQL Injection, unprotected creation of queries leading to harmful queries combined with weak authentication can expose data. Today, we’ll secure our database and admin panel.
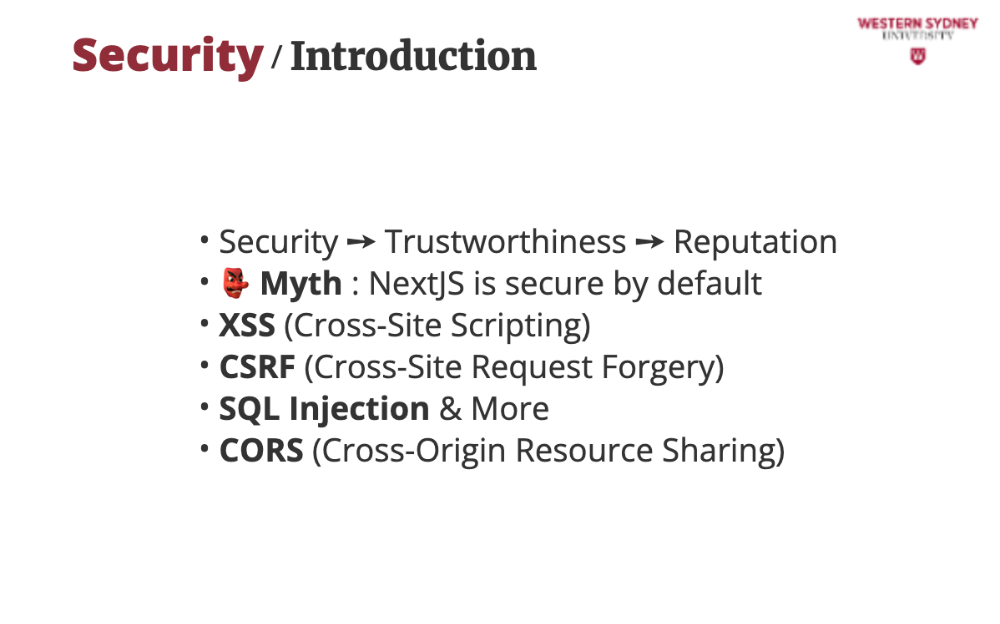
A lot of issues can be solved with CORS, or Cross-Origin Resource Sharing controls, which domains can access your API, preventing unauthorised sites from fetching data. So, let's dive in and see how we can implement protection against these threats and apply CORS to our API.
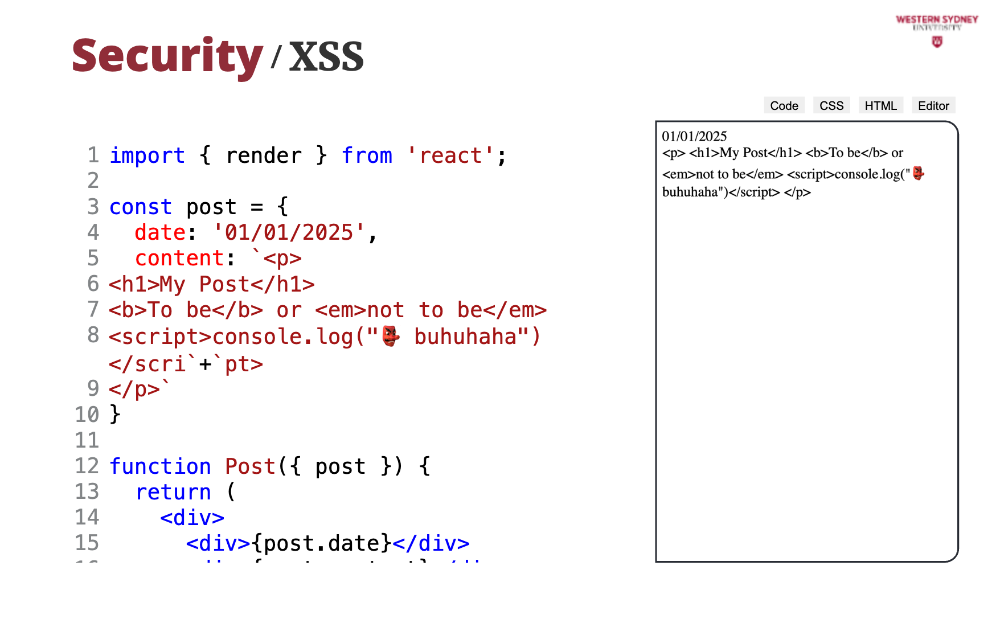
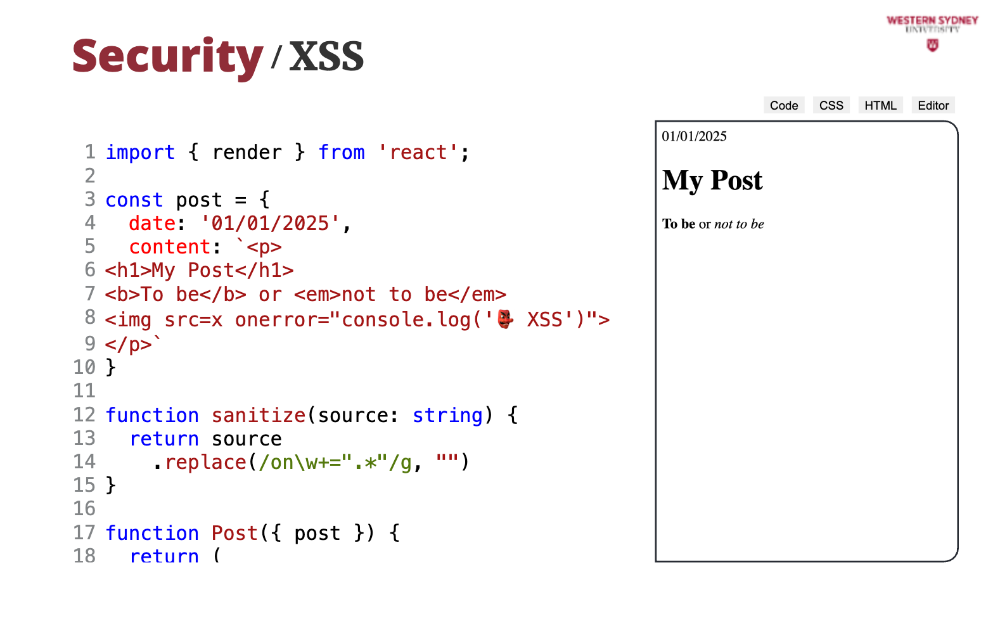
Let's take a look at dangers of XSS. Imagine you are trying to render a post in your blog.
It is very probable, that your post contains some formatting, such as bold text, italics, different fonts or tables. Thus, it is a normal practice to keep formatting in HTML.
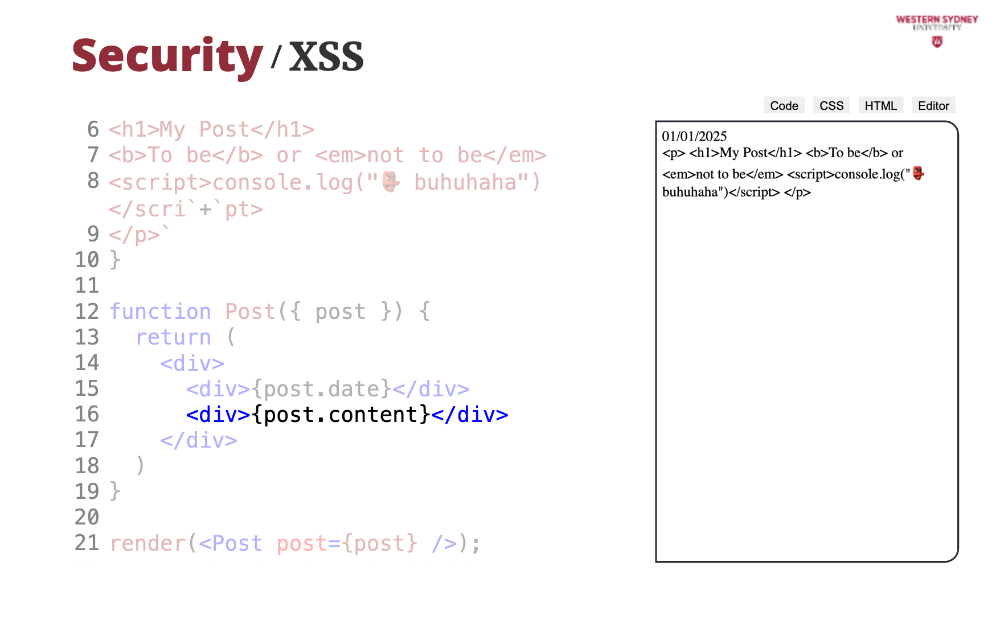
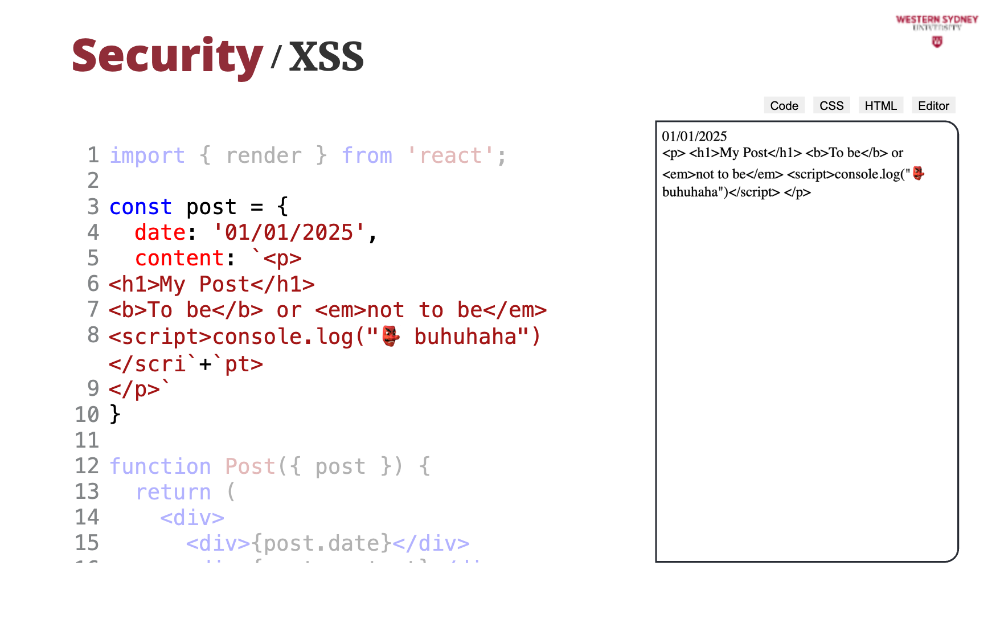
But, if we render HTML string with just curly braces ...
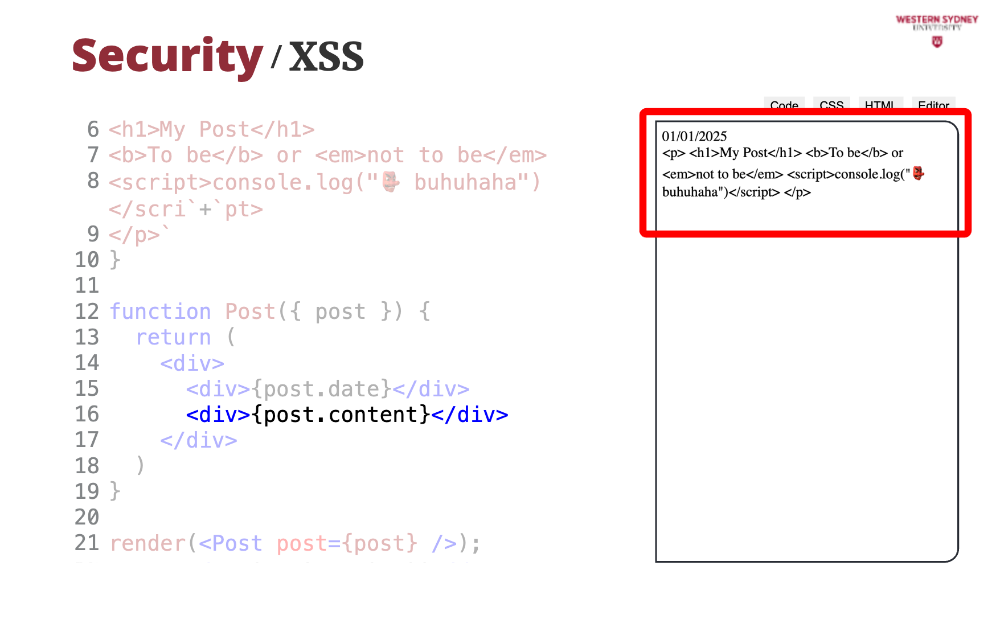
... we can see that instead of seeing rich text, React renders the HTML source.
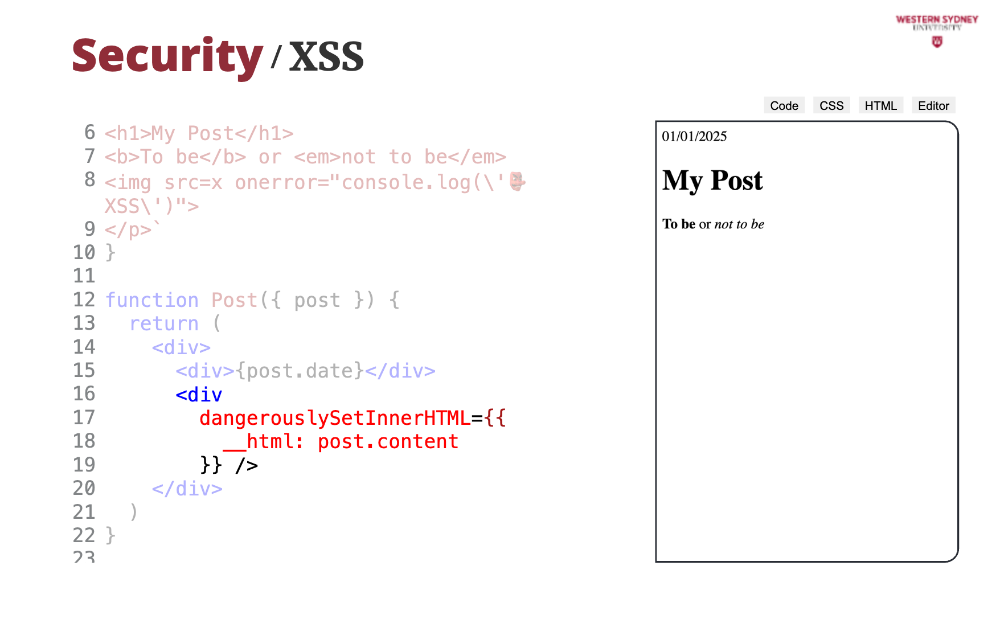
Therefore, if you want to render HTML from string, you have to use the dangerouslySetInnerHTML property. But oh-oh. If you look at the output, we see a properly formatted post, but we also see that the post executed arbitrary javascript, in this case, just logging a message in the console. In a worse scenario, a hacker could have sent the content of your local storage or your cookies to a different location, stealing your session and impersonating you.
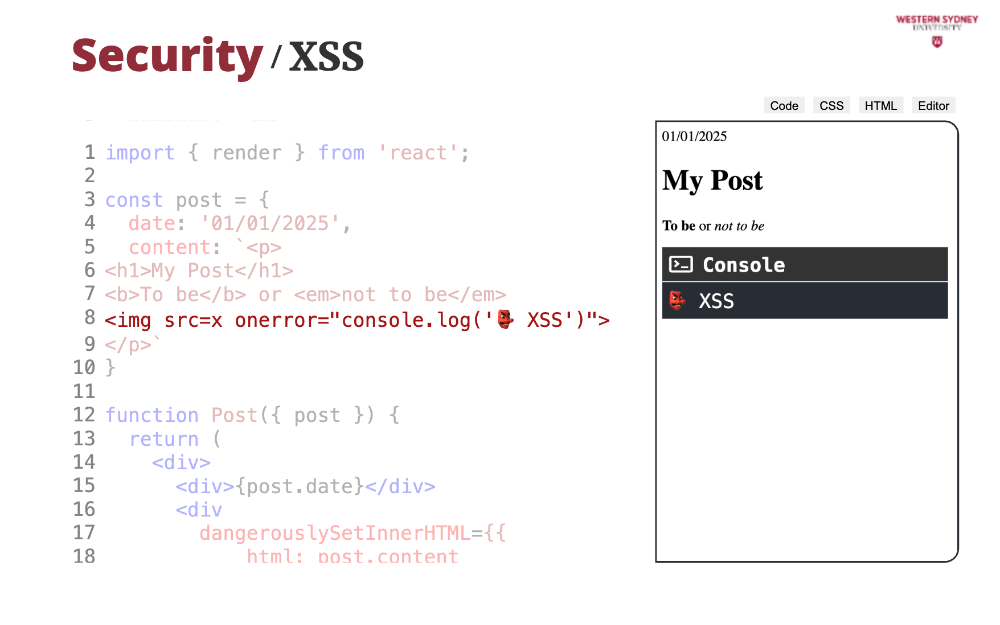
While the dangerouslySetInnerHtml does not execute any script tags, it has its security limits; this is flagged as dangerous. The problem is this line in the post, where we set the incorrect URL of the image and hook a javascript function to the onError handler. Let's fix that!
To deal with this problem, we implemented a simple sanitisation library, that strips the unwanted parts from the stored string.
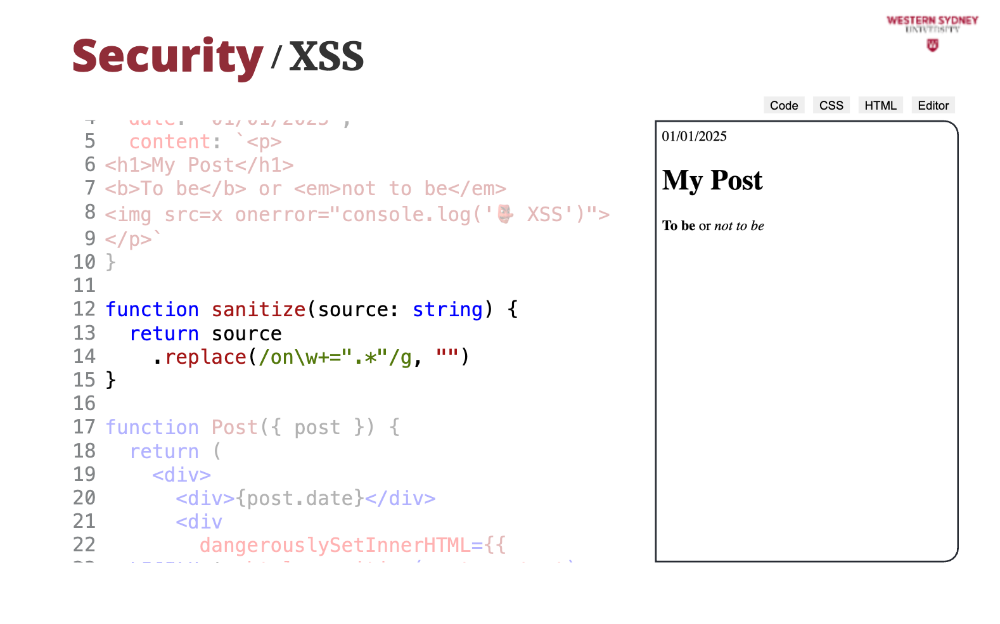
In our case, we just remove all the event handlers that start with onSomething string. In production, you want to use established libraries such as domPurify or sanitize-html.
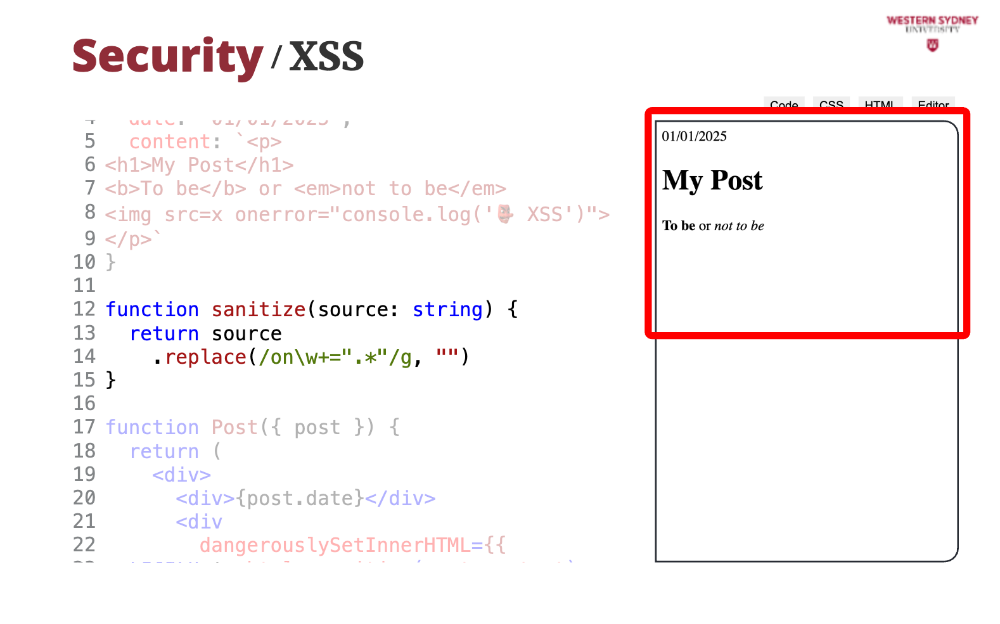
But as a result, you can see no message in the console. So sanitisation strips all the harmful parts of stored HTML source and prohibits XSS attacks.
CSRF attack is like a puppet show where the attacker pulls the strings by tricking a logged-in user into unknowingly sending malicious requests to a trusted website, exploiting their active session to perform unauthorised actions. We encourage you to pause our presentation and watch the video on what CSRF is and how to perform it.
You can protect yourself from CSRF in multiple ways.
First, you can use CSRF tokens, which are unique tokens for admin actions like deleting posts and verifying server-side. We will show you how to do that in NextJS very soon.
Second, you can tighten security of your cookies and issue same site cookies which prevent cross-origin requests from using session cookies.

Last, you can also double-submit your cookies as tokens in headers for extra security.
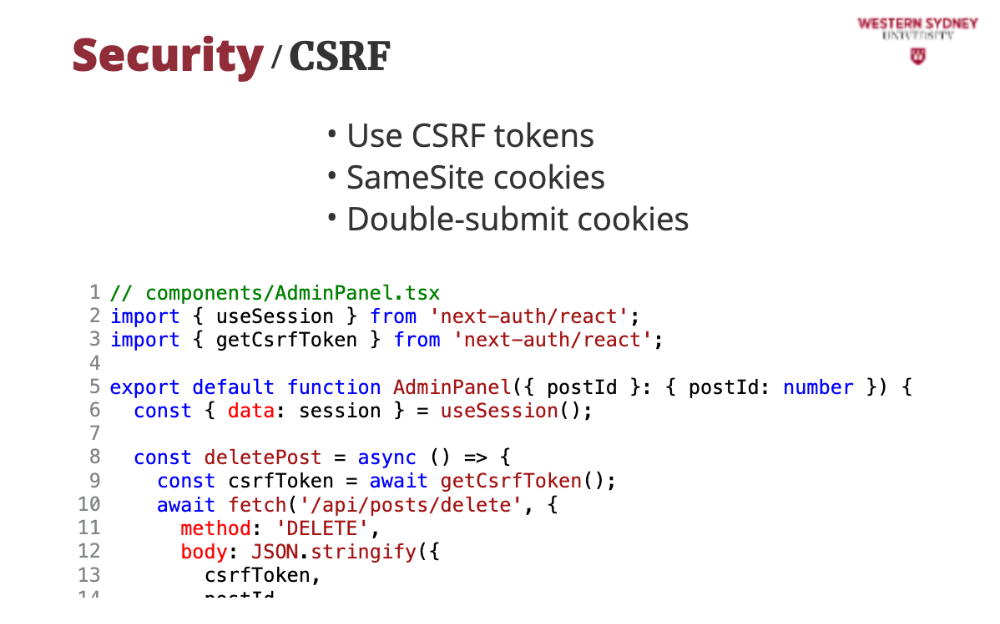
Now, let's take a look how we can solve the CSRF with CSRF token.
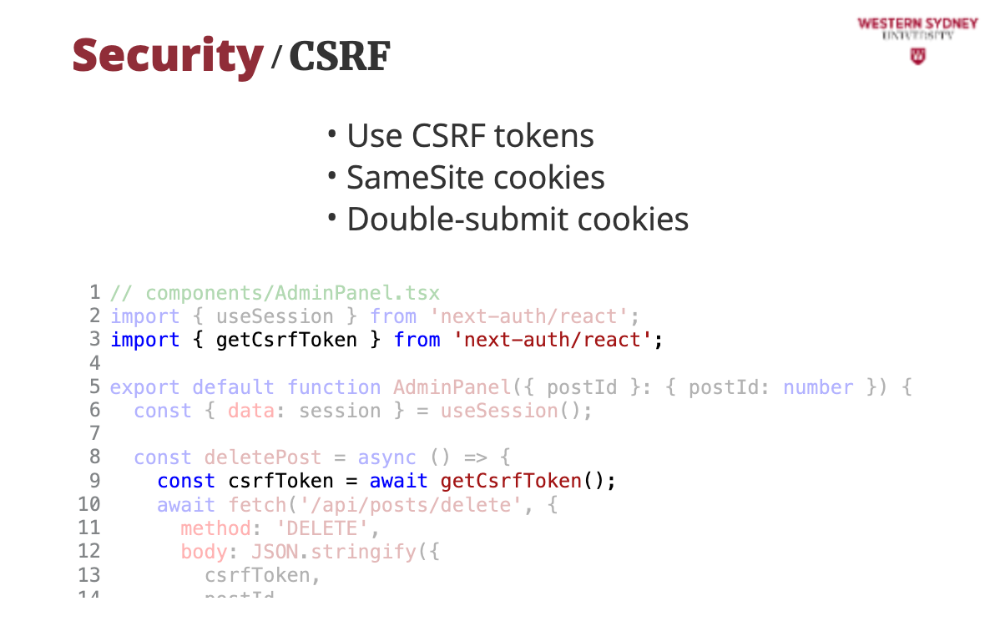
First, on the client, we obtain a CSRF token from the server. This request would be prohibited to read from another site than ours, and no other website can get access to it.
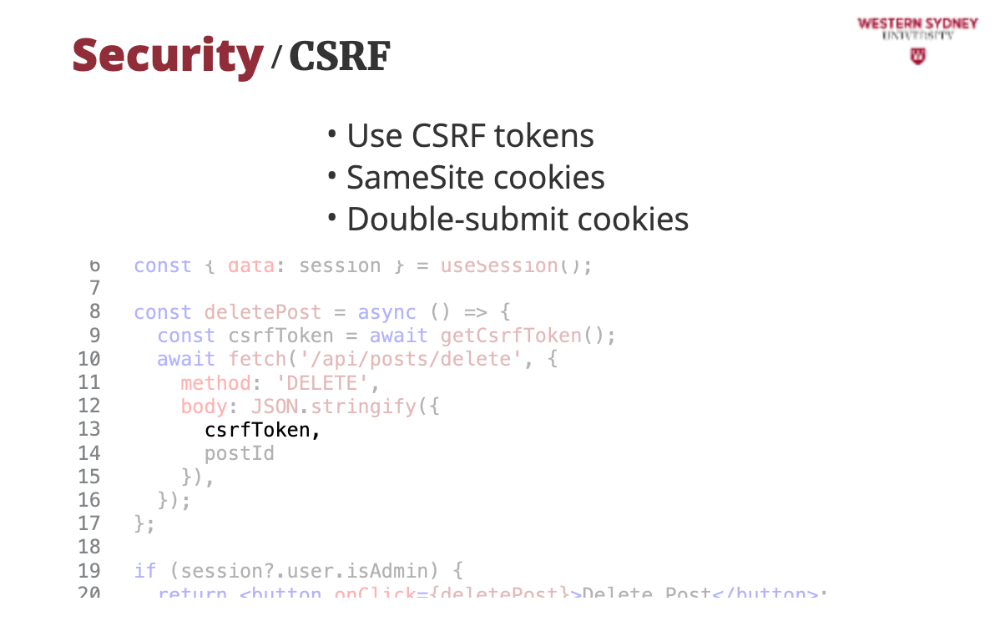
We add this token to the request.
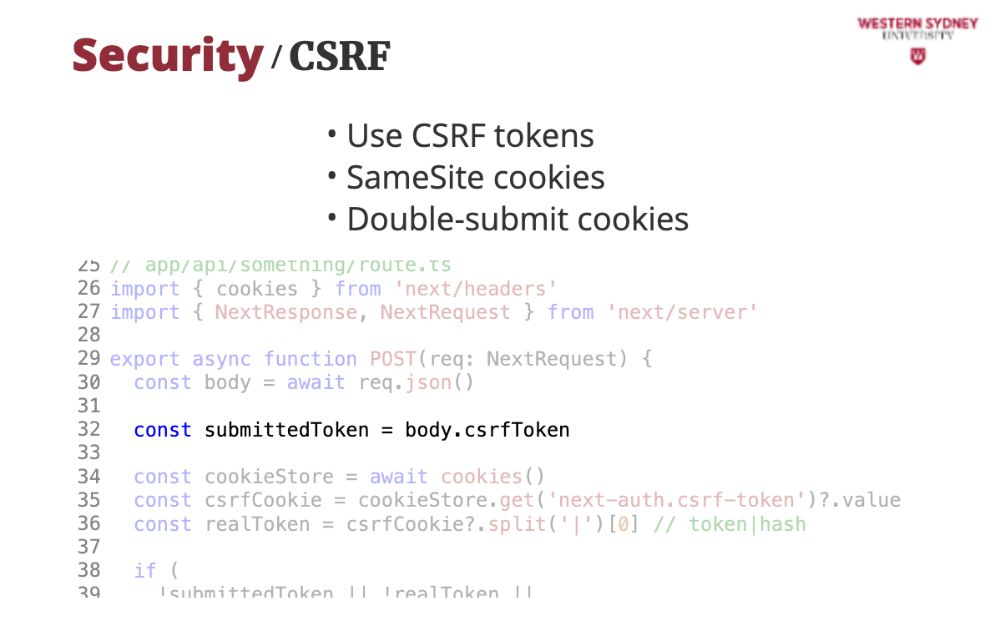
Then, in API route, we read both tokens from from the body of the request ...
... and from the cookie.
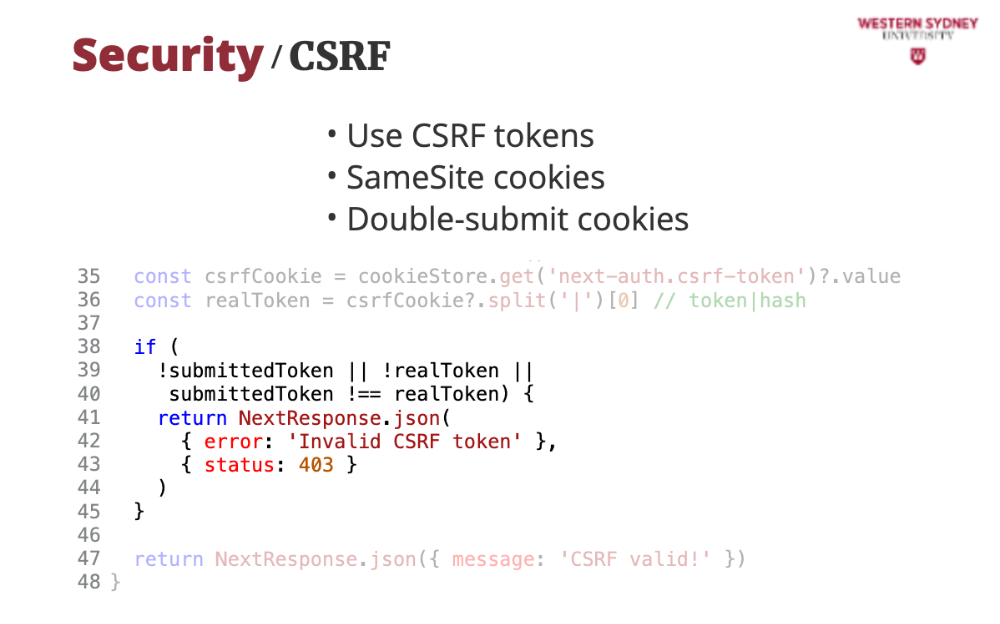
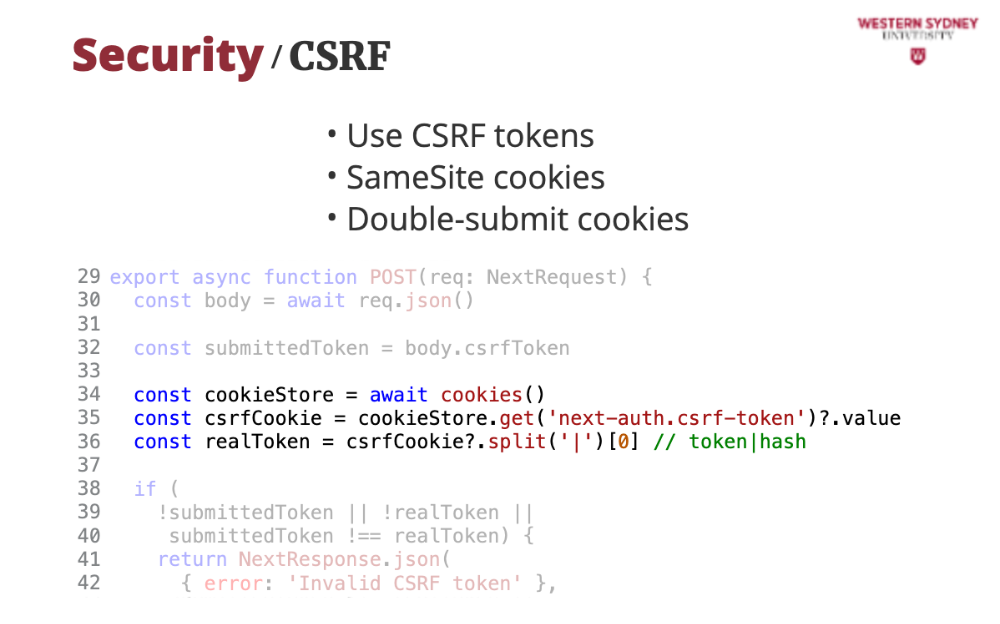
Last, since the cookies can be hijacked by CSRF, we compare the CSFR cookie from the request with the cookie value, and if they differ, we return an error. Problem solved!
Cross-Origin Resource Sharing (CORS) controls which domains can access your API or resources such as images, preventing unauthorised sites from fetching data. Our blogging uses CORS to stop malicious sites from reading post data.
Without CORS, any site could request your API, risking data exposure or abuse. Proper CORS policies ensure that only trusted domains interact with your app.
To implement CORS in NextJS you would implement middleware or API route headers to set CORS policies, allowing specific origins for safe API access.
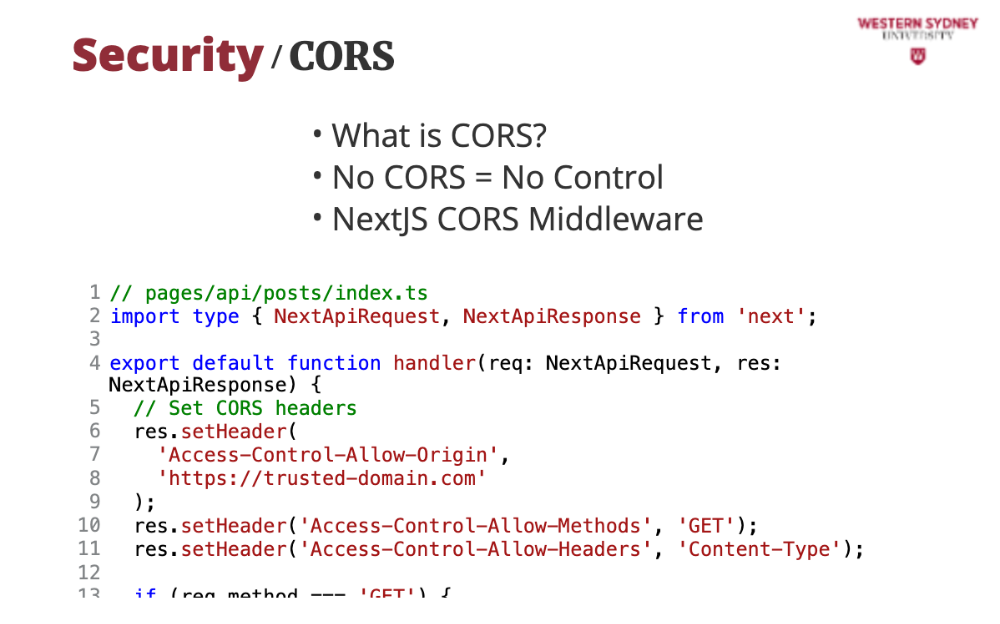
Let's check out an example. This code secures our blog’s API by restricting access to trusted domains and preventing unauthorised data requests.
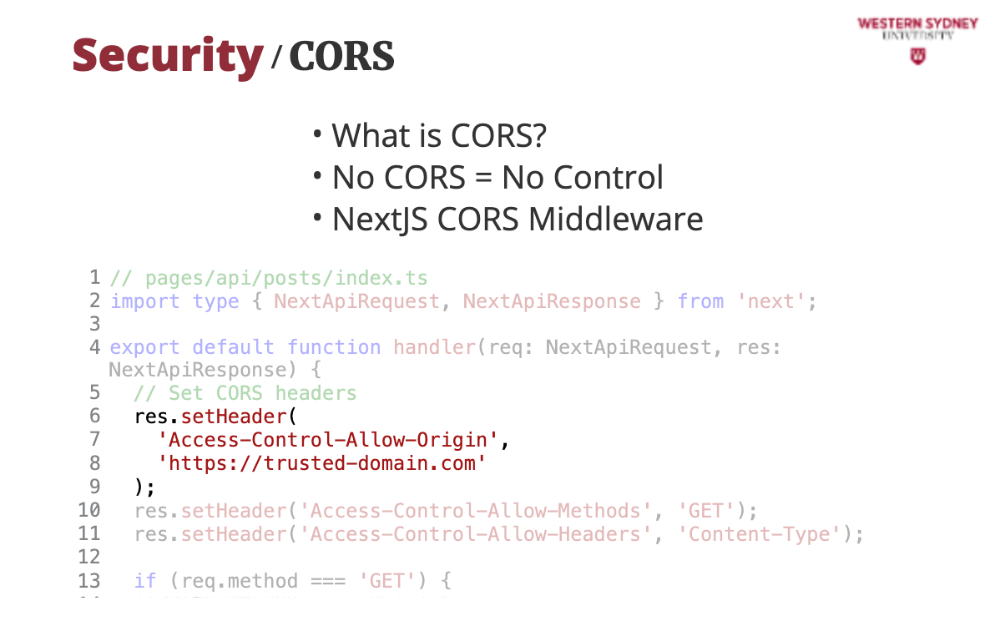
With Access-Control-Allow-Origin header we can limit the domains which can make requests to our API
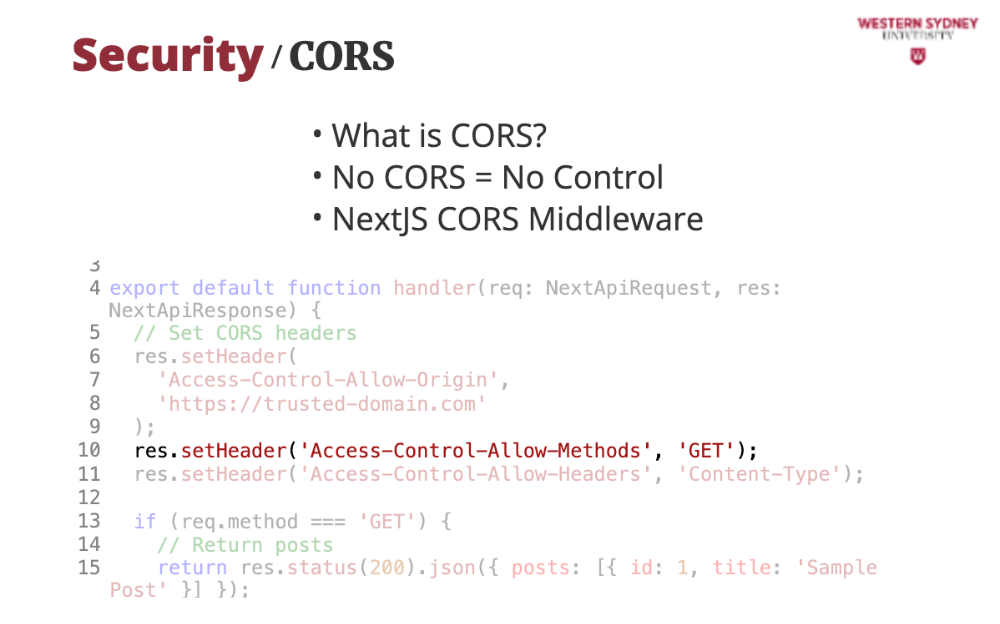
With Access-Control-Allow-Methods header we limit the REST methods that can be requested from our API. In this case we limit only GET method.
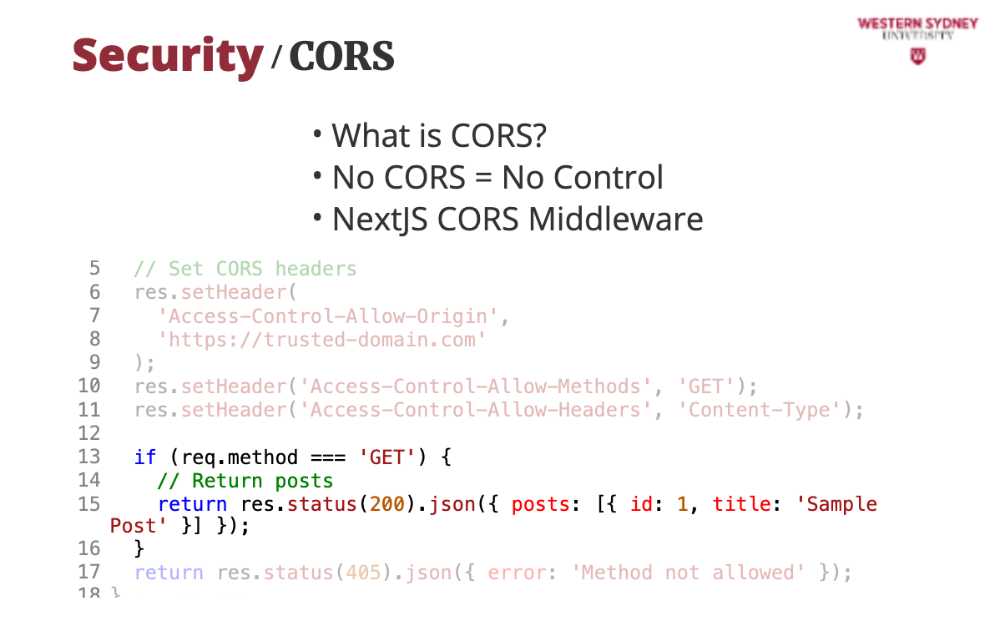
Last, with Access-Control-Allow-Headers we can limit which headers the server should consider when processing a request.
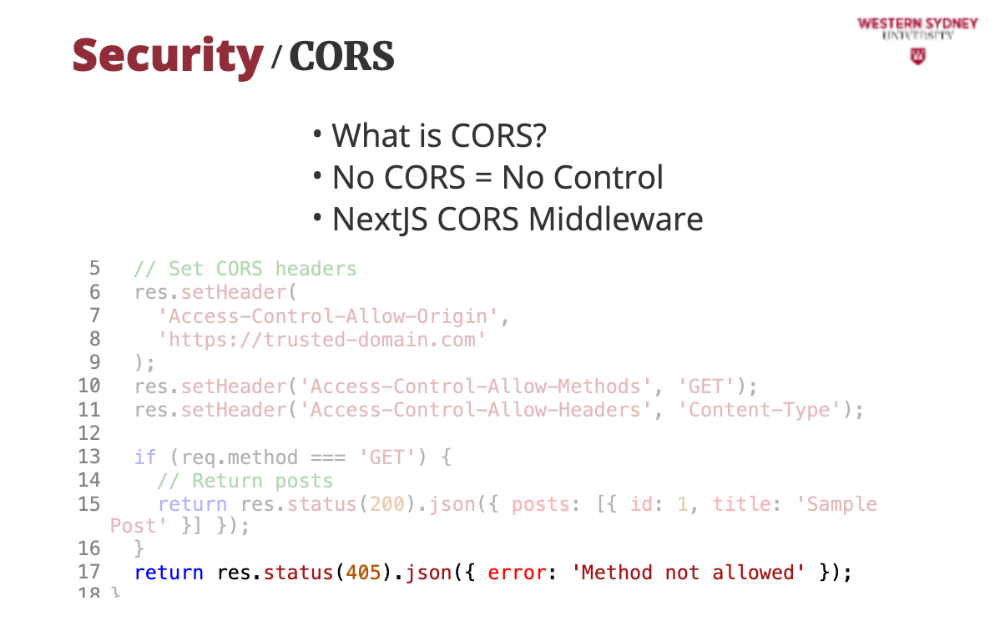
It's a bit strange that we also need to double-check these values in code because the CORS headers assure that incorrect requests will receive an error, but the body of the API route is still executed. With incorrectly handled CSRF, this approach can still lead to hackers executing unwanted requests on our server. Therefore, even if we prohibit the execution of other methods that GET, we double-check this in our code.
To deal with other security measures, you should use parameterised queries or ORMs like Prisma or Drizzle to safely query your database.

For authentication, use established packages or providers such as NExtAuth, or use social logins to avoid the headache.
Add other secure headers to your requests, such as X-Frame-Options to prevent clickjacking. Read the documentation and guidelines to prevent most attacks that can happen on your site.
Make sure to perform penetration testing on your application. The fastest are manual measures such as injecting scripts in comments to check sanitisation.
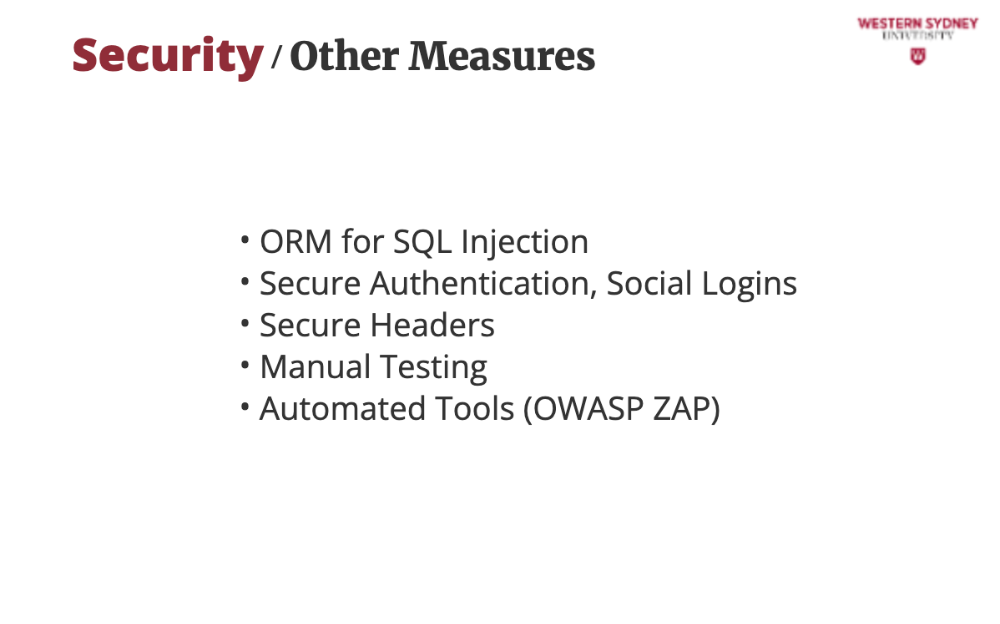
You can also use OWASP ZAP to scan for XSS or CSRF flaws.
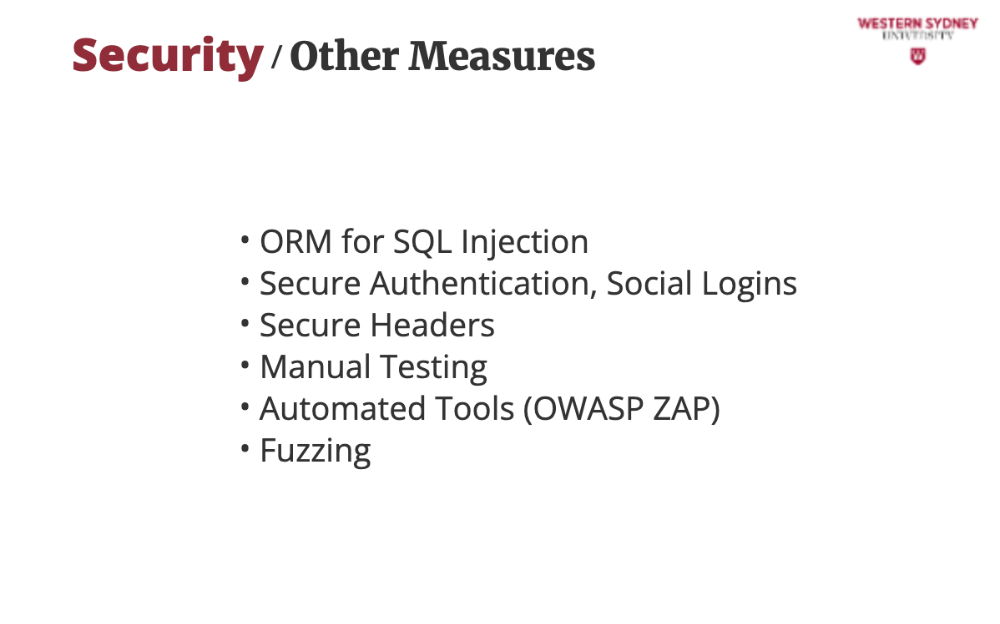
You should also test your APIs with random inputs to ensure robust error handling.
Let's wrap up!
The key takeaway is to never trust user input, always sanitise and validate to prevent XSS and injections.

Use NextJS tools wisely. Combining with nextAuth package, headers, and middleware helps, but you must configure them. Follow their latest developments and stay on top of them.
Test often and test regularly, pen-testing catches issues before hackers do.
Last, be smart, do not skip audits or ignore request headers. These oversights invite attacks—stay proactive. That's it for now, stay safe!